How a Light Bulb Is Made: Step-by-Step Guide
Explore the full production process of a traditional incandescent light bulb, from glass envelope shaping to final testing. Bulb Fix explains each stage with safety guidance and practical insights for homeowners and DIYers.

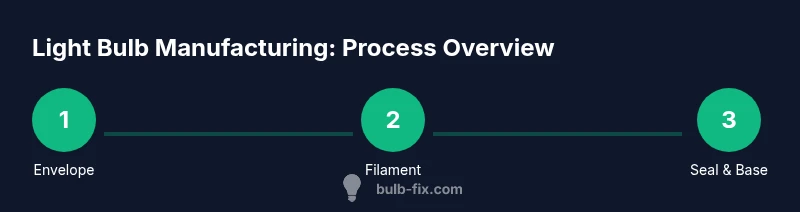
How a light bulb is made starts with shaping the glass envelope, then adding a tungsten filament or other light-emitting element, evacuating air, filling with an inert gas, and finally sealing the neck and attaching the base. This guide focuses on traditional incandescent bulbs, with notes on newer LED and CFL differences for contrast.
The purpose of the glass envelope
The glass envelope is more than a protective shell. It keeps the delicate inner components safe from dust and moisture while shaping the light's glow. In traditional incandescent bulbs, the envelope is evacuated or filled with an inert gas to prevent the tungsten filament from oxidizing and thinning over time. The envelope also helps minimize heat loss and provides a stable optical surface for the light to pass through. For homeowners, understanding this layer helps explain why bulbs are shaped differently (A-shapes, globe shapes, and tubular forms) and why some bulbs are labeled as halogen or standard incandescent. Bulb Fix emphasizes that a high-quality envelope is essential to long bulb life and consistent light output.
Glass envelope shaping and forming methods
Bulbs start as a glass preform that is heated in a shaping process. In traditional bulbs, artisans or automated furnaces stretch and blow the hot glass into a bulb shape, then allow it to cool slowly to prevent stress cracks. Modern manufacturing often uses automated molding to ensure consistent geometry. The choice of glass matters: soda‑lime glass is common for standard bulbs, while borosilicate variants handle higher heat in specialty lamps. After forming, a thin neck section is prepared where the base and leads will be attached. At this stage, manufacturers inspect for uniform thickness and any micro-cracks that could compromise performance.
Filament basics and deposition
The filament is the heart of a traditional bulb. Tungsten is chosen for its high melting point and strong electron emission at elevated temperatures. Filaments are produced as very fine wires or coiled ribbons, then treated to enhance strength and durability. In many production lines, the filament is coiled and mounted on metal support wires that will later connect to the bulb's electrical contacts. Cleanliness matters here; even tiny contaminants can create weak spots that shorten bulb life. Manufacturers also consider alternative filaments or coatings for halogen bulbs, but standard incandescent bulbs rely on a straightforward tungsten wire with careful surface treatment.
Attaching the filament assembly inside the envelope
The assembly step secures the filament, support wires, and connection leads to the glass neck before sealing. The fragile filament is handled with precision using micromanipulators and specialized fixtures to prevent bending or damaging the wire. The glass neck is slid into position and fused or welded to the lead-in wires, creating a reliable, heat‑resistant joint. This stage requires strict cleanliness to avoid microscopic particles that could cause premature failure. Once the assembly is complete, a preliminary dry fit checks the geometry and tension of the filament inside the forming envelope.
Vacuum creation and inert gas filling
To prevent filament oxidation, air is removed from the bulb and the interior is filled with an inert gas or a vacuum, depending on bulb type. In incandescent bulbs, a vacuum or inert atmosphere reduces filament evaporation and extends life. The sealing neck is designed to allow gas to be introduced after air is removed, then closed with a glass seal. Equipment for this step includes vacuum pumps, gas delivery systems, and precise temperature control to ensure a tight seal without introducing contaminants. This stage is a major quality checkpoint because even a small leak can lead to performance loss and shorter bulb life.
Sealing the neck and final shaping
Once evacuated or backfilled, the bulb neck is sealed to trap the gas inside. The seal must be hermetic to prevent leaks while maintaining a smooth exterior. Some processes fuse the glass neck with a precise heating cycle, while others use mechanical crimping combined with sealing compounds. After sealing, the bulb is cooled under controlled conditions to prevent stress cracks. The envelope may then undergo a light finishing pass to ensure the surface is free of imperfections that would scatter light or reduce brightness.
Base attachment and electrical contacts
The bottom of the bulb must connect reliably to a socket. Metal base contacts and lead wires pass through a sealed glass-to-metal joint, creating a durable interface for AC power. The base type (E26/E27, bayonet, or other) determines the exact hardware and fit. During assembly, technicians test contact integrity, ensure proper insulation, and verify that the base threads are free of burrs that could damage sockets. A secure seal around the base protects against moisture ingress.
Making variants: halogen, CFL, and LED bulbs
Not all bulbs use the same internal technology. Halogen bulbs are similar to standard incandescent bulbs but use a halogen cycle to extend life. Compact fluorescent lamps (CFLs) replace the tungsten filament with gas-discharge technology and phosphor coatings. Light-emitting diode (LED) bulbs use semiconductors rather than a filament. Each technology requires different assembly lines, materials, and quality checks. The guide here focuses on traditional incandescent manufacture, then notes key differences for energy-efficient options so readers understand how manufacturing objectives shift with technology.
Quality control, safety testing, and labeling
Manufacturers perform leak tests, resistance checks, brightness uniformity, and burn-in tests to identify early failures. Safety standards require accurate labeling, proper electrical ratings, and warnings about handling hot surfaces. Quality teams inspect seals, base connections, and finish to ensure no glass fragments remain and that the bulb meets required tolerances. Documentation accompanies each batch, enabling traceability from raw materials to finished product. In home contexts, understanding these tests helps you read product labels more confidently.
Environmental considerations and recycling
Bulb production raises concerns about waste and energy use. Recyclers and manufacturers design processes to recover glass, metal, and tungsten, and many bulbs are collected for proper recycling rather than landfill disposal. Consumers can help by recycling bulbs at designated centers and choosing bulbs with longer lifespans to reduce waste. The guide also discusses safe handling of broken bulbs to avoid glass shards and mercury exposure (in some bulb types), and why packaging and shipping practices matter for overall sustainability.
Common production challenges and practical tips
Every manufacturing line faces challenges like micro-cracks, leakage, or contamination that can silently degrade performance. Best practices include maintaining cleanrooms or clean areas, using quality control samples, and running routine leak checks. For homeowners, the takeaway is understanding why product certifications exist and how to interpret warranty terms. Practical tips cover storage, handling, and transport to maintain bulb integrity until installation.
Buying guide: reading markings and selecting bulbs
Understanding markings helps you pick the right bulb for any fixture. Look for wattage, voltage, base type, and life expectancy. Certifications from recognized agencies indicate safety and performance standards. The Bulb Fix approach is to compare product datasheets, read user reviews, and prefer bulbs with longer lifespans and reliable warranties. This knowledge empowers you to choose bulbs that fit your fixtures and energy goals.
Tools & Materials
- Glass envelope preform(Starting shape for the envelope)
- Glass envelope forming furnace(Heat and blow the envelope into its final shape)
- Tungsten filament wire(The light-emitting element in traditional bulbs)
- Filament support wires(Hold the filament in place inside the envelope)
- Lead wires and base contacts(Create the electrical connection to the socket)
- Vacuum pump(Remove air to create a vacuum environment)
- Inert gas fill (argon or nitrogen)(Backfill the envelope to reduce filament evaporation)
- Gas delivery and sealing equipment(Introduce gas and seal the neck after evacuation)
- Cleanroom apparel (gloves, gown, mask)(Minimize contamination during assembly)
Steps
Estimated time: 2-3 hours
- 1
Prepare the glass envelope
Select a clean glass preform and inspect for visible defects. Position it in the shaping fixture so that the neck will align with subsequent components. This initial setup sets the stage for uniform wall thickness and reliable sealing.
Tip: Wear clean gloves to avoid transferring oils that can weaken the glass. - 2
Shape the envelope
Heat the glass and form it into a bulb shape using blowing or molding techniques. Maintain even heat to prevent stress lines and ensure the neck is ready for the filament assembly. Allow the piece to cool gradually to avoid cracking.
Tip: Monitor the temperature gradient carefully; abrupt cooling creates microcracks. - 3
Prepare the filament
Fabricate the tungsten filament and mount it on support wires. Ensure the filament has the right tension and alignment so it sits centered inside the envelope. This step directly influences brightness and uniformity.
Tip: Handle the filament with precision tools to avoid bending or kinking. - 4
Mount filament inside envelope
Insert the filament assembly into the envelope neck and secure the leads. Verify alignment and that the wires do not contact the glass surface. Proper mounting prevents early failure due to mechanical stress.
Tip: Use alignment jigs to keep the filament centered. - 5
Evacuate and backfill
Place the bulb in the evacuation system and remove air. Backfill with inert gas if required for the bulb type. This environment reduces oxidation and improves filament life.
Tip: Run a brief leak check after backfill to confirm the seal integrity. - 6
Seal the neck
Close the glass neck to hermetically trap the gas or vacuum inside. Use a precise heating cycle to avoid distorting the envelope. A good seal prevents leaks that would shorten bulb life.
Tip: Avoid overheating the neck; it can cause microcracks that compromise sealing. - 7
Attach base and contacts
Install and secure the base contacts and lead wires into the sealed neck. Ensure the interface with the socket is clean and thread surfaces are burr-free. Proper sealing around the base protects against moisture ingress.
Tip: Inspect the base threads for burrs before assembly. - 8
Perform quality checks
Conduct electrical, leakage, and brightness checks on finished bulbs. Record measurements for traceability and future warranty support. Early detection of defects improves batch yield.
Tip: Use non-destructive testing where possible to avoid wasting good units. - 9
Label, package, and finalize
Apply markings for voltage, wattage, base type, and safety certifications. Package the bulb to prevent damage during transport and include disposal instructions. Final packaging reflects product quality and brand ethics.
Tip: Always verify labeling accuracy against the batch documentation.
Got Questions?
What is the inert gas for in a bulb?
Inert gas prevents tungsten from oxidizing and reduces evaporation, extending filament life. It also helps stabilize the operating temperature for consistent light output.
The inert gas protects the filament and helps keep the bulb bright for longer.
Why is tungsten used for the filament?
Tungsten has the highest melting point among industrial metals and emits electrons efficiently at high temperatures, making it ideal for visible-light bulbs with long lifespans.
Because tungsten stays strong at high temperatures and emits light efficiently.
How is the bulb sealed after evacuation?
After air is removed, the bulb is either evacuated or backfilled with an inert gas, and the neck is fused to create a hermetic seal. This prevents leaks and protects the filament.
The bulb neck is sealed after removing air or filling with gas to keep the interior intact.
Are incandescent bulbs still manufactured today?
Yes, they are still produced for certain applications and specialty bulbs, but LED and CFL technologies dominate the market due to efficiency.
They’re still made in some niches, but LEDs and CFLs are far more common now.
What safety standards govern bulb manufacturing?
Bulb manufacturing adheres to electrical safety, product safety, and environmental standards set by organizations like UL and IEC, ensuring reliable performance and safe disposal.
They follow major safety standards to ensure bulbs are safe and reliable.
Why do bulbs have different bases?
Sockets come in various sizes and designs (like Edison screw and bayonet). Different bases ensure compatibility with fixtures and electrical systems.
Bases differ so bulbs fit a wide range of fixtures and sockets.
Watch Video
Key Points
- Understand the glass envelope's protective and optical role.
- Filament life hinges on material choice and clean handling.
- Vacuum or inert gas environment is critical for longevity.
- Hermetic neck sealing and base integrity affect safety.
- Read product markings and certifications for reliability.