Tower Bulb Change Guide: Safe, Step-by-Step Replacement
Learn how to safely replace a light bulb on a tower with a practical, step-by-step approach. This guide covers planning, access, bulb selection, fall protection, and post-change checks to minimize risk and ensure reliable outdoor lighting.

With this guide you'll safely perform a light bulb change on tower structures. You’ll learn how to plan, access the fixture, select the correct bulb, and perform a controlled replacement while maintaining fall protection and grounding. The process emphasizes permissions, weather checks, and post-work inspection to prevent hazards. Additionally, you’ll find practical safety reminders and a step-by-step approach suitable for outdoor environments.
Understanding the task: light bulb change on tower
A light bulb change on a tower involves replacing bulbs mounted on tall outdoor structures such as streetlights, utility lights, or telecom towers. Unlike indoor fixtures, these tasks expose workers to higher wind speeds, limited access, and electrical hazards. The bulb type and base can vary widely depending on the fixture, from traditional screw-in variants to specialized high-luminance LED modules. Planning is essential to prevent dropped tools, electrical shocks, or structural stress on the fixture. According to Bulb Fix, outdoor bulb replacements demand rigorous safety checks, proper PPE, and clear coordination with ground crews. The goal is to complete the replacement efficiently while maintaining a secure working area and preserving fixture integrity so the tower continues to perform reliably after service.
Safety prerequisites and risk assessment
Outdoor tower bulb replacement is a high-risk activity that requires a formal risk assessment and a defined safety plan. Before any ascent, evaluate weather conditions (wind, rain, lightning), lighting needs, and the potential for power interruptions. Identify all hazards—electrical energy, fall hazards, blown fuses, or damaged fixtures—and document controls. PPE should include a certified fall-arrest harness, hard hat, eye/face protection, and non-conductive gloves. Ensure that emergency procedures are established and that a trained ground crew member can assist from below. The Bulb Fix team emphasizes that risk assessment is not a one-time check; it should be revisited if conditions change during the task.
Site assessment, permits, and weather considerations
Site readiness begins with securing proper permissions and notifying nearby workers of the activity. Confirm access permits if the tower requires climbing or the use of a bucket lift, and verify electrical isolation where possible. Weather plays a critical role: avoid replacements during gusty winds, icy surfaces, or thunderstorms, as these conditions dramatically raise fall risk and equipment instability. Survey the ground drop zone for bystanders and obstacles, and set up warning signs or barriers to keep pedestrians at a safe distance. Bulb Fix guidance highlights that proactive site assessment reduces last-minute delays and safety incidents.
Selecting replacement bulbs and bases for outdoor towers
Outdoor fixtures demand bulbs rated for exterior exposure and compatible with the fixture’s base. Verify the bulb’s type (LED, HID, or incandescent) and base (for example, a common screw-in base versus a pin-based base) on the fixture label or documentation. Check color temperature and lumen output suitable for the tower’s purpose—roadway lighting often requires higher brightness and specific color rendering. If you’re unsure, consult the fixture’s datasheet or a maintainer familiar with the system. Using the wrong bulb can cause electrical issues, overheating, or reduced lighting performance, and Bulb Fix notes that mismatched bulbs are a frequent maintenance pitfall.
Access methods and fall protection specifics
Accessing a tower safely requires a well-planned method—whether it’s a climbing setup with a harness, a bucket truck, or an approved ladder system in a controlled zone. Establish anchor points and ensure fall protection is properly connected before any ascent. Keep all tools secured in a tool lanyard or belt, and maintain three points of contact when ascending. Ground crews should stay in communication, monitoring the climber’s status and ready to lower equipment if needed. It’s important to test anchors and inspect PPE for wear prior to starting the ascent.
Preparing equipment and crew roles
A successful bulb change depends on clear roles and ready equipment. Assign a lead climber, a ground spotter, and a safety observer, plus a backup if weather changes. Prepare a kit with the replacement bulb, spare bases or adapters, appropriate wrenches, non-conductive tools, a voltage tester, and a flashlight or headlamp for low-light conditions. Pack spare bulbs with the same base type and ensure replacements are rated for outdoor use. The ground crew should have a comms plan and a clear drop-zone protocol in case of emergencies.
The safe replacement process: a high-level approach
Begin by isolating power and confirming the fixture is de-energized. Access the bulb carefully, disengage any retaining screws or clamps, and gently remove the old bulb without twisting beyond the fixture’s design. Inspect the socket for corrosion or damage before inserting the new bulb. Secure the bulb according to manufacturer guidance and test the fixture after re-energizing. Re-establish all safety lines, tidy tools, and document the replacement details for maintenance records. Always prioritize fall protection and avoid rushing through the process.
Post-change inspection, disposal, and documentation
After installation, inspect the surrounding area for any debris, seals, or gaps that may affect weatherproofing. Dispose of the old bulb according to local regulations for bulbs and hazardous materials; fashion any needed protective packaging for transport. Document the replacement date, bulb type, base, and any observed issues with the fixture. Schedule a follow-up inspection if the tower shows signs of instability or inconsistent lighting. This final check helps ensure long-term reliability and safety.
Common challenges and troubleshooting tips
Tower bulb changes frequently encounter corroded bases, stiff retaining hardware, or alignment misfits. If a bulb doesn’t seat properly, avoid forcing it; reassess base compatibility and socket condition. Cold or windy conditions can make handling tools difficult, so pause if grip is compromised. Always verify there is no live current before touching the bulb. If the fixture seems unstable or the socket is damaged, stop work and escalate to a professional technician.
Tools & Materials
- fall protection harness with lanyard(Full-body harness with energy-absorbing lanyard; attach to certified anchor point)
- climbing helmet(Hard hat with chin strap; impact protection is essential)
- safety gloves (insulated)(Outdoors, protect hands from conductors and rough surfaces)
- eye protection or face shield(Protect eyes from debris and sparks)
- non-conductive hand tools(Tools with insulated handles reduce shock risk)
- voltage tester or non-contact tester(Confirm de-energized fixture before touching bulbs)
- replacement bulb rated for exterior use(Match base type and outdoor rating)
- socket adapters or bases (if needed)(Only if the new bulb requires a different base)
- headlamp or portable light(Provide hands-free lighting in tower crevices)
- drop-zone barriers and warning signs(Keep ground crew and passersby safe)
- spare bulbs and fasteners(Bring extras for potential multiple replacements)
- spool of rope or webbing and carabiners(Used for securing tools and additional safety if needed)
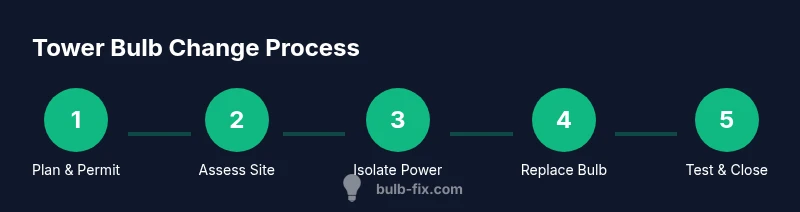
Steps
Estimated time: 60-150 minutes
- 1
Verify permissions and weather window
Confirm access permissions and worker authorization. Check forecast for wind, precipitation, and lightning risk. If conditions are not safe, postpone the task. Ensure a ground crew member is ready to assist.
Tip: Always have a contingency plan for sudden weather changes. - 2
Record tower details and bulb type
Document tower ID, fixture type, base, and last maintenance date. Locate the bulb specification on the fixture label or datasheet to ensure the correct replacement is selected.
Tip: Double-check markings before removing the old bulb. - 3
Set up access equipment and establish a fall-protected zone
Position the ground crew to define a safe zone. Secure anchor points and attach the harness line to a verified anchor. Prepare the bucket or ladder if using a mechanical access method.
Tip: Test the anchor and stand-by a qualified person to manage tools. - 4
Isolate power and verify de-energization
Use a voltage tester on the fixture terminals to confirm power is off. Lockout/tagout if applicable and communicate with the control room before touching the bulb.
Tip: Never bypass a lockout procedure, even for a quick change. - 5
Remove the old bulb
Loosen any retaining screws or clamps. Gently rotate the bulb while keeping it aligned with the socket to avoid damaging threads. Place old bulb in a protective container.
Tip: Hold the bulb with a towel or glove to prevent dropping shards. - 6
Install the new bulb and secure it
Insert the replacement bulb and seat it firmly without over-tightening. Reattach any clamps and confirm the bulb is firmly mounted.
Tip: Use a base-specific adapter only if required by the fixture. - 7
Test operation and verify safety
Restore power and observe lamp operation from a safe distance. Check for flicker, heat, or unusual noises. If problems arise, shut down and reassess.
Tip: Allow a short warm-up period to confirm stable operation. - 8
Clean up, store tools, and document completion
Pack tools, label the replacement date, and note any observed socket or fixture issues. Notify maintenance records for future reference.
Tip: Return all fasteners and if needed, order replacement parts for next time.
Got Questions?
What training is required to change a bulb on a tower?
Tower bulb changes require fall protection training, electrical awareness, and possibly tower-climbing certification. Many jurisdictions require formal safety training and a documented permit process. Always work with a supervisor or experienced technician if you are unsure.
Tower bulb changes require fall protection training, electrical awareness, and proper supervision. Always consult a qualified technician if unsure.
What permits or permissions are typically needed?
Permissions depend on local regulations and the tower owner. Commonly, an access permit, a lockout/tagout protocol, and coordination with the utility or property owner are required. Check with your organization's safety officer before starting.
You usually need access permits and lockout procedures; coordinate with the tower owner before starting.
What safety equipment is essential for this task?
Essential gear includes a fall-arrest harness, helmet, eye protection, non-conductive gloves, and a communication device. Ensure anchor points are secure and PPE is in good condition.
Wear a harness, helmet, eye protection, and non-conductive gloves, and verify anchors are secure.
How often should outdoor tower bulbs be inspected or replaced?
Replacement frequency depends on bulb type and fixture usage. LED bulbs often last longer than HID types, but regular visual checks should be part of routine maintenance.
LEDs last longer, but regular inspections prevent unexpected failures.
What if the bulb base or socket is corroded?
Do not force a bulb into a corroded socket. Stop and report the issue to maintenance for replacement of the socket or fixture. Corrosion can pose electrical hazards.
If the base is corroded, stop work and report it for socket replacement to avoid electrical hazards.
Can this be done solo, or is a team required?
Many tower bulb changes require a team: a climber, a ground spotter, and a safety observer. Solo attempts increase risk; follow your organization’s safety policy.
Usually requires a team; solo work is not recommended.
Watch Video
Key Points
- Plan safety first and obtain permission before climbing.
- Match bulb type and base to the fixture for reliable operation.
- Use proper fall protection and maintain anchor integrity.
- Test after installation and document the maintenance activity.