Can You Use a T8 Bulb Instead of a T12? A Practical Guide
Explore whether you can replace a T12 with a T8, what to check, ballast compatibility, safety tips, and upgrade options for safer, efficient lighting.

In general, you cannot simply swap a T8 bulb into a T12 fixture without changes. The two tube types differ in diameter, ballast compatibility, and socket requirements, so a direct drop-in is rarely feasible. Most upgrades require either a ballast retrofit or a full fixture replacement to ensure safe operation and acceptable light output.
Can You Use a T8 Bulb in a T12 Fixture? Practical Reality
Can you use a t8 bulb instead of a t12? The short answer is: not usually without changes. According to Bulb Fix, a direct drop-in swap is rarely possible because the two tube sizes have different physical diameters and ballast expectations, which impacts how the lamp lights and how safely it runs. A T12 fixture was designed around a larger tube and its ballast, and a T8 bulb typically won’t align with the same sockets or electrical ballast. If you force the fit, you risk flicker, reduced lifespan, or heat buildup, and you may void safety certifications for the fixture. To know for sure, check the fixture label, confirm ballast type, and verify socket compatibility. If you are determined to pursue a conversion, plan for either a ballast retrofit or a full fixture upgrade. This isn’t a quick cosmetic swap but a systems change that should be approached with care.
How T8 and T12 Differ: Size, Base, and Ballast Requirements
T8 and T12 lamps differ in several core aspects beyond their aluminum shells. The most noticeable is the diameter: T8 tubes are thinner than T12 tubes, which affects whether the lamp physically fits inside the housing and whether the end caps align with the sockets. Both lamp types frequently use a bi-pin G13 base, but the ballast that powers them is tuned to a specific lamp size and wattage. A T12 ballast is not automatically compatible with a T8 bulb, and a mismatched ballast can lead to poor light, dim output, or ballast failure. If you’re upgrading, you’ll need to verify whether your fixture’s ballast is rated for T8 length and wattage, or whether a ballast retrofit or a complete fixture replacement is required. In practice, most households opt for a dedicated T8-compatible fixture or a retrofit kit rather than forcing a mismatch to save a few dollars.
Why Ballasts Matter for Fluorescent Upgrades
The ballast is the control unit that starts and regulates current to the fluorescent tube. When changing lamp types, the ballast must match the lamp’s electrical characteristics. Mixing a lamp and ballast outside of their intended pairing can cause flicker, color shift, or shortened lamp life. In older homes with magnetic ballasts, converting to a different lamp size often means replacing the ballast with an electronic unit designed for the target lamp. LED retrofits are another path, but they require a ballast-compatible setup or a ballast bypass. In short, ballast compatibility is the deciding factor; if the ballast is not suitable for the lamp you want, the upgrade should be redirected to a different lamp type or a new fixture.
Common Scenarios: When a T8 Upgrade Might Be Feasible
There are a few situations where a T8 upgrade could be considered, but they usually require accessory changes. If the fixture is designed with interchangeable ballast housing and you can install a T8-compatible ballast, a retrofit is possible. Alternatively, some fixtures are designed to accept multiple tube types with interchangeable components, including adapters or retrofit kits. In many cases, however, the simplest safe option is to replace the entire fixture with a model that is rated for T8 lamps or switch to a LED tube that is explicitly compatible with the existing ballast or that supports ballast bypass.
Safer Alternatives: What To Do Instead
If you want better efficiency or broader availability, consider safer alternatives rather than forcing a T8 into a T12 setup. A proven approach is to upgrade to a T8-compatible fixture with the correct ballast and end-caps, or to install LED tubes that are either ballast-compatible or ballast-bypass certified. LED options offer energy savings and longer life cycles, but they require proper driver compatibility and heat management. Before making any purchase, confirm the fixture’s rating, the ballast type, and the intended lamp length. If you’re uncertain, consult a licensed electrician who can verify compatibility and perform the upgrade safely.
Step-by-Step Planning: Mapping Your Upgrade Path
A well-planned upgrade avoids guesswork and unsafe modifications. Start by listing every component of the current setup: fixture type, ballast model, end-cap type, and lamp wattage. Then determine whether a ballast retrofit kit is available for your fixture or if you should replace the fixture entirely with an LED or fluorescents designed for the space. Finally, budget for parts and labor, and ensure all work complies with local electrical codes. If you proceed, document the exact components installed for future maintenance and warranty considerations.
Tools & Materials
- Non-contact voltage tester(Confirm power is off before touching any components)
- Screwdriver set (Phillips and flathead)(Access fixture housing and ballast panels)
- Multimeter(Check continuity and verify ballast compatibility)
- Ladder or step stool(Safe height access to ceiling fixtures)
- Safety gloves and eye protection(Personal protection during handling)
- T8 and/or T12 fluorescent tubes(Select length and wattage that match your fixture or retrofit plan)
- Ballast retrofit kit or LED-compatible tubes(Only if upgrading ballast or going LED; otherwise unnecessary)
Steps
Estimated time: 60-120 minutes depending on path and familiarity
- 1
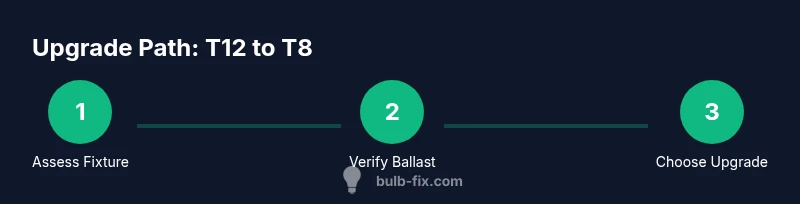
Assess the fixture and ballast
Power off at the breaker and remove the diffuser to inspect the ballast label. Note the tube length, ballast type, and end-cap style. This determines whether a retrofit is feasible or if a full fixture replacement is preferable.
Tip: Take clear photos of the ballast label and end-cap configuration for exact matching. - 2
Check for retrofit options
Search for ballast retrofit kits compatible with your fixture’s model. If a kit exists for a T8, verify wattage and electrical compatibility before purchasing.
Tip: If you cannot find a compatible retrofit, plan for a new fixture rather than a risky mismatch. - 3
Decide on the upgrade path
Choose between a ballast retrofit, a full fixture replacement, or a ballast-bypass LED option. Document the plan and budget accordingly.
Tip: LED options often offer the best long-term savings but require proper driver compatibility. - 4
Gather components
Acquire the ballast, adapters, or LED tubes that match your chosen path. Confirm all parts are rated for the fixture size and local electrical codes.
Tip: Double-check compatibility with the fixture housing and mounting hardware. - 5
Install and test
Follow the retrofit kit instructions or fixture replacement steps. Reassemble, restore power, and test for proper starting, brightness, and color quality.
Tip: Keep a spare tube on hand for quick replacement during testing. - 6
Finalize and document
Secure all components, label the new setup, and store warranty information. Dispose of old parts per local regulations.
Tip: Document the upgrade for future maintenance or resale.
Got Questions?
Can you use a T8 bulb in a T12 fixture without changing the ballast?
Usually not. A T12 ballast is sized for a larger tube, and the ballast may not properly start or run a T8. In many cases, a ballast retrofit or a full fixture replacement is required to ensure safe operation and reliable light output.
Usually not; a ballast retrofit or fixture upgrade is often needed for a safe, reliable result.
Is upgrading to LED a good alternative to switching to a T8?
LED options can offer energy savings and longer life, but you must ensure the driver and fixtures are compatible and meet code requirements. LED upgrades can be ballast-compatible or ballast-bypass, depending on the product and installation.
LED upgrades can save energy but require proper compatibility and potentially bypassing ballast.
What risks arise from an improper T8/T12 upgrade?
Risks include electrical shock, arcing, overheating, reduced lamp life, nuisance flicker, and potential code violations. Always confirm ballast compatibility and follow manufacturer instructions or hire a professional.
Risks include shock, flicker, overheating, and code violations if done improperly.
Are there cost considerations I should expect?
Costs vary based on whether you retrofit the ballast or replace the fixture, and whether you choose LED. Plan for parts plus labor, and verify warranties for the new components.
Costs vary with retrofit vs new fixtures and LED choices; check warranties.
What is the best first step for a homeowner?
Start by reading the fixture label and ballast marking, then check for compatible retrofit options or LED replacements. If in doubt, consult a licensed electrician to confirm the plan and ensure code compliance.
Read the fixture label, check retrofit options, and if unsure, call a licensed electrician.
Can older magnetic ballasts handle LED tubes?
Most LED tubes require a compatible ballast or ballast bypass configuration. Using traditional magnetic ballasts with LED tubes often isn’t supported and can reduce performance or create safety issues.
LED tubes need compatible ballasts or bypass; magnetic ballasts often don’t work well with LEDs.
Watch Video
Key Points
- Assess ballast before any tube swap
- Ballast compatibility drives the upgrade path
- Consider safer LED or proper T8-compatible fixtures
- Follow safety steps and local codes
- Document and test the upgraded setup