How to Check Bulbs in Christmas Lights
Learn a safe, practical method to check bulbs in Christmas lights, diagnose outages, and replace faulty bulbs with matching types for bright, reliable holiday displays in 2026.

This guide shows you how to check bulbs in Christmas lights, diagnose outages, and replace faulty bulbs safely. Start by unplugging the set, inspecting for damage, and testing sockets with a tester or spare bulbs. The steps cover LED and incandescent strings, indoor and outdoor setups, and essential safety reminders.
Safety First: Unplug, Inspect, and Prep
According to Bulb Fix, safety is the first step when you learn how to check bulbs in christmas lights. Always unplug the string from the outlet before touching any bulbs or connectors. Inspect the plug area for signs of wear, exposed wires, or scorching. If you see damage, do not power the string again until it has been repaired or discarded. For outdoor displays, use a grounded outlet and keep water away from plugs. Prepare a clean, dry workspace, roll out enough cable to reach the power source, and lay the string on a dry, non-conductive surface to minimize accidents. A quick visual sweep for loose sockets or frayed cords can save trouble later.
Understanding LED vs Incandescent and Indoor vs Outdoor Strings
The way you approach checking bulbs depends on string type. LED strings use low voltage and individual diodes that fail gracefully, while incandescent strings rely on tiny filaments that burn out when worn. Outdoor-rated strings differ from indoor ones in insulation and weatherproofing. If you mix types, retire the entire run for safety and consistency. When checking how to check bulbs in christmas lights, always replace with bulbs of the same type and voltage rating to preserve brightness and avoid electrical overload. Bulb Fix analyses from 2026 emphasize matching type and voltage for reliable results.
Visual Inspection Essentials: What to Look For
A thorough visual inspection is the backbone of detecting problems. Look for: dark or dim bulbs, bulbs that don’t illuminate at all, broken glass, scorch marks on sockets, melted insulation, loose connections, and frayed cords. Check sockets for corrosion or signs of moisture. Wiggling a bulb gently (with the set unplugged) can reveal loose connections. For outdoor strings, look for water intrusion around plugs and connectors. Document any damaged bulbs so you can replace them in batches rather than hunting one by one.
Testing Bulbs In-Place vs With a Test Bulb
One of the most valuable skills in how to check bulbs in christmas lights is choosing the testing approach. In-place testing lets you identify whether a socket or several bulbs are failing, without removing each bulb. A dedicated bulb tester or continuity tester helps verify individual sockets quickly. If you don’t own a tester, use spare bulbs of the same type to substitute bulbs one at a time, noting the results. Always test with the power off and the set unplugged until you confirm behavior.
Replacing Faulty Bulbs Safely and Correctly
When you identify a faulty bulb, remove it carefully and replace with a matching spare bulb. Grip the bulb by its base and rotate gently to release; do not twist too hard. Insert the new bulb firmly, ensuring you don’t bend wires. After replacing multiple bulbs, re-test the entire string before re-hanging it. If LEDs are flickering after replacement, verify the polarity and confirm you’ve installed the correct LED type for the driver or controller in the string. Keep spare fuses handy and replace any blown fuses as needed.
Preventive Maintenance for Next Year
To make next year’s setup easier, store lights in their original packaging or labeled bins to prevent tangling and breakage. Clean sockets with a dry brush to remove dust, then wrap strings loosely to avoid kinking conductors. Inspect for corrosion or moisture at the plug and battery pack (if used). Consider upgrading to outdoor-rated LED strings for longer life, reduced heat, and better energy efficiency. A simple yearly check can dramatically reduce holiday outages and stress.
Tools & Materials
- Spare replacement bulbs (same type and voltage)(Choose bulbs matching the string (LED or incandescent) and the voltage rating printed on the plug.)
- Plug fuse and fuse puller(Keep a few spare fuses with each string; use the rating printed on the plug.)
- Bulb tester or continuity tester(Helps confirm whether a socket or bulb is functioning without removing bulbs.)
- Multimeter(Only if you want to measure continuity or voltage across sockets.)
- Non-conductive gloves(Wear while handling bulbs to reduce the risk of cuts and static shocks.)
- Soft cloth or brush(Clean dirt from sockets if needed without applying liquid cleaners.)
- Electrical tape(Useful for securing loose wiring or temporary insulation during repairs.)
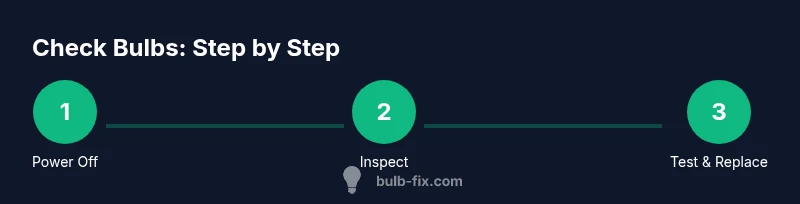
Steps
Estimated time: 30-60 minutes per string
- 1
Power off and unplug
Before touching any bulbs, unplug the string from the outlet. If you’re testing outdoor strings, unplug at the outdoor source and avoid power strips. This prevents shock and protects you while you inspect the entire length.
Tip: Always test with dry hands and on a dry surface; moisture is a hidden risk. - 2
Conduct a visual inspection
Scan for broken bulbs, darkened filaments, scorch marks on the base, corroded sockets, and loose connections. Gently wiggle each bulb to identify loosening in the socket. Note any sections that look worn or damaged and prioritize these for testing.
Tip: Take photos of damaged areas to help track replacements. - 3
Choose a testing approach
Decide whether to test in place using a bulb tester or to substitute with spare bulbs. In-place testing minimizes bulb removal, while substitution quickly confirms socket function. Always ensure the power is off during testing.
Tip: If you are unsure about socket health, start with the most visible damaged area first. - 4
Test bulbs and sockets
Use the tester on individual sockets or swap with known-good bulbs. If a socket doesn’t illuminate with a good bulb, replace the socket or retire the entire strand. Document failures to optimize replacements later.
Tip: Label sections that require multiple replacements to streamline future checks. - 5
Replace faulty bulbs
Insert replacement bulbs gently with a slight twist if needed, ensuring the base sits firmly in the socket. Don’t over-tighten or force bulbs, as that can crack the base or damage the socket.
Tip: Always use bulbs from the same manufacturer and batch when possible for color consistency. - 6
Check fuses and connectors
Inspect the plug fuses and replace any that are blown with an exact rating fuse. Check the connections at the plug and any extension adapters for looseness or moisture.
Tip: If fuses blow repeatedly, stop and check for short circuits or moisture intrusion. - 7
Test the entire string
Plug the string back in and observe all bulbs. Look for flickering or dim sections and re-test as needed. If any bulb remains problematic, replace it and inspect nearby bulbs for partial failures.
Tip: Test first in daylight, then again in the dark to ensure brightness is even.
Got Questions?
How can I tell if a bulb is burned out?
A bulb is typically burned out if it doesn’t light when swapped with a known-good bulb, or if the socket shows no continuity with a tester. Inspect the bulb for a broken filament, darkened glass, or burnt smell. Use a tester to confirm and then replace.
If the bulb won’t light after swapping with a good one, it’s likely burned out. Use a tester to confirm before replacing.
Should I test bulbs with the string lit?
No. For safety, always unplug before testing. If you need to assess in-use behavior, do a staged test with the power off and then reconnect to verify the effect.
Never test with power on. Unplug first, then test each bulb or socket.
Can I replace just one bulb or should I replace many at once?
If only one bulb is faulty, replace that bulb with a matching type. If multiple bulbs are failing in the same section, consider replacing several to restore even brightness and reduce troubleshooting time.
Yes, replace only the faulty bulb unless several in a section are failing.
What should I do if the fuse keeps blowing?
Unplug the string and inspect for short circuits, moisture, or loose connections. Replace the fuse with the correct rating if needed. If the fuse blows again, discontinue use and inspect the entire string for damage.
If the fuse blows repeatedly, unplug and inspect for shorts and moisture; replace with the correct fuse rating, then test again.
Are outdoor LED strings safe for exterior use?
Only use strings rated for outdoor use. Outdoor LEDs are designed to withstand weather and temperature changes, but you should still follow all safety guidelines, including GFCI outlets and weatherproof connectors.
Yes, but only if they’re listed for outdoor use and properly protected.
Watch Video
Key Points
- Unplug before handling any bulbs or sockets.
- Test with the right type and voltage bulbs.
- Replace only with matching bulbs to maintain safety and brightness.
- Check fuses and moisture at outdoor plugs.
- Store lights carefully to simplify next year’s setup.