Ballast vs Bulb: How to Tell Which Is Bad in Your Fixture
Urgent troubleshooting guide to determine whether a lighting issue comes from a bad bulb or a faulty ballast. Step-by-step tests, safety tips, and practical replacements.

In most cases, a flicker or dim light points to a bulb, while a buzzing or intermittent lighting with a faint hum suggests a ballast issue. Start by safely swapping in a known-good bulb in a compatible fixture to test. If the problem persists after bulb replacement, suspect the ballast and follow our diagnostic flow.
Quick Diagnostic Overview
Light fixtures fail for several reasons, but the most common culprits are the bulb and the ballast. Before you pull apart wiring, take a breath and review the symptoms. According to Bulb Fix, starting with safety-first checks and a structured approach dramatically reduces unnecessary replacements. In many homes, a balky bulb is the actual culprit, not the ballast, especially in fixtures that use standard screw-in bulbs. But when product and fixture interactions are more complex—linear fluorescent tubes, compact fluorescents, or LED retrofit kits—the ballast becomes the stronger suspect. The goal of this overview is to help you identify, in plain language, which component is misbehaving, and to outline a safe, practical path to resolution. You’ll learn how to interpret common signs, how to test components safely, and when to call a professional. Your plan is to test one variable at a time: first the bulb, then the ballast or the fixture, and finally the wiring or socket connections.
Signs a Bulb Is Failing
Bulbs typically give telltale signs before they burn out. If a bulb flickers intermittently, dims, or fails to reach full brightness, the first suspect is often the bulb. Bulbs can degrade over time from heat, vibration, or frequent on/off cycling. In many households, simply replacing the bulb solves the problem, especially in fixtures that have easy access. The Bulb Fix analysis shows that homeowners frequently diagnose ballast trouble when the symptom is just a tired bulb. If you install a fresh bulb of the correct type and wattage and the fixture behaves consistently again, you’ve likely solved the issue. Always handle bulbs with care, avoid touching the glass with bare hands, and dispose of burned-out bulbs properly. Keep a spare bulb of the same type on hand during diagnostic testing to prevent repeated trips to the store.
Signs a Ballast Is Failing
Ballast failures often produce more complex symptoms. If the bulb lights intermittently, hums or buzzes, or won’t start even with a new bulb, the ballast is a frequent culprit. A ballast that's overheating may cause the lamp to shut off prematurely or fluctuate brightness. In some fixtures, the ballast can become noisy when it’s near the end of life. If your fixture is an older model, or uses high-intensity discharge (HID) or linear tubes, the ballast is more likely the problem after bulb replacement fails to fix things. Because electrical components inside ballasts can fail in different ways, you should test systematically and avoid touching any high-voltage components.
Safety Essentials Before Testing
Power must be off to any fixture you test, and you should work on a non-conductive surface with appropriate PPE. Use insulated gloves, eye protection, and a rigid ladder or stable step stool. If you’re not comfortable working with electrical components, or if the fixture is ceiling-mounted in a way that requires you to reach over a high place, call a licensed electrician. Never attempt to repair or bypass a ballast by jumping wires or using makeshift fixes. Ensure you use the correct replacement parts that match the fixture’s voltage, wattage, and ballast type. Finally, always unplug the fixture or switch off the circuit breaker before removing bulbs or examining sockets.
Diagnostic Flow: Symptom to Solution
Start with the simplest check: replace the bulb with a known-good one. If symptoms persist, test the bulb in a different fixture or use a similar ballast in another compatible lamp. If the problem stays in the same fixture after bulb replacement, shift focus to the ballast or the fixture’s wiring. Inspect the socket for corrosion, burn marks, or loose connections. If you see obvious damage, proceed to safe replacement or electrician help. The diagnostic flow relies on isolating variables: bulb, ballast, socket, wiring. This method reduces guesswork and minimizes unnecessary replacements.
Step-by-Step: Replacing a Faulty Bulb (Most Common Fix)
Step 1: Power down and verify the fixture is unplugged. Step 2: Remove the old bulb by turning it counterclockwise and wearing gloves. Step 3: Check the socket for signs of wear or corrosion. Step 4: Insert a fresh bulb of the same type and wattage, tighten securely, and power up to test. Step 5: If flicker or dimming continues, move to ballast testing. Tip: Have the replacement bulb ready and label the fixture to remind yourself which bulb is installed. Time estimate: 15-25 minutes for a simple bulb swap in a typical socket.
Step-by-Step: Testing and Replacing a Ballast
Step 1: Confirm the bulb is good and compatible; then power down and disconnect power to the fixture. Step 2: Access the ballast, following the fixture’s service manual. Step 3: Inspect for signs of damage, heat discoloration, or burnt components. Step 4: Test with a multimeter if you have one: check continuity across ballast windings and inspect input/output wires for damage. Step 5: If the ballast tests fail or shows signs of overheating, replace it with a compatible unit. Step 6: Reassemble, re-test with a known-good bulb, and verify stable operation. Tip: If you’re unsure about wiring, consult a professional. Time: 25-40 minutes.
Prevention, Maintenance, and When to Call a Pro
Regular maintenance can extend fixture life. Clean contacts to remove dust and corrosion, replace aging bulbs promptly, and ensure fixtures are rated for the intended bulb type. Keep spare bulbs and a basic set of tools for quick tests. If a fixture shows repeated failure after bulb and ballast replacement, or if you notice buzzing that grows louder over time, there could be wiring or a fixture problem beyond simple replacement. In those cases, contact a licensed electrician and avoid attempting risky repairs. The goal is to prevent future outages and keep energy use efficient.
Quick Test Scenarios and Examples
Scenario A: A flickering LED tube in a fluorescent ballast fixture—bulb first, ballast second. Scenario B: An old HID fixture that buzzes—likely ballast issue, bulb replacement may not fix it. Scenario C: A compact lamp that won’t start after bulb replacement—check the socket and wiring. These examples illustrate how isolating variables leads to accurate diagnosis. For complex cases, see the full guide and consider professional help.
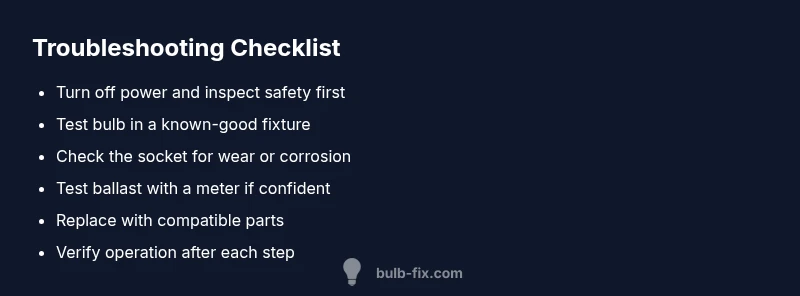
Steps
Estimated time: 60-75 minutes
- 1
Power down and verify safety
Turn off the circuit breaker or unplug the fixture. Wear eye protection and gloves. Confirm the fixture is completely de-energized before touching any components.
Tip: If you’re unsure about the circuit, test with a non-contact voltage tester before handling wires. - 2
Test the bulb with a known-good unit
Remove the existing bulb and install a known-good bulb of the correct type and wattage. Observe if the fixture lights normally or shows the same symptoms.
Tip: Keep a spare bulb with matching specifications for quick swaps. - 3
Evaluate the socket and connections
Inspect the socket contacts for corrosion, discoloration, or looseness. Reseat wires if you see loose connections and ensure the bulb seats firmly.
Tip: Only perform socket inspection if you’re confident; otherwise skip to testing the ballast. - 4
Test the ballast (where accessible)
If the bulb works in another fixture or a different ballast, the original ballast may be faulty. For some fixtures, you can test continuity on ballast windings with a multimeter.
Tip: Follow the manufacturer’s service manual for ballast testing. - 5
Replace the ballast if needed
Install a compatible ballast if testing indicates failure or overheating. Reassemble the fixture carefully and ensure all components are secure.
Tip: Use parts from reputable suppliers and verify compatibility. - 6
Final test and monitoring
Power the fixture back on and monitor for stable light output. If issues persist, re-check wiring or seek professional help.
Tip: Document what you test so you can reproduce checks later.
Diagnosis: Flicker, buzz, or no light in a fixture after power is restored
Possible Causes
- highBulb is burned out or failing
- highBallast is faulty or nearing end of life
- mediumWiring or socket connections are loose or damaged
Fixes
- easyReplace the bulb with a compatible new bulb
- mediumTest the ballast and replace if it fails a basic check
- hardInspect and reseat sockets, or tighten connections; replace wiring if burnt
Got Questions?
How can I tell if a bulb is bad?
If a bulb flickers, dims, or won’t light after replacement with a known-good bulb, the bulb is likely faulty. Always test in a safe environment and confirm the fixture isn’t the source of the issue.
If a bulb flickers or won’t light even after replacing with a known-good bulb, the bulb is likely bad. Test safely and confirm the fixture isn’t the source.
Can a bad ballast cause buzzing or flicker?
Yes. A failing ballast often causes buzzing, intermittent light, or dim outputs even with a good bulb. If bulb replacement doesn’t fix the issue, the ballast is a likely culprit.
A bad ballast can cause buzzing or flicker; if a new bulb doesn’t fix it, suspect the ballast.
Should I test the ballast with a multimeter?
Testing ballast windings with a multimeter is helpful when you have experience with electrical testing. If unsure, rely on the fixture manual and consider professional service.
Using a multimeter can help test a ballast if you’re comfortable with electrical work. If not, seek professional help.
Is it safe to replace a ballast myself?
Ballast replacement involves high voltage in some fixtures. Only attempt it if you’re confident, have the right tools, and follow safety guidelines. Otherwise, hire a licensed electrician.
Replacing a ballast can be risky; if you’re not confident, hire a professional.
What if a new bulb still won’t light after replacement?
If a new bulb doesn’t light, the issue is likely the ballast or wiring. Proceed with the diagnostic flow and test sockets, wiring, and ballast step by step.
If a new bulb doesn’t light, the ballast or wiring is likely at fault.
What are signs of a faulty socket or wiring?
Signs include corrosion, discoloration, warm or burnt smells, or loose connections. These require careful inspection and may need component replacement by a pro.
Corrosion, discoloration, or loose connections indicate socket or wiring issues; involve a pro if needed.
Watch Video
Key Points
- Test the bulb first before assuming ballast failure.
- Power off and work safely; use PPE and insulated tools.
- Isolate one variable at a time to pinpoint the issue.
- Call a licensed electrician for complex wiring or uncertain work.