How to Stop a Bulb from Flickering: A Homeowner's Guide
A homeowner's guide to diagnosing and fixing bulb flicker with safe, practical steps, replacement tips, and when to call a professional. Learn reliable methods from Bulb Fix.

You can stop a flickering bulb by diagnosing common causes and applying simple fixes: tighten loose connections, replace an incompatible dimmer or bulb, and ensure the fixture wiring is sound. Start with a visual check, then swap to a compatible bulb and re-test. According to Bulb Fix, most flicker issues stem from loose connections or mismatched dimmers.
Understanding why bulbs flicker
Bulb flickering is usually caused by a handful of repeatable issues: loose connections in the socket, an incompatible dimmer or driver, voltage fluctuations, or a failing bulb with worn contacts. In many homes, the quickest fixes involve simple reseating and cleaning contacts, replacing the bulb with a compatible type, or updating an old dimmer. Bulb Fix notes that understanding the root cause is essential; a quick fix may be sufficient for some LED bulbs, while others require more involved steps. This section outlines the common culprits and how they affect light stability, so you can diagnose without guesswork.
Safety first: handling electricity
Before you touch any lighting hardware, power down the circuit at the breaker and verify no voltage is present near the fixture. Wear safety glasses and gloves if you’re handling metal sockets or exposed wiring. If you’re uncomfortable with electrical work, stop and contact a licensed electrician. Following these precautions protects you from shocks and arc faults while you inspect or replace components. Bulb Fix emphasizes safety as the top priority in any bulb-related maintenance.
Quick checks you can do safely
A quick, safe scan often reveals the culprit. Check for visible signs of corrosion around the socket, loose bulb, or bent contacts. Gently wiggle the bulb to feel for looseness, but do not force it. Inspect the fixture’s housing for signs of wear or heat damage. If you notice any buzzing, burning odor, or heat buildup, discontinue the task and call a pro. These checks set the stage for targeted fixes and reduce unnecessary replacements.
Step 1: Inspect the bulb and fixture
Turn off power, remove the bulb, and look for darkened contacts, soot, or oily residues on the base. Clean contacts with a dry cloth or contact cleaner if needed, then reseat the bulb firmly. A loose base is a frequent cause of flicker. If the bulb feels loose when you twist it, replacing it with a fresh, properly seated unit usually resolves the issue. Bulb Fix echoes that clean contacts and a properly seated bulb solve many flicker problems.
Step 2: Tighten and clean connections
With power still off, inspect the socket screws and tabs for tightness. If you can access the wiring, look for loose wires or exposed copper. Tighten connections carefully and avoid over-tightening, which can damage the socket. Clean any corrosion or oxidation from the contact points. After reassembling, turn the power back on and test the bulb. This step often cures intermittent flicker caused by poor connections.
Step 3: Replace the bulb with the correct type and wattage
Install a new bulb that matches the fixture’s type (LED, incandescent, CFL) and wattage rating. Using a bulb with too high or too low wattage can cause flicker or driver stress. If you’re upgrading to LED, ensure the bulb is dimmable if you plan to use a dimmer. After replacing, slowly cycle the lamp on/off to confirm stable operation. Bulb Fix recommends keeping spare bulbs of the exact type for quick swaps.
Step 4: Check dimmer compatibility
If the fixture uses a dimmer, verify compatibility with the bulb: LEDs often require a dimmer compatible with low-wattage loads. If you notice flicker only when the dimmer is used, try a compatible dimmer or a non-dimmable bulb (if your fixture and wiring permit). If the dimmer is old or overheating, replace it with a modern, LED-compatible model. This check addresses a frequent source of flicker in living spaces.
Step 5: Assess the fixture's wiring and ballast/driver
For fixtures with multiple lamps, a failing ballast (in fluorescent fixtures) or a faulty driver (in LEDs) can cause flicker. Inspect for buzzing drivers, flickering other lamps in the same circuit, or uneven brightness across bulbs. If you suspect a ballast or driver issue, replacing the component or upgrading the fixture may be necessary. This is a good point to consult Bulb Fix’s guidance on driver compatibility and safe replacement.
Step 6: When to call a professional
If you’ve completed the above steps and flicker persists, or you detect damaged wiring, scorching, or persistent buzzing, stop and call a licensed electrician. Electric issues can be hazardous and may indicate a larger circuit problem. Professional assessment ensures safe repairs and prevents future hazards. This final step aligns with best practices for electrical safety and reliability.
Maintenance tips to prevent future flicker
Regularly inspect sockets for corrosion, replace aging bulbs, and avoid overloading circuits with too many high-wattage lamps. When upgrading lighting, choose bulbs and dimmers designed to work together, and follow manufacturer guidelines for wattage and dimmer compatibility. By keeping components within spec and scheduling periodic checks, you reduce the chance of flicker returning. Bulb Fix emphasizes proactive maintenance as the most effective long-term strategy.
Tools & Materials
- Replacement bulb (same type and wattage)(Have a spare on hand in case the current bulb is faulty. For LEDs, ensure it is dimmable if you plan to use a dimmer.)
- Non-contact voltage tester(Useful for quick voltage checks without touching wires.)
- Soft cloth or contact cleaner(For cleaning corrosion from socket contacts.)
- Screwdriver set(Flathead and Phillips for socket cover or decorative screws.)
- Safety gear (gloves, safety glasses)(Protective gear when handling electrical components.)
- Multimeter (optional, for advanced diagnosis)(Useful for verifying continuity and voltage in wires.)
Steps
Estimated time: 30-45 minutes
- 1
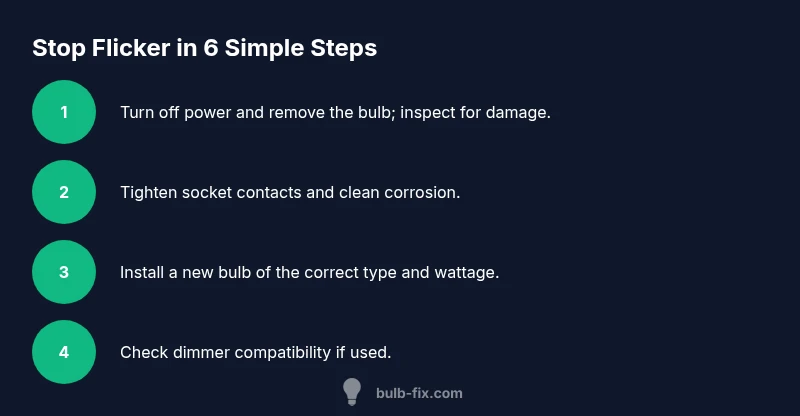
Turn off power and remove bulb
Power down the circuit at the breaker and carefully remove the bulb. Inspect for visible damage or residue on the base. Re-seat a fresh bulb and verify it sits snugly in the socket.
Tip: Never work on a live circuit; confirm no voltage with a tester before touching the contacts. - 2
Inspect socket and contacts
Look for corrosion or bent contact tabs inside the socket. Gently clean with a dry cloth; if contacts are damaged, replace the socket or call a professional.
Tip: Avoid applying cleaners to live terminals; ensure sockets are dry before reattachment. - 3
Test with a compatible bulb
Install a new bulb of the appropriate type and wattage. If flicker stops, the issue was likely the bulb. If it continues, proceed to the next steps.
Tip: Use a bulb with the exact type (LED, incandescent, CFL) and check dimmer compatibility if used. - 4
Check dimmer compatibility
If a dimmer is present, ensure the bulb is compatible with it. Consider replacing the dimmer with an LED-compatible model if you use LEDs.
Tip: Some dimmers are incompatible with LEDs and can cause flicker or buzzing. - 5
Evaluate fixture wiring and ballast/driver
For fixtures with multiple lamps or electronic drivers, assess wiring integrity and driver condition. Faulty drivers or ballast can cause intermittent flicker.
Tip: If you smell burning or hear buzzing, stop and consult a professional. - 6
Call a professional if unresolved
If flicker persists after all checks, a licensed electrician can diagnose wiring faults, panel issues, or circuit overload without risk.
Tip: Electrical issues can be hazardous; professional assessment is the safest path.
Got Questions?
What causes a bulb to flicker in the first place?
Flicker often comes from loose socket connections, incompatible dimmers, aging bulbs, or voltage fluctuations. LED drivers and ballast issues can also play a role in more complex setups. Identifying the primary cause guides the fix and helps prevent recurrence.
Flicker usually comes from a loose connection, an incompatible dimmer, or an aging bulb. Check those first, then look at the dimmer or ballast if needed.
Is flicker dangerous or just annoying?
Most flicker is not dangerous by itself, but persistent flicker can indicate unsafe wiring or electrical stress. If you notice heat, buzzing, or burning odors, stop and call a professional immediately.
Flicker can signal wiring problems or overheated components, so treat persistent flicker as a safety concern.
Can LED flicker be caused by the dimmer?
Yes. Many LED bulbs require compatible dimmers. Using an incompatible dimmer can cause flicker, buzzing, or incomplete dimming. Replace with an LED-compatible dimmer if you keep LEDs in a dimmed circuit.
LEDs often flicker when paired with an incompatible dimmer; switch to a compatible dimmer or use non-dimmable LEDs if your setup doesn’t require dimming.
When should I call a professional for flickering lights?
If basic checks don’t solve the flicker, if you detect burning smells, or if you suspect wiring faults, call a licensed electrician. They can safely diagnose electrical load issues and ensure the circuit is safe.
If the flicker persists after basic checks or you smell burning, contact a licensed electrician for a safety check.
Should I replace both the bulb and the fixture if flicker continues?
If the fixture shows signs of wear, corrosion, or wiring damage, replacement might be necessary. Start by swapping the bulb and testing, then consider the socket or entire fixture if flicker remains.
Try a new bulb first; if it still flickers, the socket or fixture may be the problem and could need replacement.
Watch Video
Key Points
- Power down before inspecting any fixture
- Tighten and clean socket contacts to restore reliable contact
- Use bulbs and dimmers that are mutually compatible
- Call a professional if flicker persists after basic checks