How to Make a Bulb Circuit: A Safe DIY Guide
Learn to build a basic, safe bulb circuit using a low-voltage power source, switch, and simple wiring. This Bulb Fix guide covers setup, safety, testing, and troubleshooting for DIY enthusiasts.

Goal: learn how to make bulb circuit safely using a power source, a bulb, a switch, and simple connecting wires. This quick answer highlights the core concept, safety notes, and required parts. For a complete, step-by-step build with diagrams, measurements, and troubleshooting tips, continue to the body blocks.
What is a simple bulb circuit?
A bulb circuit is a closed path that lets electrical current flow from a power source through a load (the bulb) and back to complete the circuit. Understanding this core idea helps answer how to make bulb circuit in a safe, controlled way. The Bulb Fix Team emphasizes keeping voltage safety at the forefront and starting with a low-voltage setup to learn the basics without risking shocks or fires. The essential elements are a source, conductors, and a bulb or equivalent load. When these elements are connected in a loop, light is produced as current passes through the filament or LED. Always arrange components on a non-conductive base to reduce accidental shorts.
How circuits work: current, voltage, and resistance
In any circuit, current is the flow of electrons, voltage is the pressure pushing that flow, and resistance is what slows it down. A bulb converts electrical energy into light and heat. By adjusting these variables (for example, using a dimmable bulb or resistor), you can observe how brightness changes. This section lays groundwork for practical experiments described later in the guide, and it helps explain why proper component values matter for safety and performance.
Safety first: essential precautions
Working with electricity can be risky. Always use a low-voltage power source, work on a non-conductive surface, and keep your workspace dry. Wear safety glasses when cutting wires, and never connect directly to mains voltage. Before touching any live connections, unplug power and discharge capacitors if applicable. The goal is to learn safely rather than rush to see light.
Tools and materials you'll need
A simple bulb circuit requires a few basic items that are easy to source. Essential: a power source (low-voltage DC), a bulb, a switch, and insulated connecting wires. Optional but helpful: a breadboard, a resistor for LED experiments, electrical tape, and wire strippers. Gather these on a clean, non-conductive surface to minimize accidental shorts and to keep your workstation organized.
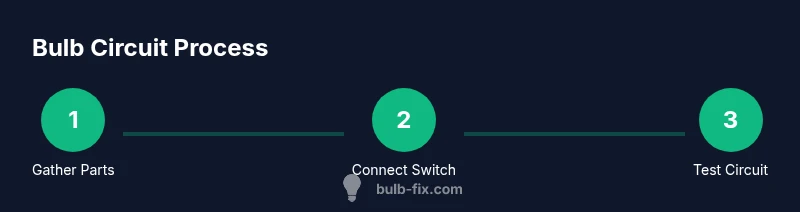
Step-by-step overview: a safe, low-risk setup
This overview walks you through a safe, high-level path for building a basic circuit before diving into numbered steps. By keeping the circuit in one loop on a non-conductive base, you reduce confusion and risk. You will learn how to confirm connections and test the circuit after wiring the switch and bulb. The overview ensures you understand the sequence before you begin the hands-on steps.
Series circuit: one bulb in a single path
In a series configuration, current travels through each component in a single path. For a basic bulb circuit, place the power source, switch, and bulb in one line, connected by wires. If the bulb lights, you’ve completed a successful path. If not, re-check polarity, connections, and ensure the bulb is functional. Series circuits are simple to analyze and great for learning Ohm's law basics.
Parallel circuit: multiple bulbs with independent paths
A parallel setup provides each bulb its own path to the power source. This means the failure of one bulb doesn’t darken the others. Wiring a parallel bulb circuit typically involves branching wires from the power source to each bulb (with a proper return path). Use short, separate jumper wires and keep all connections secure to avoid shorts.
Testing and troubleshooting common issues
Begin by turning off the power and inspecting your connections. Use a multimeter to check continuity and verify there is a complete circuit. If the bulb won’t light, check bulb orientation, socket compatibility, and switch operation. Loose wires or a dead power source are common culprits. Replace any faulty components to confirm the rest of the circuit works.
Safe testing practices and measurement
When testing, power off before adjusting wiring. Use a low-voltage source and keep metal tools away from live circuits. Probing with a meter should be done with one hand, if possible, to reduce the chance of completing an unintended path. Document readings, including voltage across the bulb and current through the path, to reinforce learning and safety habits.
Common myths about bulb circuits
Myth: Any bulb will light in any configuration. Reality: Bulbs require a proper voltage and a closed loop; mismatched resistance or loose connections prevent illumination. Myth: Higher voltage always makes bulbs brighter. Reality: Beyond a safe limit, excessive voltage can burn bulbs and wiring. Stick to recommended components and never work with mains voltage for DIY experiments.
Next steps: expanding your bulb circuit experiments
Once you’re comfortable with a single bulb, you can explore adding a resistor for LED experiments, incorporating a small current-limiting element, or adding a switch and indicator. These steps deepen your understanding of circuit behavior, while keeping safety a top priority. Always test incrementally and disconnect power when making changes.
Reading list and resources
For further learning, consult reputable sources on basic electronics, safe hands-on projects, and circuit theory. Start with beginner-friendly references and continue with guided, safe experiments on a non-conductive surface.
Tools & Materials
- Low-voltage power source(Use a battery or bench supply; avoid mains voltage for DIY practice.)
- Bulb (appropriate for the power source)(Incandescent or LED bulb; ensure base matches sockets you’ll use.)
- Switch(Single-pole switch to safely interrupt current.)
- Insulated wiring with alligator clips(Length about 12–18 cm per lead; keep clean and untangled.)
- Non-conductive base (e.g., plastic board)(Helpful for organizing and preventing shorts.)
- Breadboard (optional)(Good for experimentation without soldering.)
- Wire strippers/tweezers(Useful for clean, safe wire preparations.)
Steps
Estimated time: 15-25 minutes
- 1
Gather components and safety gear
Collect the power source, bulb, switch, and wires on a non-conductive surface. Verify each component is undamaged and rated for low-voltage operation. This prep minimizes live-work mistakes and sets a clear starting point.
Tip: Lay everything out before you begin to avoid missing parts. - 2
Set up a safe work area
Place a non-conductive base on a dry, stable surface. Ensure your hands are dry and you’re wearing safety glasses if you’ll cut or strip wires. A tidy workspace reduces the risk of shorts and accidental contact with live leads.
Tip: Keep metal tools away from any live connections. - 3
Connect the power source and switch
Attach one lead of the power source to the switch, and the other lead from the switch to the bulb’s contact. Check that the polarity is consistent and that connections are secure before powering on.
Tip: Double-check that the switch isolates the circuit when open. - 4
Attach the bulb and complete the loop
Connect the bulb back to the remaining power source lead to complete the loop. Ensure the bulb seats properly in its socket and that all wires are firmly connected.
Tip: Use small, tidy wire runs to avoid tangles that can snag or short. - 5
Power up and observe
Turn on the power switch and observe the bulb lighting. If it doesn’t light, power off and re-check connections, bulb integrity, and socket compatibility.
Tip: If the bulb stays dark, test the bulb separately to confirm it’s working. - 6
Test safety and function with measurements
Power off first, then use a multimeter to verify continuity and safe voltage across the bulb. Record readings to reinforce your understanding of circuits and to identify abnormal values early.
Tip: Keep one hand behind your back when probing live paths to reduce shock risk. - 7
Power down and store components
After testing, switch off and disconnect the power source. Coil wires neatly and store components in a dry place to prevent corrosion or damage.
Tip: Label components if you plan future experiments for easier reassembly.
Got Questions?
What is the simplest bulb circuit I can build safely?
The simplest safe setup uses a low-voltage power source, a single switch, one bulb, and connecting wires in a single loop. This limits variables so you can observe basic circuit behavior without complexity. Always work on a non-conductive surface and power off when wiring.
The simplest safe setup uses a low-voltage source, one switch, one bulb, and wires in a single loop. Always work on a non-conductive surface and power off when wiring.
Do I need a resistor for a basic bulb circuit?
For a standard incandescent bulb, a resistor is not required. If you’re experimenting with LEDs or higher brightness bulbs, a resistor or current-limiting element should be used to prevent damage. Always match components to safe operating values.
For a standard bulb, a resistor isn’t required. With LEDs, a resistor is important to limit current.
Can I use a breadboard for practicing a bulb circuit?
Yes, a breadboard is helpful for quick experiments because it avoids soldering and lets you rearrange components easily. For long-term setups, a hard-wired base is more durable.
A breadboard is handy for quick, reusable experiments; it’s not required but makes changes easy.
Why won’t my bulb light up after wiring?
Common causes include a dead bulb, loose connections, reversed polarity, or an insufficient power source. Recheck all connections, test the bulb separately, and ensure the switch completes the circuit.
If the bulb won’t light, check the bulb, connections, and power source, then verify the switch completes the circuit.
Is it safe to experiment with circuits at home?
Yes, with proper precautions: use low-voltage sources, conduct experiments on non-conductive surfaces, and keep liquids away. Avoid mains voltage and never work with live electricity without training.
It's safe if you use low voltage, work on non-conductive surfaces, and avoid mains electricity.
What should I do after completing a test?
Power down the circuit, disconnect the power source, and store parts neatly. Document what worked and what didn’t to guide future experiments.
Power down, disconnect, and store parts. Note what you learned for next time.
Watch Video
Key Points
- Identify essential parts and goal.
- Use low voltage for safety during practice.
- Verify connections before powering on.
- Document findings to reinforce learning.