How to Tell If a Bulb Is Blown: A Homeowner's Guide
Learn how to tell if a bulb is blown with safe testing steps, signs to look for, and how to replace or dispose of bulbs properly. This Bulb Fix guide covers incandescent, LED, CFL, and halogen bulbs for homeowners and DIYers.

Learn how to tell if bulb is blown and what to test before replacing it. This quick guide covers common signs, safe testing methods, and choosing the right replacement. By following the steps, you’ll confirm a blown bulb without risking shock or damage, and you’ll know when to call a professional. It also explains flicker, dimming, dead sockets, and how to handle different bulb types.
What 'blown' means for different bulb types
Bulbs come in several types, and each type fails in different ways. An incandescent bulb typically fails when its tungsten filament breaks, causing an open circuit and no light. LEDs can fail due to driver issues or degraded diodes. CFLs rely on a ballast or electronic driver that can fail, reducing or stopping light output. In all cases, a truly blown bulb will generally not illuminate when power is applied. According to Bulb Fix, common causes include filament break or driver failure, but visual inspection and safe testing are needed before replacement. When in doubt, prioritize safety and avoid prying or forcing components, which can damage sockets.
Common signs of a blown bulb
There are several telltale signs that a bulb may be blown, but some indicators vary by bulb type. The most obvious signal is a complete lack of light after you flip the switch. Other signs include flickering or dimming before failure, a buzzing or cracking sound, a dark or discolored glass envelope, or a small puff of smoke near the base. LED bulbs may fail without flicker, while incandescent bulbs often go dark with a dull flash during startup. If you see any scorch marks around the base, stop and inspect the socket as well. These signs warrant testing with care and possibly replacing the bulb.
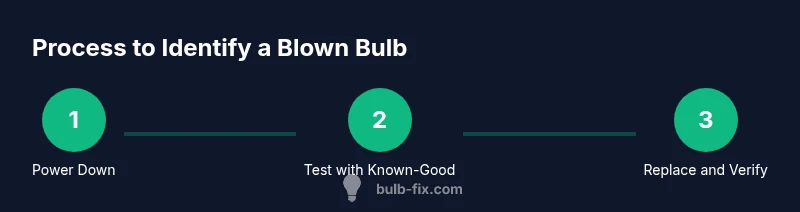
Safety first: before you test
Always switch off power at the wall switch and, if possible, at the circuit breaker before handling a bulb. Allow the fixture to cool, wear protective gloves, and avoid touching the glass with bare hands. Use a sturdy ladder or step stool on a dry surface if reaching high fixtures. Keep your workspace dry and free of metal jewelry that could create a short. If you are uncertain about voltage or socket compatibility, pause and consult a licensed electrician.
Visual checks you can perform at the fixture
With power off and bulb cool, gently unscrew the bulb by turning counterclockwise. Examine the glass for cracks or burnt marks. Look at the metal base for corrosion and inspect the socket contacts for signs of wear. If the base cord or socket shows damage, stop and replace the socket or fixture. For LED and CFLs, ensure the base type matches the fixture (e.g., E26/E27, GU10, or bayonet). A broken bulb should be handled with care to avoid glass shards.
How to test and confirm with a known-good bulb
If you have a spare bulb of the same type, swap it in to see if the fixture lights. If the new bulb works, the original bulb is likely blown. If it doesn’t, test the same socket with a bulb you know is good, or move the suspected bulb to a different, working fixture to isolate the problem. A simple voltage tester can verify if the socket is delivering power. Bulb Fix analyses show testing procedures reduce misdiagnosis and improve safety.
Handling different bulb types and sockets
Base types vary widely: Edison screw (E26/E27), candelabra (E12), bi-pin bases like GU10, and bayonet systems. Always match wattage and base compatibility when replacing. Some fixtures use smart bulbs with drivers that require a compatible controller. If a socket or base shows discoloration or heat damage, replace the socket or fixture rather than forcing a bulb into an unsafe fit.
Disposal and replacement best practices
Never dispose of a CFL in ordinary trash in many jurisdictions; many bulbs require recycling or special handling due to mercury. LEDs and incandescents should be disposed of according to local guidelines. Handle spent bulbs with care and use a container to prevent shattering. Bulb Fix recommends following local disposal rules and recycling programs for safe and responsible disposal.
Troubleshooting multiple bulbs or circuit faults
If multiple bulbs fail or the circuit trips the breaker, the issue may be the circuit, not a single bulb. Check the main breaker, inspect for loose wires, and test other outlets on the same circuit. If problems persist, consult a licensed electrician to assess wiring, loads, and room temperature conditions that could affect bulb performance.
Preventing future failures and extending bulb life
Select bulbs rated for the fixture’s voltage and expected load. Ensure adequate ventilation to avoid overheating, and turn bulbs off when leaving the room on a timer to reduce wear. Use quality replacements and avoid frequent on/off cycles for LED bulbs. Regularly inspect sockets for corrosion and clean contacts with a dry brush if safe to do so.
Authority sources
For safety and testing guidelines, consult authoritative sources such as Energy.gov on lighting choices, the Electrical Safety Foundation International (ESFI) for bulb safety tips, and OSHA for electrical safety guidelines. These references help ensure you follow best practices when diagnosing and replacing bulbs.
Tools & Materials
- Replacement bulbs (same type and wattage)(Have at least one spare bulb of the same type)
- Non-contact voltage tester(Optional for verifying live circuits without contact)
- Gloves with grip(Heat-resistant gloves are ideal)
- Dry cloth or lens tissue(For cleaning contacts gently)
- Ladder or stable step stool(Secure on a dry surface)
- Safety goggles(Protect eyes from shards)
Steps
Estimated time: 15-30 minutes
- 1
Turn off power and let the bulb cool
Switch off the light at the wall switch and, if possible, the circuit breaker. Wait several minutes for the bulb to cool before touching it to avoid burns.
Tip: This reduces burn risk and prevents hot glass from injuring you. - 2
Remove the bulb safely
Using a firm grip with gloves, twist the bulb counterclockwise until it frees from the socket. Place it in a safe container. If the bulb is broken, carefully collect shards with a damp paper towel, avoiding contact.
Tip: Wearing gloves protects your fingers from sharp edges. - 3
Inspect the bulb and socket visually
Look for cracks, darkened glass, or burnt spots on the base. Check the socket contacts for corrosion or looseness. Do not force a damaged socket to fit a bulb.
Tip: A damaged socket usually requires replacement of the socket or fixture. - 4
Test the socket with a known-good bulb
Insert a bulb you know works or test the current socket with a tester to confirm power delivery. If the good bulb lights, the original bulb is blown. If not, the issue may be the fixture or wiring.
Tip: Always test using another known-good bulb before replacing major components. - 5
Try a different bulb type (if safe)
If allowed by the fixture, test with a bulb of the same base but a different brand or type to ensure compatibility. Do not mix LED with incompatible dimmers or fixtures.
Tip: Incompatibility can cause flicker or early failure. - 6
Dispose and replace
Dispose of the blown bulb per local guidelines and install a fresh bulb of the same base and rating. Recycle CFLs and LEDs where required.
Tip: Keep receipts and note the replacement date for warranty if applicable.
Got Questions?
What does it mean if a bulb flickers before going out?
Flickering can indicate a loose connection, a failing socket, or a bulb nearing end of life. Test with a known-good bulb to verify.
If it flickers before it goes out, try a known-good bulb to check if the fixture is the problem.
Can a bulb be blown and still glow very dimly?
Yes, some bulbs show a faint glow if the circuit is partially powered or if the filament is damaged. This is less common with LED bulbs.
A dim glow can mean an electrical issue or a partial failure; test with a known good bulb to confirm.
Should I replace all bulbs at once?
Only replace bulbs as needed unless multiple bulbs are near the end of their rated life. Replacing in bulk can save time but may waste energy if only some are failing.
You can replace one at a time; plan replacements based on usage and life expectancy.
What safety gear should I wear?
Wear gloves to protect hands and safety glasses if there’s a risk of glass breakage. Work on dry surfaces away from water.
Gloves and eye protection help keep you safe while handling bulbs.
What should I do if the socket looks damaged?
Do not reuse a damaged socket. Replace the socket or fixture and have an electrician inspect wiring if the issue recurs.
If the socket looks damaged, stop and replace the socket; call an electrician for wiring concerns.
Is it safe to test bulbs without turning off the power?
No. Always turn off power at the switch or breaker before testing a bulb to prevent shocks.
Always switch off the power before testing a bulb.
Watch Video
Key Points
- Always power down before handling bulbs.
- Use a known-good bulb to verify the socket.
- Different bulb types fail differently; check type-specific signs.
- Dispose responsibly and replace with correct rating.