How to Test Bulb with Multimeter: A Homeowner's Guide
A practical, safety-focused guide to testing bulbs with a multimeter, with step-by-step instructions for incandescent and LED bulbs, plus troubleshooting tips and interpretation of results.

Learn how to test bulb with multimeter to confirm whether a bulb is dead or working, and to diagnose common faults. This safe, step-by-step approach covers continuity and resistance checks for incandescent, LED, and specialty bulbs. According to Bulb Fix, always unplug, wear eye protection, and handle bulbs gently during testing; use the correct test mode for each bulb type.
Safety first: prepping for bulb testing
Before you touch any bulb or electrical fixture, turn off power at the switch and circuit breaker. Let fixtures cool if recently used. Wear eye protection and gloves when handling bulbs to prevent burns or cuts. Work in a well-lit area, and keep a flashlight handy for socket access. If you’re uncertain about wiring or you’re testing fixtures in the ceiling, consider hiring a licensed electrician. The goal is to minimize shock risk and avoid broken glass. Bulb Fix emphasizes safety as the foundation of any testing process, so plan carefully and test in a controlled environment.
Understanding multimeter basics for bulb testing
A digital multimeter can measure continuity, resistance, and diode behavior, which helps determine bulb health without powering the lamp. For bulbs, you’ll typically use the continuity setting (or audible beep) to see if current can flow through the bulb’s filament or internal circuitry, and the resistance setting to compare expected ranges. Note that many modern bulbs contain electronics that distort simple resistance readings. Bulb Fix notes that results can vary by bulb type, so treat readings as indicators rather than guarantees and combine them with a visual inspection.
Preparing the bulb and fixture for testing
With power off, remove the bulb gently using the correct technique for your fixture. Inspect the bulb base for cracks, discoloration, or melted insulation. If you can access the base without forcing, wipe it clean to ensure good contact with meter leads. If a bulb has a built-in filament or glass pinch, do not force it out of the socket. Keep the socket contacts clean and free of debris; dirty contacts can produce misleading readings. Bulb Fix recommends performing tests with fresh gloves rather than dirty ones.
Step 1: Test continuity across the bulb contacts
Set the multimeter to continuity or diode mode if you have a diode test option. Place one probe on the bulb contact at the base and the other on the opposite contact or base connection. A healthy bulb circuit should show continuity or a diode reading that indicates proper orientation for diodes in LED bulbs. If there is no continuity, the bulb is likely dead or the socket is faulty. Inspect the bulb again and try another bulb to confirm.
Step 2: Check resistance with the bulb removed
Remove the bulb entirely from the socket to avoid false readings from socket contacts or mains wiring. Connect meter probes across the two bulb terminals (base contacts). A very high resistance or infinite reading usually means open filament or defective electronics; a very low reading can indicate a short or contamination. Compare readings against a known-good bulb if possible.
Step 3: LED bulbs: diode tests and driver considerations
LED bulbs contain a driver circuit; a simple resistance check may not reveal the fault. If your meter has a diode test, you can test the internal LED diodes by placing probes across each LED leg while the driver is disconnected. If readings are inconsistent or no diode conduction occurs, the LED may be failed. When testing LEDs, avoid powering the bulb through the meter connected to mains; use isolated testing methods.
Step 4: Re-seat a known-good bulb to verify fixture
Install a known-good bulb in the same socket and confirm whether it lights normally. If the new bulb works but the original does not, the bulb is faulty. If the new bulb also fails, the fixture, socket contacts, or wiring may be the problem. This cross-check helps isolate the issue without guessing.
Step 5: Interpret readings and plan next steps
Record what you observed in each test and compare against expectations for the bulb type. A well-functioning bulb should show continuity and a reasonable resistance pattern when tested outside active power. If readings are inconclusive, retest with clean contacts and a fresh bulb, and consider professional testing for complex fixtures. Bulb Fix emphasizes combining readings with a visual inspection for the most reliable conclusion.
Step 6: Reassemble safely and organize your results
After testing, reinsert or replace bulbs carefully. Keep a simple log of the bulb type, socket, readings, and final conclusion. This record helps future maintenance and informs replacement decisions. If you encountered a faulty socket, avoid forcing connections and seek electrical service to prevent damage or safety hazards.
Quick reference: common mistakes to avoid during testing
- Testing in a live circuit increases shock risk; always power down first.
- Using dirty probes or corroded contacts can produce misleading readings.
- Relying solely on resistance for LEDs can be misleading due to the internal driver.
Final thought on safe testing practices
Approach testing methodically, document your results, and replace bulbs when in doubt. The goal is to confirm bulb health without exposing yourself to electrical hazards or damaging fixtures. Bulb Fix encourages homeowners to follow these steps and prioritize safety at every stage.
toolsMaterialsNotIncludedInBlockMakeThisSectionOptionalIfNeededForDataIntegrityNotAPossibleNull
Tools & Materials
- Digital multimeter(Prefer a DMM with continuity/beep mode and diode test option for LEDs.)
- Alligator clip leads(Shields hands from touching bulb contacts and keeps readings stable.)
- Known-good replacement bulb(Use for fixture cross-checks when testing in sockets.)
- Original bulb under test(Keep for side-by-side comparison with replacement bulb.)
- Safety gloves and eye protection(Protect hands from sharp edges and glass breakage.)
- Soft cloth or lint-free pad(Clean socket contacts before testing if corrosion is suspected.)
Steps
Estimated time: 30-45 minutes
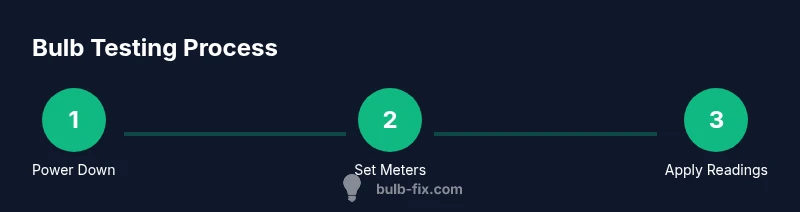
- 1
Power down and remove the bulb
Turn off the light switch and, if possible, switch off the circuit at the breaker. Allow the fixture to cool, then carefully remove the bulb using the correct technique for your fixture. This prevents shock and minimizes the risk of glass breakage.
Tip: Never force a bulb out; hold the base not the glass and twist gently. - 2
Set up the multimeter
Connect the test leads to the multimeter and select continuity or diode/diode-array mode, depending on your meter. If you’re testing LEDs, diode mode can reveal internal failures that resistance alone won’t show.
Tip: If your meter has auto-range, use it; if not, start with a mid-range value and adjust as needed. - 3
Test continuity across bulb contacts
Place one probe on the base contact and the other on the opposite contact. A successful path (continuity) indicates a closed circuit; no result suggests a broken filament or internal fault.
Tip: Ensure clean contact points; dirty contacts can imitate a fault. - 4
Check resistance with the bulb removed
With the bulb removed, place the leads on the two bulb terminals. High or infinite resistance usually means an open filament or internal issue; a very low reading might indicate a short or contamination.
Tip: Compare with a known-good bulb to interpret the readings more accurately. - 5
Perform LED-focused checks
If testing an LED, use diode test mode to check individual diodes or the driver circuit. A lack of proper conduction or inconsistent values points to a failed LED or driver.
Tip: Do not apply power to the bulb during this step—keep it isolated from mains. - 6
Cross-check in a known-good socket
Install a known-good bulb in the same fixture. If the fixture lights, the original bulb is faulty; if it doesn’t, the socket or wiring may be at fault.
Tip: This step helps separate bulb health from socket issues. - 7
Document and compare results
Record the readings and observations for future reference. Compare against your log and any manufacturer guidance for your bulb type.
Tip: A clear log saves time on future maintenance. - 8
Reassemble and plan next steps
Reinsert the bulb or replace with a new one if needed. If issues persist, consider professional testing or fixture repair.
Tip: Prioritize safety; if you’re unsure, call an electrician.
Got Questions?
Can I test a bulb without removing it from the fixture?
You can test without removing the bulb if you have a multimeter with safe, non-contact access, but accuracy often improves when the bulb is removed for testing. Use caution and ensure power is off.
Yes, but removing the bulb for a test improves accuracy and safety.
What does a failed continuity test mean?
A failed continuity test typically means the bulb’s filament or internal circuit is open, or the socket is preventing a proper connection. Validate by testing a known-good bulb in the same socket.
If continuity fails, the bulb or socket likely has an issue.
Why do LED bulbs sometimes show odd readings?
LED bulbs include drivers that can distort simple resistance readings. Use diode checks and verify in a known-good fixture to interpret results accurately.
LEDs and their drivers can give misleading readings; rely on multiple tests.
Is it safe to test a bulb while it’s in the fixture?
Power should be off before testing. If you must test in the fixture, do not touch live components and avoid prying with metal tools. Prefer removing the bulb when possible.
No—power off first, remove if possible, and be careful with sockets.
Which multimeter mode should I use for bulb testing?
Use continuity or diode mode for LEDs, and resistance as a backup. Choose the mode that best reveals the bulb’s health without powering the circuit.
Use continuity and diode modes for the most accurate checks.
How can I tell if the socket is the problem?
If a known-good bulb works in the same socket, the original bulb is faulty. If not, the socket or fixture wiring may be the issue.
If another bulb fails too, the socket is likely at fault.
Watch Video
Key Points
- Always power off before testing
- Use continuity and diode tests for LEDs
- Different bulb types require different interpretation of readings
- Cross-check with a known-good bulb in the same fixture
- Document results to inform future maintenance