Replace Bulb in Oven: A Safe Step-by-Step Guide
Learn how to safely replace a bulb in your oven with this practical, DIY-friendly guide. Bulb Fix explains materials, safety tips, step-by-step actions, testing, and disposal for a quick, confident fix.

You will learn to safely replace a bulb in an oven, a simple fix that restores visibility and even cooking. Gather a heat-rated replacement bulb, insulated gloves, a flashlight, and the right screwdriver. Always ensure the oven is cool, unplugged, and the rack removed before you begin. This guide emphasizes safety, proper disposal of old bulbs, and testing the light after installation.
Why replacing the oven bulb matters
A clear view inside your oven helps you monitor browning, avoid overcooking, and spot spills before they bake on. A failed oven light is more than an inconvenience—it can hide hotspots and uneven heating that affect results. For most homeowners, replacing the bulb is a straightforward task that you can perform with common tools and a few safety checks. According to Bulb Fix, a properly installed, heat-rated bulb improves visibility without compromising oven safety, and it reduces the chance of bulb-related leakages or glass breakage over time. Keeping the interior light working also minimizes the risk of reopening the oven door mid-cycle to peek, which can waste energy and disrupt temperatures.
In practice, the repair is inexpensive, quick, and empowers you to troubleshoot small issues without calling a technician. By following this guide, you’ll gain confidence in handling basic electrical components around kitchen appliances, and you’ll learn how to select the correct bulb for your exact oven model.
Safety and preparation: establish a safe starting point
Before you touch any appliance, power off and unplug it at the wall outlet. If your oven is hard-wired, switch off the circuit breaker that serves the kitchen to ensure there’s no current flowing. Allow the oven to cool completely—hot glass can cause severe burns. Pull out the bottom rack or any racks near the bulb area to reduce the risk of contact while handling.
Wear insulated gloves to protect your hands from sharp edges and the potential bite of a hot bulb base. Keep a flashlight handy so you can clearly see inside the oven cavity and confirm the bulb’s base type before buying a replacement. Also, check the oven’s user manual for the recommended bulb type and socket size. If the bulb is tightly sealed or the cover is stubborn, don’t force it; instead, apply a gentle heat to loosen the fit or consult the manual.
Choosing the right bulb: match base and rating
Most oven bulbs are heat-rated and use a standard base, but socket types vary by model. Start by removing the existing bulb (if safe to do so) to inspect the base and confirm the base type (for example, E26 or similar). Next, verify the wattage rating printed on the bulb or in the manual; use a replacement with equal or higher heat tolerance, never lower. If you can’t find the exact specification, contact the oven manufacturer or consult the service label on the back or inside the door.
If you’re unsure, buy a universally compatible heat-rated oven bulb and test in a non-operational setting first. This minimizes waste and helps you compare fit across different models. Bulb Fix notes that selecting the correct wattage reduces energy waste and avoids premature bulb failure due to excessive heat.
Step-by-step replacement (hands-on guide)
Here is a concise, hands-on sequence you can follow once you have the correct bulb: remove the bulb cover, gently unscrew the old bulb, discard it safely, insert the new bulb to the same base, reattach the cover, and test the light with the oven door open before cooking. Make sure you’re using a bulb rated for oven temperatures. If you encounter resistance, stop and re-check the base alignment.
Watch for any exposed wires or scorched insulation; if you see damage, do not proceed and call a professional. The goal is a snug, secure fit that won’t rattle or loosen during use.
Testing and cleanup: verify and finish
Reconnect power to the oven and switch on the light by opening the door or pressing the light switch, depending on your model. If the bulb lights up, you’re done. If not, double-check the bulb seating and the fuse or circuit. Wipe away any dust or debris from the bulb area with a dry cloth and inspect for any signs of moisture or residue that could indicate a leak or spill.
Keep the old bulb in a small container for recycling or safe disposal per local guidelines. A quick test after replacement confirms immediate success and gives you the confidence to resume cooking.
Common mistakes and safety reminders
Common missteps include using a bulb with too low a temperature rating, forcing the bulb into a socket, and failing to unplug the oven before starting. Always confirm the oven is completely disconnected from power, and handle glass components with care. If the cover or gasket around the bulb is cracked, avoid using the oven and seek service.
Finally, dispose of spent bulbs safely and according to local regulations. Replacing an oven bulb is a small repair, but doing it correctly protects your appliance and your family.
Maintenance tips to extend bulb life and avoid future failures
Keep the interior clean to reduce heat buildup, and replace bulbs promptly when signs of dimming appear. Label spare bulbs with the oven model to streamline future replacements. Periodic checks of the light cover and bracket prevent rattling that can loosen connections over time. By coordinating bulb replacement with routine oven cleaning, you’ll prolong the bulb’s life and ensure consistent visibility during cooking.
Tools & Materials
- Heat-rated oven light bulb (matched to base and wattage)(Confirm socket type (e.g., E26) and wattage from the oven manual or label on the inside panel)
- Insulated gloves(Heat-resistant; prevents burns when handling hot glass or metal parts)
- Flashlight or headlamp(Bright, focused light to inspect the socket and bulb area)
- Screwdriver (flathead or Phillips as needed)(Used to remove the bulb cover or screws securing the bulb cover if required)
- Soft cloth or lint-free wipe(Clean surfaces around the bulb cover and interior glass)
- Trash-safe container(Dispose of the old bulb according to local rules; keep it separate from food prep areas)
Steps
Estimated time: 12-20 minutes
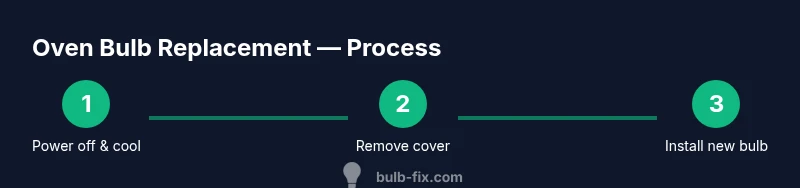
- 1
Power off and cool
Unplug the oven from the wall outlet or switch off the circuit. Allow the interior to cool completely to avoid burns when touching the bulb and glass.
Tip: If the oven is installed under a countertop, place a non-slip mat under your workspace to prevent movement. - 2
Access the bulb
Remove any racks obstructing access to the bulb area. If there is a protective cover, locate its fastening method and prepare to remove it.
Tip: Take a quick photo of the cover’s orientation before removal to ease reassembly. - 3
Remove the old bulb
Gently twist or unclip the old bulb from its socket, taking care not to tilt it too far. Keep the bulb straight to avoid breaking the glass.
Tip: If the bulb is stuck, apply a small amount of upward pressure and rotate slowly; do not force. - 4
Check the socket
Inspect the socket for signs of wear, corrosion, or burn marks. If you see damage, stop and consider professional service.
Tip: Wipe the socket with a dry cloth; moisture can cause short circuits when powered on. - 5
Install the new bulb
Insert the heat-rated bulb firmly into the socket with a gentle twist or push, aligning the base with the socket.
Tip: Avoid touching the glass with bare fingers; oils can shorten bulb life—use a clean cloth or gloves. - 6
Reassemble and test
Replace the bulb cover and rack, restore power, and test the light with the oven door open or the control light on.
Tip: If the light flickers, reseat the bulb or check for a loose connection.
Got Questions?
Can I replace the oven bulb myself?
Yes, most oven bulbs can be replaced by homeowners who follow safety steps and use the correct bulb type. Always unplug or switch off the circuit and let the oven cool before starting.
Yes, you can replace the oven bulb yourself if you follow safety steps and use the correct bulb.
What bulb type should I use?
Use a heat-rated bulb compatible with your oven’s socket. Check the manual or the label inside the door for the exact base and wattage specification.
Use a heat-rated bulb that matches your oven’s socket and wattage as specified in the manual.
What if the new bulb won’t light?
Re-seat the bulb to ensure good contact, check the socket for corrosion, and verify the power is on. If it still won’t light, the socket or wiring may be damaged.
If the new bulb doesn’t light, reseat it and inspect the socket; if it still fails, seek professional help.
Is it safe to run the oven with the bulb out?
Running the oven with no light is not dangerous, but you won’t be able to see inside. Avoid using the oven for precise cooking until the bulb is replaced.
It’s not dangerous to run without the light, but you can’t see inside and should replace the bulb soon.
How should I dispose of the old bulb?
Allow the bulb to cool, wrap it in a protective material, and reuse or recycle according to local guidelines. Do not throw broken glass in regular trash.
Cool the bulb, wrap it, and follow local recycling guidelines.
Watch Video
Key Points
- Power off and cool before starting.
- Use the correct heat-rated bulb for your oven.
- Inspect the socket for damage, never force a connection.
- Test the light after installation to confirm proper operation.
- Dispose of the old bulb responsibly.