Replacement Projector Bulb Guide: Step-by-Step
Learn how to safely replace a projector bulb with practical steps, bulb compatibility tips, and troubleshooting guidance from Bulb Fix. Plus lamp-hour notes.

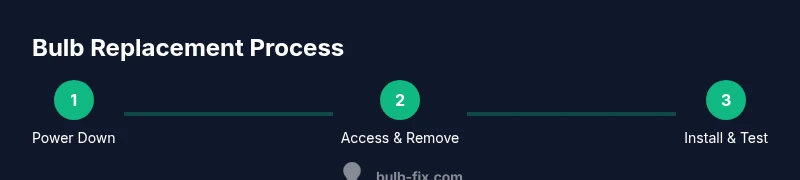
You can replace a projector bulb by safely powering down, allowing the lamp to cool, accessing the lamp housing, removing the old bulb with the correct tool, and installing a compatible replacement bulb of the same wattage and base. After installation, reset the lamp timer and run test patterns to verify color and brightness.
Why replacement projector bulbs matter and when to act
When you use a projector regularly, the bulb will gradually dim, shift color, or fail to reach full brightness. Replacing a worn or incompatible bulb can restore image quality and prevent strain on the ballast or cooling system. According to Bulb Fix, staying on top of lamp life and using the correct replacement projector bulb reduces downtime and preserves your viewing experience. If you notice a visible dip in brightness, color shifts, or extended warm-up times, it’s time to inspect the bulb and plan a replacement. This isn’t just about brightness; it’s about protecting the projector’s electronics from undue stress and avoiding premature failure of components downstream. A planned replacement also helps you maintain consistent home theater performance and classroom presentation reliability.
Understanding bulb types and bases for projectors
Projector bulbs come in several base types and wattage ratings. Common base families include GU and MX-style bases, with wattage requirements ranging from modest lamp outputs to high-luminosity cinema-grade brightness. The key is matching the base to the socket and selecting a wattage that your projector’s ballast handles. Not all bulbs are interchangeable; using the wrong base or wattage can damage the lamp housing or reduce image quality. When in doubt, consult your projector manual or the manufacturer’s compatibility chart. Bulb Fix emphasizes verifying both the base type and the lamp’s rated wattage before purchasing a replacement projector bulb to ensure a safe, reliable fit.
Safety first: power, cooling, and handling
Always power down and unplug the projector before removing or installing a bulb. Let the lamp cool for at least 15–30 minutes, as touching a live or hot bulb can cause burns and damage. Use gloves or a clean cloth to handle the bulb by its base, avoiding contact with the glass due to oils from your skin that can shorten bulb life. Work in a clean space free of dust, and keep track of small screws or fasteners. If your projector has an enclosed lamp assembly, consult the manual about any safety interlocks or spring-loaded covers. Following these safety steps protects you and extends lamp life.
How to choose a replacement bulb: wattage, base, and compatibility
Start by checking your projector’s manual or a label on the device for the exact bulb type and base. Do not assume wattage from the brightness you see; using too high a wattage can overheat the ballast and shorten the lamp’s life, while too low a wattage may disappoint with underwhelming brightness. The replacement projector bulb should have the same base type and be within the recommended wattage range. Bulb Fix Analysis, 2026 notes that mismatched wattage and incompatible bases are common culprits behind premature lamp failures. After confirming compatibility, purchase from a reputable source and store the replacement in its original packaging until installation.
Common mistakes and how to avoid them
Avoid touching the glass of a new bulb with bare hands; skin oils can create hot spots and shorten bulb life. Do not overtighten the lamp housing screws, as overtightening can crack the seal or misalign the bulb. Don’t force a bulb into a socket—if it doesn’t seat with light resistance, remove and recheck the alignment. Keep a small container handy for screws and a note pad to record the lamp hours and purchase date. Finally, avoid using a used or damaged bulb, even if it appears to work briefly, as this can fail without warning and void warranties.
Testing and aftercare: what to expect after installation
Power the projector back on and allow it to warm up. Observe brightness, color accuracy, and uniformity across the image. Run a few test patterns that emphasize grayscale, color balance, and geometry. If you notice flicker, color fringing, or uneven brightness, recheck the bulb seating and ensure the lamp cover is reinstalled correctly. Reset the lamp timer per your projector’s manual after a successful test run. Routine checks every 6–12 months can help catch issues before they become failures.
Maintenance and planning for the long term
Log the replacement date, bulb model, and estimated lamp life in a maintenance tracker. Store spare bulbs in a cool, dry place and rotate stock to avoid aging issues from long-term storage. If you project frequently, consider keeping two bulbs on hand to minimize downtime. Plan replacements around show schedules or class calendars to prevent last-minute outages. Regular cleaning of air vents and ensuring proper ambient temperature also supports bulb longevity by reducing heat buildup.
Tools & Materials
- Replacement projector bulb(Compatible with your projector model; verify base type and wattage rating.)
- Screwdriver set(Phillips #2 for most lamp access screws)
- Gloves (latex or nitrile)(Avoid skin oils on the bulb glass)
- Lint-free cloth(For cleaning the lens area and housing exterior)
- Isopropyl alcohol (70%)(For cleaning stubborn dust; ensure no liquid enters the lamp housing)
- Owner's manual or projector model guide(Reference for exact bulb type, base, and disassembly steps)
- Small tray or magnetic mat(Keep screws and tiny parts organized)
Steps
Estimated time: 20-40 minutes
- 1
Power down and cool
Unplug the projector and switch it off completely. Allow at least 15–30 minutes for the lamp to cool before touching any components. This reduces burn risk and minimizes the chance of heat-related damage to internal parts.
Tip: If you’re unsure about cooling time, wait 20 minutes and check that the lamp area is comfortable to touch. - 2
Access the lamp housing
Use the screwdriver to remove the access panel or lamp cover as described in the manual. Keep track of screws and set aside a clean workspace. Gently open the housing to reveal the bulb carrier without forcing any clips.
Tip: Some models require releasing a spring latch—consult the exact model guide to avoid damage. - 3
Disconnect and remove the old bulb
Carefully disconnect any wires or connectors attached to the bulb carrier. Grasp the bulb by its base, not the glass, and lift it straight out. Place the bulb in a safe container if you’re discarding it.
Tip: Never twist harder than needed; bulbs can crack if forced. - 4
Inspect the socket and housing
Check the socket for signs of corrosion or residue. Wipe away dust with a lint-free cloth dampened lightly with isopropyl alcohol if needed. Ensure the housing is clean and free of foreign objects before seating the new bulb.
Tip: If the socket looks damaged, substitute the entire lamp assembly if your warranty allows. - 5
Install the new bulb
Align the base with the socket and insert firmly until it seats. Avoid touching the glass with bare hands; use gloves. Reconnect any wires, ensuring a snug fit and proper polarity if applicable.
Tip: Inspect the bulb’s base for scratches or debris before seating. - 6
Reassemble and reset lamp timer
Replace the lamp cover and secure screws. Reconnect power and use the projector’s menu to reset the lamp timer to the manufacturer’s recommended hours. This helps track remaining life and plan future replacements.
Tip: If your device lacks a dedicated lamp timer, note the installation date in your maintenance log. - 7
Test and verify
Power on the projector and run a test image. Check brightness, color accuracy, and uniformity. If the image is off, revisit seating and covers to ensure no gaps or misalignments are present.
Tip: Run a short test pattern first to confirm operation before a full presentation.
Got Questions?
How do I know if my bulb needs replacement?
Look for dimming brightness, color shifts, longer warm-up times, or a burning smell near the lamp area. If you see a warning indicator on the projector, or the image is unreliable, inspect the bulb and consider replacement.
Signs you need a replacement bulb include dim brightness, color shifts, longer warm-up, or a warning light from the projector.
Can I replace a projector bulb myself, or should I hire a technician?
Many projector bulbs are user-serviceable, especially in consumer models. If you’re comfortable with basic tools and following the manual, you can replace it yourself. For high-end or complex assemblies, or if you’re unsure, a technician is a safer option.
You can often replace it yourself if you follow the manual; otherwise, hire a technician for tricky models.
Are LED projector bulbs available and compatible?
LED replacements exist for some projector models, but not all. Check your manual for compatibility and ballast requirements. LED options can offer longer life and lower heat, but may require brightness adjustments for image quality.
LED replacements are available for some models; verify compatibility before buying.
How long does replacement take on average?
A typical replacement takes about 20 to 40 minutes, including cooling, disassembly, bulb swap, reassembly, and testing. Complex models may take longer.
Most replacements take around 20 to 40 minutes with proper safety steps.
What should I do with the old bulb?
Handle the old bulb with care and store it in its original packaging or a dedicated container until proper disposal. Do not throw it in regular trash if your local regulations require special handling.
Dispose of the old bulb according to local rules, keeping it safely stored until disposal.
Watch Video
Key Points
- Power off, unplug, and cool before handling the bulb.
- Match base type and wattage exactly to prevent damage.
- Handle bulbs with gloves and avoid touching the glass.
- Reset the lamp timer after installation and test thoroughly.