Find the Bad Christmas Light Bulb Fast: A Practical Troubleshooting Guide
Discover how to quickly identify which bulb is bad in Christmas lights with a safe, practical troubleshoot flow. Bulb Fix guides you step by step today.

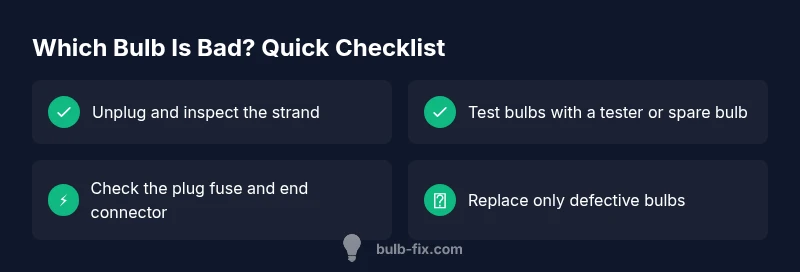
According to Bulb Fix, the most common cause of a dark strand is a burnt-out bulb or blown fuse. Start by identifying the first dark bulb, then test nearby bulbs to confirm the fault. Use a bulb tester or swap in a known-good bulb to verify, replacing only the defective one. If needed, inspect the plug, end connector, and fuse as well.
Which bulb is bad in christmas lights
When a Christmas light strand goes dark, the first goal is to determine if a single bulb is failing or if the issue is systemic. The exact phrase which bulb is bad in christmas lights is a common concern for homeowners who want a quick, safe fix. In most cases, the culprit is a burnt-out bulb or a blown fuse, and pinpointing the exact bulb you replace can save time and money. Bulb Fix analyses show that a single faulty bulb or a blown fuse accounts for the majority of outages, especially in older strings. Start with a calm, methodical approach: identify the first dark bulb and proceed in order along the strand. This helps avoid unnecessary bulb replacements and minimizes handling of live wires.
A practical approach to common outages
Most Christmas light failures come from one of a few predictable patterns. A single dark bulb on a long strand often signals a burnt-out bulb. If several bulbs in a row are out, the issue is more likely a blown fuse, a loose socket, or a damaged section of the wire. Understanding these patterns helps you prioritize checks and prevents guesswork. Always work from the plug end toward the end of the string to stay organized and maintain a steady diagnostic pace. According to Bulb Fix, focusing on the first non-working bulb and testing adjacent bulbs dramatically reduces the time to locate the fault.
Safety first: unplug, inspect, and plan
Before touching any bulbs, unplug the strand and set it on a non-conductive surface. Inspect for obvious signs of damage: cracked casings, bent pins, melted plastic, or water exposure. Remember that many faults are caused by loose connections or poor seating. Planning your steps minimizes repeated unplugging and reduces the risk of electric shock. If you see any signs of frayed wires or moisture, stop and replace the strand rather than attempting risky repairs.
Tools and simple tests you can trust
A dedicated bulb tester is the fastest non-destructive method to confirm a bad bulb. If you don’t own one, swapping in a known-good bulb (of the same base and wattage) is an effective alternative. Keep spare bulbs for the most common base types (miniature and C7/C9 shapes). When testing, only touch the bulb base, not the glass, to avoid burns or cuts. Bulb testing not only confirms the fault but also protects other bulbs from unnecessary wear.
Step-by-step diagnostic flow for a partial outage
Follow a systematic flow: identify the first dark bulb, test with a tester or replace it, re-test the strand, and if the problem shifts, continue along the string. If nothing changes after several bulbs are tested, review the plug-end fuse and end connectors for corrosion or looseness. If the fuse is blown, replace with the correct rating; never bypass fuses. If you identify a damaged socket or wire, stop using the strand and replace it to avoid shock or fire risk.
Replacing bulbs and avoiding common mistakes
When replacing bulbs, ensure you match the base type, voltage, and color temperature. Mixing LED and incandescent bulbs within the same string can cause odd behavior or uneven brightness. After replacement, gently re-seat all bulbs to ensure a proper electrical contact. Do not force bulbs or twist them aggressively; misaligned pins can create intermittent faults that are hard to diagnose. Bulb Fix recommends testing each section after replacement to confirm full functionality.
Safety, maintenance, and when to call a pro
If you encounter damaged insulation, exposed wires, or water intrusion, stop immediately and dispose of the strand. Water and electricity are a dangerous combination; use a dry, indoor area for testing if possible. Regularly inspect strands after storage and before decorating to catch wear and corrosion early. If a strand has multiple failures, if the wiring or plug-end looks damaged, or if you’re unsure about handling live connections, contact a licensed electrician for safe, compliant repairs.
Prevention: keeping holiday lighting reliable year after year
Store lights in original packaging or labeled containers to prevent tangling and pinching. Inspect bulbs, sockets, and fuses annually, and replace aging strings that show signs of wear. Keeping a small spare bulb kit and a tester on hand makes next year’s setup faster and safer. Proper handling and early replacement of weak bulbs can avoid a large outage during a holiday event. Bulb Fix emphasizes planning ahead to minimize home outages and maintain safety.
The quick verdict: a method you can trust every season
By following a deliberate, safety-first diagnostic flow, you can identify which bulb is bad in christmas lights without guessing or resorting to trial and error. Replace only the authentic defective bulb, verify the fix with a test, and protect your family by ensuring all components are intact and dry. With careful testing, most outages resolve quickly and safely.
Steps
Estimated time: 20-45 minutes
- 1
Power down and inspect the strand
Unplug the lights and place them on a dry surface. Visually inspect for cracks, corrosion, or moisture at sockets and the plug. A quick look often reveals obvious damage that should not be ignored.
Tip: Use a loupe or flashlight to inspect pin alignment inside sockets. - 2
Find the first dark bulb
Starting at the plug, gently scan the strand to locate the first bulb that isn’t glowing. Mark it in your mind or with a safe marker so you don’t lose track as you test nearby bulbs.
Tip: Don't remove bulbs too quickly; test nearby bulbs to confirm the fault. - 3
Test the suspect bulb
Use a bulb tester or swap in a known-good bulb of the same base and wattage. If the bulb lights, you’ve identified a bad one; if not, continue to the next bulb along the strand.
Tip: Keep spare bulbs handy for quick testing. - 4
Check nearby bulbs and connections
Even if the first bulb is bad, nearby bulbs can fail soon after due to similar conditions. Re-seat suspects and inspect the socket for corrosion or bent pins.
Tip: Wipe metal contacts gently with a dry cloth to improve contact. - 5
Inspect fuses and plug-end details
If the fuse is blown, replace with the correct rating. Inspect the end connector for looseness or corrosion, which can break the circuit even if bulbs are fine.
Tip: Never bypass a fuse; it’s there for safety. - 6
Test and re-test in sections
For multi-section strands, test each section separately to identify which section contains the fault. Reassemble after all tests to confirm full operation.
Tip: Label tested sections for easier reassembly next year. - 7
Purge damaged bulbs and prepare for replacement
Dispose of broken bulbs safely and replace with correct base types. Avoid mixing base types in one strand to prevent voltage and resistance issues.
Tip: Keep a small stash of common replacement bulbs on hand. - 8
Final safety check and test
Plug the string back in and watch for a stable glow across all bulbs. If any bulb flickers or fails again, stop and re-check the problem area.
Tip: If in doubt, call a pro to avoid electrical hazards.
Diagnosis: Several bulbs on a Christmas light strand do not illuminate; first light in the strand is dark and others may flicker.
Possible Causes
- highOne or more burnt-out bulbs in the string
- mediumLoose connections at the plug or in the end connector
- mediumTripped fuse in the plug or circuit breaker
- lowDamaged strand due to pinched wires or water exposure
Fixes
- easyIdentify the first dark bulb and replace it with a correct replacement bulb.
- easyCheck and replace the fuse in the plug-end, if present.
- easyReseat bulbs that look loose and inspect sockets for corrosion.
- mediumIf a large section remains dark, inspect the end connector and replace damaged sections.
- mediumIf damage is extensive, consider replacing the entire strand to avoid safety risks.
Got Questions?
What is the easiest way to tell which bulb is bad in Christmas lights?
Start with the first non-lighting bulb in the strand and test it with a bulb tester or swap in a known-good bulb. If it lights, replace that bulb only. If not, move to the next bulb and repeat the test until the entire strand is working.
Begin with the first dark bulb, test it, and replace only the failed one. Repeat along the strand to identify all issues.
Can a single bad bulb cause the whole strand to fail?
Yes, in a series circuit, one bad bulb can prevent current from reaching the rest of the bulbs. Replacing that bulb often restores the entire length of lights.
Yes, a single bad bulb can stop the whole strand in a series circuit.
Should I mix LED and incandescent bulbs on the same string?
Mixing LED and incandescent bulbs is generally not recommended unless the manufacturer specifies compatibility. Incompatible bulbs can reduce performance and cause uneven brightness or early failures.
Mixing is usually not advised unless your strand is designed for both types.
Is it safe to test bulbs while the strand is plugged in?
Testing while plugged in is unsafe. Always unplug the strand before handling bulbs or sockets and use a tester or spare bulbs to verify faults.
No, unplug first. Use a tester or spare bulb to check faults safely.
What should I do with broken bulbs or damaged strands?
Carefully dispose of broken bulbs and replace damaged strands rather than attempting risky repairs. Damaged wiring can pose shock or fire hazards.
Dispose of broken bulbs and replace damaged strands for safety.
Watch Video
Key Points
- Identify the first dark bulb to start troubleshooting.
- Test suspects with a bulb tester or known-good replacement.
- Check fuses and end connectors if no bulbs are visibly faulty.
- Prioritize safety and consider replacing the strand if damage is extensive.