Which bulb is out Christmas lights: A practical troubleshooting guide
Learn how to identify which bulb is out christmas lights and fix outdoor strands safely with a step-by-step diagnostic flow, quick checks, and a replacement guide.

How to Approach the Question: which bulb is out christmas lights
When a string of outdoor or indoor Christmas lights goes dark, the first instinct is to locate which bulb is out christmas lights. This framing matters because many outages are caused not by an entire strand, but by one failing bulb or a tripped fuse. As you troubleshoot, think in small steps: verify safety, inspect the plug and fuses, and then methodically test bulbs. This mindset helps homeowners and DIY enthusiasts home in on the exact bulb or connection, reducing guesswork and discouraging risky improvisation. The goal is a safe, repeatable method for identifying the faulty bulb without replacing the entire strand. In line with Bulb Fix guidance, treat each bulb as a potential culprit and base decisions on observed signs rather than assumptions.
Quick Checks to Do Before Pulling Bulbs
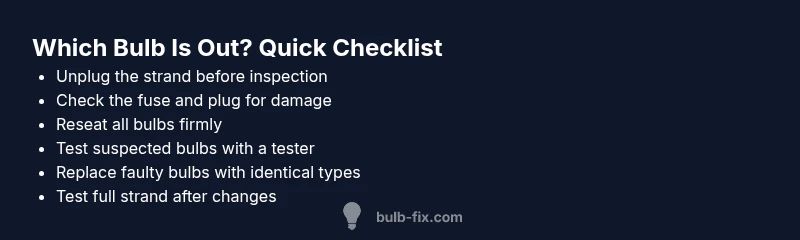
- Disconnect power at the source before handling any bulbs. This basic safety step protects you from shocks and short circuits.
- Inspect the plug and any inline fuse or reset switch. A blown fuse will cut power to the entire strand; replacing it with the correct rating is essential.
- Look for obviously damaged bulbs, corrosion, or signs of overheating. Damaged sockets or loose connections can create intermittent outages that mimic a single bad bulb.
- Gently reseat every bulb in its socket. A loose bulb is a common cause of dimming or dark sections along the strand.
- Test bulbs one-by-one with a bulb tester or using a known-good replacement in a suspect position. This helps confirm which bulb is out christmas lights and prevents unnecessary replacements.
- If you see several dark sections, the issue may be at the plug, the end-to-end wiring, or a fused control box rather than a single bulb.
Diagnostic Flow: From Symptom to Solution
Symptom: Partial darkness or one section of the strand remains lit while another is off. Potential causes include a loose bulb, a burnt-out bulb, a blown fuse, or a damaged section of wiring. Start with the simplest fix (reseat bulbs) and move toward more involved steps (fuse replacement, testing bulbs). Recommended checks:
- Confirm power supply and safety switches are on.
- Inspect and test fuses in the plug or inline. Replace with the same rating if needed.
- Identify suspected bulbs by strand length and the first dark area; remove and test those bulbs individually.
- After replacing a suspect bulb, re-test the entire strand to verify restoration of full function. If none of these steps restore function, the fault may lie in wiring or the power source, in which case consider professional help. This systematic approach aligns with Bulb Fix guidance and minimizes unnecessary bulb changes.
Step-by-Step: Safe Bulb Replacement for Most Strands
- Power off and unplug the strand. Ensure the area around outdoor outlets is dry and safe. Tip: Wear dry gloves to protect bulbs and fingers.
- Identify the suspect bulb positions using the symptom map from your diagnostic flow. Tip: Mark sections with a small piece of tape to track tested areas.
- Gently remove each suspect bulb, one at a time. Look for cracks, blackening at the base, or bent pins. Tip: Do not twist hard; rotate counterclockwise to release.
- Test suspected bulbs with a bulb tester or substitute in a known-good replacement. Tip: Keep spare bulbs of the same type and rating.
- Replace any faulty bulb with a like-for-like unit (same wattage and base). Tip: Never mix bulb types within a single strand unless the manufacturer allows it.
- Re-insert all bulbs snugly and ensure sockets are clean and dry. Tip: Wipe with a dry cloth if a socket feels humid.
- Plug in and run a brief test across the full length of the strand to confirm full restoration. Tip: Observe for any new flicker or warmth along the cord.
Safety Warnings and Common Mistakes to Avoid
- Never work with wet hands or in wet conditions when dealing with plugs and cords.
- Do not bypass fuses or jury-rig damaged sockets; faulty wiring can create fire hazards.
- Avoid pulling bulbs by the wires; handle bulbs by the glass and insert/remove gently.
- Don’t assume a single burnt bulb is the cause of a multi-dark section; check the fuse and the cord integrity as well.
- Always store lights properly after troubleshooting to prevent moisture ingress and corrosion.
Prevention Tips for Next Season
- Inspect strands for signs of wear before you store them; replace any frayed cords or corroded connectors.
- Use a dedicated, outdoor-rated bulb tester to verify bulbs without excessive handling.
- Keep a small stock of identical bulbs for quick swaps during the holidays.
- Coil cords without sharp bends to minimize stress on insulation and connectors.
- Consider upgrading to LED strands that reduce heat, extend life, and are less prone to outages.
Tools, Testing Devices, and Quick Reference
- Bulb tester or multimeter (for continuity checks)
- Spare bulbs of the same type and rating
- Insulating tape and cable ties for neat, safe wiring
- A non-contact voltage tester for quick safety checks
- A waterproof storage container for off-season bulbs
- A digital camera or notes to map retained sections for future reference