Why Is My Bulb Buzzing? A Practical Troubleshooting Guide
Discover why your bulb buzzes and how to fix it safely. Bulb Fix guides you through common causes, quick checks, and when to call a professional. Learn proven, safe steps to diagnose buzzing bulbs in 2026.

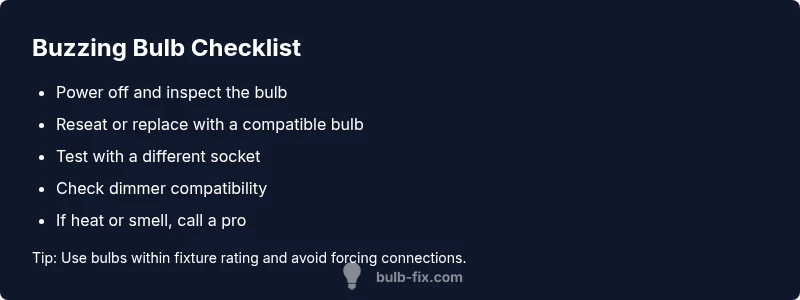
Buzzing from a light bulb is usually caused by a loose connection, incompatible dimmer, or a failing ballast. Start by turning off power and inspecting the bulb, socket, and any dimmer switch. If buzzing persists after reseating the bulb and testing another lamp, proceed to check wiring and load. If unsafe, call a licensed electrician. Bulb Fix notes that quick, safe checks prevent bigger hazards.
Understanding why is my bulb buzzing
If you’ve ever asked yourself, why is my bulb buzzing, you’re not alone. In most homes, a buzzing bulb isn’t a mystery reserved for electricians; it’s a sign your lighting setup may have a minor fault that can escalate if ignored. The common culprits include a loose bulb connection, a socket with worn contacts, or a dimmer switch that isn’t compatible with the bulb technology in use. For many homeowners, the simplest first step is to ensure the bulb is seated correctly and that the socket pins are clean and undamaged. Remember that buzzing can indicate electrical load issues, which can generate heat and shorten bulb life if left unchecked. This section will help you identify whether the symptom is a simple seating issue or a sign of a deeper compatibility problem.
Key takeaways: start with the easiest fix first, then move to compatibility checks if reseating doesn’t resolve the issue. This approach minimizes risk while you gather more data about the circuit and fixture.
Common buzzing culprits you can inspect safely
Buzzing bulbs are usually a symptom you can diagnose with basic safety steps. Begin with the bulb itself:
- Loose seating: A bulb not fully screwed in can vibrate and hum as electricity flows. Tighten the bulb firmly, but avoid over-tightening.
- Poor socket contact: Worn or corroded sockets may cause intermittent contact, resulting in a buzz. Inspect visually for discoloration or melted plastic.
- Incompatible bulb type: Some older fixtures aren’t designed for high-efficiency LED or CFL bulbs. If you recently switched to LEDs, the fixture’s electronics may struggle with the lower wattage.
- Dimmer incompatibility: If you’re using a dimmer, ensure the bulb type is dimmable and compatible with the dimmer itself. Incompatible combinations are a frequent buzz source.
- Wiring or ballast issues: In fixtures with transformers or ballasts, buzzing can come from aging components or loose wires. If you uncover heat, smell burning, or see arcing, stop and call a pro.
Note: If any sign of heat, smoke, or unusual odor appears, shut off power at the switch or circuit breaker and consult a licensed electrician right away.
Dimmers, transformers, and ballast: potential culprits
Dimmers designed for incandescent bulbs often don’t play well with LEDs or CFLs, causing audible hums or buzzing. Ballasts (in older fluorescent fixtures) or LED drivers can also produce a buzz when they’re failing or under heavy load. Assess the entire load on the circuit: a combination of high-wattage bulbs on a single dimmer or dimmer with insufficient minimum load can create buzzing. If you’re unsure about compatibility, replace the fixture or bulb with a known-compatible alternative and re-test. In all cases, avoid imposing a load that overheats components or causes arcing.
Practical tip: keep a small log of which bulbs buzz in which rooms, and note the fixtures, dimmers, and visible conditions to help you plan safer fixes.
Safety first: when buzzing indicates a hazard
Buzzing is not always dangerous, but it can be a warning sign of an electrical issue. If you notice warmth around the fixture, a burning smell, scorch marks, flickering in addition to buzzing, or buzzing that worsens with dimming, shut off the power at the breaker and call a licensed electrician. Do not attempt rewiring or replacing live components; working with live electricity can cause shocks, fires, or further damage. Prioritize safety and never ignore persistent buzzing in dim fixtures or outdoor lighting that could be exposed to moisture.
Always follow local electrical codes and use properly rated bulbs and fixtures. If you have any doubt about safety, postpone testing and seek professional help immediately.
Diagnostic flow you can follow at home
A structured approach helps you isolate the cause without random guessing. Start with the simplest checks and move toward more involved diagnostics:
- Symptom check: Did the bulb buzz only when dimmed or at full brightness?
- Visual inspection: Inspect the bulb, socket, and fixture for signs of wear or heat.
- Test substitutions: Swap in a known-good bulb of the same type and re-test.
- Dimmer compatibility: If buzzing occurs only with a dimmer, verify compatibility and minimum load requirements.
- Wiring check: If you’re comfortable, inspect accessible wiring connections at the fixture for looseness or discoloration.
- When in doubt: If the buzzing persists after all basic checks, contact a licensed electrician to inspect wiring, ballast, or the panel.
Safety note: Always disconnect the power before inspecting or handling any electrical components.
Step-by-step fixes for the most common causes
This section provides concrete fixes you can perform safely after turning off power and verifying there are no signs of danger:
- Fix 1: Reseat the bulb and clean the socket contacts. Replace the bulb with a compatible model if buzzing continues.
- Fix 2: Replace a worn socket or upgrade to a fixture designed for LED or CFL bulbs.
- Fix 3: If using a dimmer, swap to a dimmable bulb and a dimmer rated for LEDs or CFLs, or replace the dimmer with a compatible model.
- Fix 4: For fixtures with ballasts, consider replacing the ballast or converting to a direct-wire LED fixture if applicable.
- Fix 5: Inspect wiring for looseness at the terminal screws; tighten if safely possible and cap any exposed conductors.
- Fix 6: If heat, arcing, or smell is present, stop and call a pro immediately.
Tip: Work methodically and test after each fix; document changes to identify what resolves the buzzing.
Prevention tips to avoid future buzzing
Prevention is easier than repeated troubleshooting. Keep these habits to reduce buzzing:
- Use bulbs that match fixture specifications, particularly wattage and dimmer compatibility.
- Replace aging sockets and ballast components before they fail entirely.
- Limit the number of high-load bulbs on one dimmer or circuit.
- Regularly inspect outdoor fixtures for moisture ingress and corrosion.
- Schedule a periodic electrical safety check with a licensed professional, especially in older homes.
By adopting these practices, you minimize buzzing occurrences and extend the life of your lighting system.
Steps
Estimated time: 45-60 minutes
- 1
Power down and prep
Switch off the fixture and, if safe, the circuit breaker. Gather a clean cloth, a spare bulb of the same type, and a non-contact voltage tester. This prevents shocks and ensures you can safely probe the fixture.
Tip: Always assume a live circuit; if you doubt, call a professional. - 2
Inspect the bulb seating
Carefully remove and re-seat the bulb, ensuring it sits snugly in the socket without forcing it. If the contacts look tarnished or corroded, gently clean them with a dry cloth and try a new bulb.
Tip: Do not use metal tools to pry or twist; gentle seating reduces risk of damage. - 3
Test with a known-good bulb
Install a bulb of the same type and wattage that you know works. If buzzing continues, the issue may be with the fixture or dimmer, not the bulb.
Tip: Keep a notebook of which bulbs you test and the results. - 4
Evaluate the dimmer (if present)
If you have a dimmer, verify compatibility with LED or CFL bulbs. Replace with a dimmer-rated bulb or a compatible dimmer if buzzing occurs when dimmed.
Tip: Avoid mismatched LED bulbs on older dimmers to reduce buzzing. - 5
Check fixture wiring
If accessible, inspect wiring for loose screws or signs of wear. Tighten terminal screws within safe limits and re-check after reassembly.
Tip: Only manipulate exposed conductors; if you see damaged insulation, call a pro. - 6
Make a safety decision
If you notice heat, burning smell, or arcing, stop immediately and contact a licensed electrician. Do not continue testing under risky conditions.
Tip: Safety first: it’s better to slow down than to rush a hazardous repair.
Diagnosis: Bulb buzzing after power is on
Possible Causes
- highLoose or faulty bulb connection
- mediumIncompatible dimmer with LED bulb
- lowWiring issue or damaged socket
Fixes
- easyTurn off power, reseat bulb and test in multiple sockets
- easyReplace with dimmer-compatible bulb or dimmer
- hardInspect wiring and socket; call electrician if signs of heat or arcing
Got Questions?
What causes a light bulb to buzz?
Buzzing is usually caused by a loose connection, a dimmer incompatibility, or a failing ballast. Wiring or socket wear can also contribute. Start with seating and a known-good bulb before testing fixtures or dimmers.
Buzzing is usually due to a loose connection, dimmer incompatibility, or a failing ballast. Start with seating a known-good bulb and test the fixture.
Is buzzing dangerous?
Buzzing isn’t always dangerous, but it can signal overheating or arcing. If you notice heat, smoke, or a burning smell, shut off power and contact a professional.
Buzzing can signal danger if there’s heat or a burning smell. Turn off power and call a pro if you notice any signs.
Can dimmer compatibility cause buzzing with LED bulbs?
Yes. Many LEDs buzz with older dimmers not rated for low-wattage bulbs. Use a dimmer-compatible LED or replace the dimmer with a compatible model.
Yes. LED buzz often comes from incompatible dimmers; switch to a compatible dimmer or LED.
What should I do if there is heat or a burning smell?
Power down immediately, unplug if possible, and inspect safely. If heat or burning persists, contact a licensed electrician.
If there’s heat or burning, turn off power and call a pro.
Can I fix buzzing bulbs myself?
Some fixes are safe (reseating, replacing with a compatible bulb), but electrical issues can be hazardous. Stop if you’re unsure and seek professional help.
You can try safe checks, but stop if unsure and call a pro.
Watch Video
Key Points
- Identify if buzzing occurs only with dimming.
- Inspect seating, socket contacts, and bulb type first.
- Check dimmer compatibility before replacing fixtures.
- Shut off power if you detect heat or burning smells.
- When in doubt, call a licensed electrician