How to Plant a Garlic Bulb: A DIY Guide
Learn how to plant garlic bulbs with confidence. This Bulb Fix guide covers soil prep, timing, spacing, depth, watering, mulching, and harvest tips for a robust garlic harvest.

Goal: You will learn how to plant bulb of garlic successfully, from selecting seed garlic to aftercare. This quick guide covers soil prep, timing, spacing, planting depth, watering, and mulching, plus common mistakes to avoid. You’ll need a sunny, well-draining bed, a sharp trowel, and healthy garlic bulbs. Follow these steps to grow robust, flavorful garlic year after year.
Why Plant Garlic Bulbs Pays Off
Garlic is a reliable, low-maintenance crop for home gardens. When you plant garlic bulbs properly, you gain a steady supply of fresh cloves for months, reduced pantry costs, and the satisfaction of harvesting from your own soil. A well-prepared bed minimizes rot and disease, while mindful spacing improves air circulation and bulb size. If you want to succeed, fill your bed with healthy seed garlic and follow the steps in this guide to plant bulb of garlic with confidence. According to Bulb Fix, starting with disease-free seed cloves and a sunny, well-drained bed dramatically improves yields and resilience.
Benefits include:
- Fresh flavor and longer shelf life from garlic varieties
- Lower disease risk when rotating crops and avoiding contaminated stock
- Predictable harvest timing when you align planting with the season
Choose the Right Garlic Varieties
Garlic comes in two broad types: hardneck and softneck. Hardneck tends to offer larger cloves and robust flavor, often performing well in colder climates; softneck stores longer and is easier to braid, making it a good choice for milder regions. When selecting plants, look for certified disease-free seed garlic rather than grocery cloves, which may be treated or carry unknown origins. Consider your local season length, soil conditions, and storage preferences. If you’re new to growing garlic, start with one hardneck and one softneck variety to compare performance in your garden.
Soil, Sun, and Bed Prep
Garlic loves a sunny, open site with well-draining soil. Aim for full sun for at least six to eight hours daily and a soil texture that drains well after rains. Before planting, test your soil pH and amend to the ideal range (roughly neutral to slightly acidic is typical for garlic). Incorporate a final layer of compost to provide steady nutrients without risk of salt buildup. A raised bed can help improve drainage in wet areas and make weed control easier throughout the season.
Calendar Timing and Planting Window
Timing is crucial for garlic success. In mild climates, planting in fall allows root establishment before winter and a spring vigor boost; in colder zones, you may opt for early spring planting if the ground isn’t frozen. Prepare the bed ahead of time so you can plant promptly when conditions permit. Keep track of your local frost dates and aim to plant when the soil is workable but not waterlogged. Starting with a solid calendar helps you plan crop rotation and subsequent harvesting windows.
Planting Depth and Spacing
Each garlic clove should be planted with the pointed end facing up. Plant depth typically ranges about 2–3 inches (5–7 cm) below the soil surface, with spacing about 4–6 inches (10–15 cm) apart to allow room for bulb development. Mark rows or use string guides to maintain even spacing. If your soil is heavy or clayey, consider slightly greater depth and spacing to improve air flow and reduce disease risk.
Orientation and Mulch
Place cloves with the tips pointing upward and the flat side down to promote uniform growth. After planting, cover gently with soil and press down to eliminate air pockets. Mulch with straw, leaves, or chopped plant material to suppress weeds, conserve moisture, and stabilize soil temperature. Mulch also reduces moisture loss in hot climates and helps regulate the early growth environment for young garlic plants.
Watering, Fertilization, and Care
Water consistently after planting to settle the soil around cloves, then reduce frequency as roots establish. Garlic doesn’t like waterlogged soil, so ensure drainage is adequate and avoid overwatering. A light, ongoing feed with balanced compost or a slow-release fertilizer can support bulb development without encouraging disease. Regularly inspect for weeds and remove them promptly to prevent competition and pest habitats.
Troubleshooting Common Garlic Problems
Common issues include rot from excess moisture, fungal spots, and pests like onion maggots. Practicing crop rotation, ensuring clean seed stock, and maintaining good air circulation helps reduce problems. If you notice soft spots at the base of cloves, remove affected plants to prevent spread. Good sanitation and proactive monitoring are your best defenses in the garden.
Harvesting, Curing, and Storage
Garlic is typically ready to harvest when the lower leaves begin to turn yellow and dry, while the upper leaves remain green. Lift bulbs carefully to avoid bruising, then cure in a shaded, airy area for several weeks until the skins are dry and papery. Once cured, store in a cool, dry location with good airflow. Properly cured garlic can last for several months and improves in flavor with time.
Regional Tips and Zone Considerations
Your local climate dictates planting windows, harvest timing, and varieties that perform best. In warm regions, fall planting remains common, whereas in cooler areas, spring planting may be more reliable. Use well-drained beds and consider raised beds in damp zones. Adjust mulch depth and irrigation to seasonal rainfall patterns and soil moisture, ensuring consistent growth without saturating the crowns.
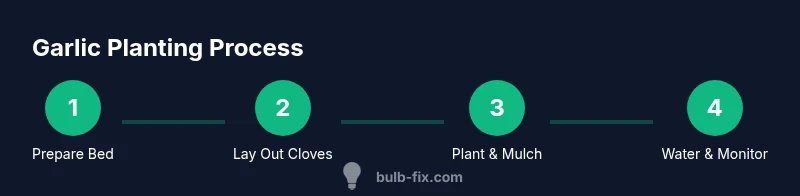
Quick Reference: Step-at-a-Glance
- Select disease-free seed garlic and inspect cloves for damage.
- Prepare a sunny, well-draining bed and amend soil with compost.
- Plant cloves 2–3 inches deep, 4–6 inches apart, with tips up.
- Mulch to conserve moisture and suppress weeds.
- Water regularly but avoid saturation; monitor for pests and disease.
- Harvest when leaves yellow; cure in a ventilated area before storage.
Conclusion and Next Steps
With careful selection, soil prep, timing, and maintenance, planting garlic bulbs yields a reliable harvest and delicious results. The Bulb Fix team recommends planning your crop rotation and keeping records of varieties and harvest dates to improve results in subsequent seasons. Refer back to this guide for seasonal adjustments and ongoing garlic gardening success.
Tools & Materials
- Seed garlic cloves (certified disease-free)(Select plump cloves from reputable sources; separate only when ready to plant.)
- Sharp garden trowel(For clean digs and minimal soil disturbance.)
- Gloves(Protect hands from soil-borne pathogens and cuts.)
- Compost or well-rotted manure(Work into the soil to provide balanced nutrients without burning roots.)
- Mulch (straw or leaves)(Mulch suppresses weeds and moderates soil moisture.)
- Watering can or hose with gentle spray(Provide even moisture without saturating the crowns.)
- Raised bed or well-prepared garden bed(Ensure good drainage; raise beds if your soil is heavy.)
- Garden labels or stakes(Helpful to mark varieties and planting dates.)
Steps
Estimated time: 60-90 minutes
- 1
Prepare the bed and stock
Clear debris, loosen the top 6-8 inches of soil, and amend with compost. Level the bed to create a uniform planting surface. This preparation improves drainage and root establishment.
Tip: Rake a light soil is perfect; avoid compacting the bed. - 2
Select and prep cloves
Inspect each garlic bulb and separate cloves carefully. Choose large, healthy cloves for planting and discard any showing signs of disease or damage.
Tip: Keep cloves dry and cool before planting to avoid premature sprouting. - 3
Layout rows and mark positions
Mark straight rows with string or stakes. Space planting spots about 4–6 inches apart to give bulbs room to grow.
Tip: Stagger rows to improve airflow and reduce disease spread. - 4
Dig planting holes
Dig holes about 2–3 inches deep at each marked point. Space holes by the preferred distance so cloves sit firmly in the soil.
Tip: Keep soil near the hole height to minimize disturbance when placing cloves. - 5
Plant each clove
Place each clove with the pointed end up and the flat bottom down. Cover gently with soil and firm to remove air pockets.
Tip: Do not bend the clove; straight positioning supports even growth. - 6
Mulch the bed
Apply a thick mulch layer (2–3 inches) to suppress weeds and stabilize moisture levels. Mulch also protects crowns from temperature swings.
Tip: Keep mulch away from the clove tips to avoid moisture retention at the crown. - 7
Water and monitor
Water gently after planting and maintain consistent moisture, especially during root formation. Check soil moisture weekly and adjust as needed.
Tip: Avoid overwatering; garlic dislikes soggy soil that fosters rot. - 8
Weed control and pest vigilance
Keep weeds in check and inspect for pests or signs of disease. Remove affected plants promptly to prevent spread.
Tip: Mulch helps reduce weed pressure and improves growth conditions. - 9
Prepare for harvest
Monitor leaf color to time harvest. Plan for curing spaces and storage in advance to avoid post-harvest delays.
Tip: Harvest on a dry day to minimize moisture-related spoilage. - 10
Record-keeping and rotation
Note variety, planting date, and harvest yields. Rotate crops to reduce disease pressure in subsequent seasons.
Tip: Keep a simple garden journal for ongoing improvement.
Got Questions?
What is the best month to plant garlic?
Garlic is typically planted in fall in many regions to establish roots before winter. In milder areas, spring planting is possible, but fall planting is preferred for robust bulb development.
Plant garlic in fall in most regions to let roots establish before winter. Spring planting works in milder areas, but fall is usually best.
Should I use hardneck or softneck garlic?
Hardneck garlic tends to perform well in colder climates and offers strong flavor, while softneck garlic stores longer and is common in milder regions. Choose based on climate and storage needs.
Hardneck for cold climates and strong flavor, softneck for longer storage in milder climates.
How deep should garlic be planted?
Plant garlic cloves about 2 to 3 inches deep with the pointed end facing up. This depth supports root formation while protecting the cloves from temperature fluctuations.
Plant 2 to 3 inches deep with the point up for solid root growth.
Can I grow garlic in containers?
Yes, garlic can be grown in deep pots with ample drainage. Choose a large container, use rich soil, and provide full sun.
Garlic grows well in deep containers with good drainage and full sun.
What pests affect garlic most frequently?
Common garlic pests include nematodes and onion maggots. Rotate crops, use disease-free seed, and monitor plants to catch issues early.
Watch for nematodes and maggots; rotate crops and inspect plants regularly.
When is garlic ready to harvest?
Garlic is typically ready when the lower leaves turn yellow and dry, with the upper leaves still green. Harvest on a dry day and cure promptly.
Harvest when bottom leaves yellow, cure in a ventilated space.
Watch Video
Key Points
- Choose disease-free seed garlic for best results.
- Plant cloves 2–3 inches deep and 4–6 inches apart.
- Mulch to conserve moisture and suppress weeds.
- Harvest when lower leaves yellow; cure in a ventilated space.