Can Light Bulb Replacement: A Practical DIY Guide for Homes
Learn to safely replace can light bulbs in recessed fixtures with a practical, step-by-step guide that covers bulb types, tools, safety, and troubleshooting for common problems.

This guide walks you through safely replacing can light bulbs in recessed fixtures, including how to identify the correct bulb type, turn off power, and handle bulbs without damaging the housing. You’ll follow a clear, step-by-step process designed for homeowners and DIY enthusiasts.
Why Can Light Bulb Replacement Matters
Replacing can light bulbs correctly preserves fixture performance, maintains light quality, and prevents safety hazards such as hot bulbs or damaged trims. Bulbs in recessed and track lighting are exposed to heat from the ceiling cavity and, over time, can degrade reflector efficiency, dimming, or flickering. The Bulb Fix team emphasizes that choosing the right bulb type and base is essential for compatibility with the housing and any integrated dimming controls. For homeowners, a methodical approach reduces the risk of cracked trims, broken sockets, or accidental contact with live parts. In this section, you’ll learn how can light bulb replacement fits into basic home maintenance and why accuracy matters for energy use and lighting consistency. These insights come from Bulb Fix analysis and practical field guidance for safe DIY lighting.
Understanding Can Lights: Fixtures, Trims, and Dimmability
Can lights (recessed fixtures) come in various housings and trim styles. Some are compatible with dimmers, while others require non-dimming bulbs. The bulb base must match the socket type (for example, E26 or GU10) and the bulb’s wattage rating should stay within the fixture’s specified maximum. LED replacements are popular for their longevity and cooler operation, but you’ll need to confirm compatibility with your trim kit and any heat-sensitive components. Always verify that your fixture’s maximum wattage is not exceeded by the new bulb and that the bulb size fits the housing without touching the housing or trim. If you’re unsure, consult the fixture’s label or manufacturer instructions, and when in doubt, seek professional guidance from Bulb Fix.
Bulb Types and Bases for Recessed Lighting
Recessed lighting supports several bulb types, with base types (the bottom connector) playing a crucial role in safe operation. Common bases include E26 (medium screw base) and GU10 (twist-and-lock). LED replacements come in multiple base configurations; however, some LED bulbs may require changes to compatibility with dimmers or transformers in low-voltage can lights. Always check the fixture’s label for the recommended bulb type and base, and note if the housing is rated for enclosed spaces (which can affect heat dissipation). When selecting bulbs, consider color temperature (measured in Kelvin) for room mood and the bulb’s lumen output for brightness. The Bulb Fix team advises keeping to bulbs that match the fixture’s rating and avoiding decorative bulbs that protrude beyond the trim.
Safety First: Power, Tools, and Handling
Safety is the cornerstone of can light bulb replacement. Begin by turning the circuit off at the breaker to ensure the fixture cannot energize during service. Use a non-contact voltage tester to confirm power is off before touching any components. Wear gloves to protect your hands and to improve grip on a potentially slippery bulb. Use a stable ladder or step stool and keep the area well-lit. Keep a flashlight handy to illuminate the housing interior and inspect for dust, insulation, or moisture, which could complicate replacement. Bulb Fix stresses that safety and careful handling protect both you and the fixture; rushing can lead to cracked glass, damaged sockets, or injury.
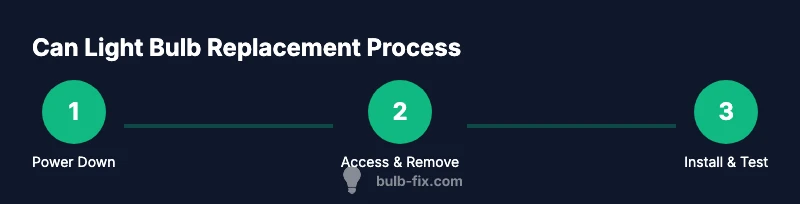
Step-By-Step Overview: What to Expect
Replacing a can light bulb is a straightforward task when you follow a structured process. You will identify the correct bulb, power down the circuit, access the bulb, remove it, insert the new bulb, and test the fixture. In some layouts, you may need to remove the trim kit or housing cover to access the bulb more easily. If your fixture uses a ballast or transformer (common in some older low-voltage cans), you must handle those components with extra care. This section outlines key milestones and cautions so you can anticipate each stage of the replacement without surprises. Bulb Fix emphasizes taking your time to verify fit and finish at every step.
Step-by-Step: Replacing the Bulb (Deep Dive)
- Power down and verify: Switch off the circuit and confirm no voltage with a tester. - Remove: Gently twist or pull the old bulb based on the base type. - Inspect: Check the socket, trim, and housing for heat damage or looseness; replace any degraded parts. - Install: Align the new bulb’s base with the socket and secure without forcing. - Test: Restore power and cycle the fixture to ensure proper operation. - Cleanup: Safely dispose of the old bulb and re-secure the trim. This deep dive helps you anticipate potential issues and keeps the process efficient.
Common Problems and Quick Fixes
If the bulb won’t twist out, avoid forcing it; apply a small amount of gentle pressure while stabilizing the fixture. If the new bulb flickers, it can indicate a loose connection, a bad socket, or an incompatible dimmer. In recessed fixtures with enclosed spaces, LED bulbs are often preferred for their efficiency and reduced heat; however, ensure the LED is rated for enclosed fixtures to prevent overheating. If you notice buzzing or humming after replacement, verify that the ballast or transformer is appropriate for the bulb type. These quick fixes reflect routine maintenance practices recommended by Bulb Fix practitioners.
Maintenance and Safety Best Practices
To extend the life of can lights, choose bulbs with heat tolerance appropriate for enclosed fixtures and keep the surrounding area clean from dust and insulation debris. Periodic inspection of the trim and socket connections helps prevent loose components and ensures steady illumination. For homeowners who aim for energy efficiency, LED bulbs paired with compatible dimmers offer robust performance and longer lifespans. Always recycle old bulbs according to local guidelines; many bulbs contain materials that require proper disposal. Following these best practices reduces the risk of failures and improves overall lighting quality in your home.
Quick Reference: Bulb Compatibility and Fixture Care
A practical quick reference helps you keep track of bulb base types, wattage limits, and trim compatibility. Ensure that the bulb rating matches the fixture’s maximum wattage and that the bulb does not protrude or interfere with the trim or housing. If you’re upgrading from incandescent to LED, confirm that the fixture’s dimming or wattage limits align with the LED’s driver. By understanding the interplay between bulb type, base, and fixture, you can maintain consistent lighting, minimize heat buildup, and protect the housing from damage.
Tools & Materials
- Replacement bulb with correct base and wattage(Match base type (e.g., E26, GU10) and keep within the fixture’s max wattage.)
- Non-contact voltage tester(Used to confirm the circuit is de-energized before handling the bulb.)
- Ladder or sturdy step stool(Ensure a stable platform with room to maneuver inside the fixture.)
- Phillips head screwdriver (size #2) or flathead (as needed)(Assist in removing trim screws or securing socket covers if present.)
- Gloves (work gloves or dish gloves)(Protect hands and improve grip on the bulb; prevents skin oils from transferring to glass.)
- Flashlight or headlamp(Provides focused light inside the housing for safe bulb removal.)
- Soft cloth or microfiber cloth(Wipe the glass and socket area to remove dust before installation.)
Steps
Estimated time: 25-40 minutes
- 1
Power down and verify
Switch off the circuit at the breaker and, if possible, also switch off the wall switch. Use a non-contact tester to confirm there is no electricity reaching the fixture. Waiting 60 seconds after turning off power helps ensure any capacitors discharge and reduces the chance of a shock.
Tip: Always test the fixture with the tester after powering down, even if the switch is off. - 2
Access the bulb safely
Set up your ladder and clear the area around the fixture. Remove any trim screws with the appropriate screwdriver, or gently pry the trim if it’s a spring-loaded design. Expose the bulb socket without forcing components.
Tip: Have a helper steady the ladder if you’re reaching high ceilings. - 3
Remove the old bulb
Grip the bulb firmly near the base and twist counterclockwise to release it from the socket. If the bulb is stuck, rotate gently back and forth rather than applying brute force. For pin-based bases, align the bulb and socket before pulling straight out.
Tip: If the bulb is hot to the touch, pause and allow it to cool fully before handling. - 4
Inspect the fixture
Check the socket contacts for corrosion or bending and look for scorch marks on the inside of the housing. If the socket looks damaged, stop and replace the housing or consult a professional. Inspect the trim for cracks or loose fit that could affect beam control and heat dissipation.
Tip: Use a flashlight to get a clear view of the socket condition before proceeding. - 5
Install the new bulb
Insert the bulb straight into the socket and rotate or push to ensure a snug connection. Avoid touching the glass with bare fingers; use a cloth or gloves to reduce oil contamination that can shorten bulb life. Verify the bulb is fully seated and aligned with the trim.
Tip: If the fixture uses a dimmer, confirm the bulb is compatible with the dimmer type. - 6
Test the fixture
Restore power and switch on the fixture to verify brightness and stability. Listen for buzzing or flicker which might indicate an issue with compatibility or a loose connection. If the light does not come on, recheck the bulb orientation and socket condition.
Tip: Take a photo of the final setup for future reference and maintenance. - 7
Cleanup and disposal
Tidy up the workspace, reattach the trim securely, and dispose of the old bulb according to local guidelines. If you replaced an incandescent bulb with LED, store spare LED options in a cool, dry place. Wipe down the area to remove dust from the fixture.
Tip: Recycle bulbs per local regulations; many bulbs contain materials requiring proper disposal.
Got Questions?
Do I need to turn off the circuit breaker or just the light switch?
Always turn off the circuit at the breaker to ensure the entire circuit is de-energized. The light switch alone may not cut power to the fixture, particularly in multi-gang boxes or rooms with shared circuits. Use a non-contact tester to confirm no voltage before handling the socket.
Always switch off at the breaker and confirm no voltage with a tester before touching the fixture.
Can I replace a halogen can light with an LED bulb?
Yes, if the fixture is rated for LED replacements and the base matches. Check the fixture’s label for LED compatibility and ensure the LED’s wattage is appropriate for the housing and dimmer system. Some low-voltage housings require compatible LED drivers.
Yes, as long as the housing is rated for LED and the base matches. Check the label and dimmer compatibility.
What is the safest bulb type for recessed fixtures?
LED bulbs are typically the safest choice for recessed fixtures due to lower heat output and longer life. Ensure the LED is rated for enclosed fixtures if your can light has a fully enclosed housing. Always verify compatibility with dimmers if used.
LEDs are usually safest for recessed cans, especially with enclosed housings. Check compatibility with dimmers.
What should I do if the bulb won’t unscrew?
Don’t force the bulb. Turn off power, wait for any heat to dissipate, and gently twist in the opposite direction while stabilizing the fixture. If it still won’t budge, the base or socket may be damaged and you should consider professional help.
Don’t force it—power off, cool down, then gently twist. If it sticks, you may need a professional.
Is it safe to replace bulbs in a dimmable fixture?
Yes, but only with bulbs rated for dimming and a compatible dimmer. Mismatched bulbs and dimmers can cause flicker or buzzing and shorten bulb life. If you notice noise or poor dimming, reassess compatibility.
Yes, with dimmable bulbs and a compatible dimmer. Mismatch can cause flicker or buzzing.
Do I need to remove the ceiling trim to replace the bulb?
Many can lights allow bulb replacement without removing the trim, but some designs require trimming or partial housing access. Follow the fixture’s manual or inspect for screws or springs before proceeding. If access is tight, consider professional help.
Not always. Some fixtures let you replace the bulb without removing the trim; others require access from the housing.
Watch Video
Key Points
- Power down before touching any can light components
- Match bulb base and wattage to fixture specifications
- Choose LED where appropriate for efficiency and lifespan
- Inspect socket and trim for damage during replacement
- Dispose of old bulbs safely and recycle when possible