Change a Fluorescent Light Bulb: Safe, Easy Steps
Learn how to safely change a fluorescent light bulb with practical steps, essential tools, and safety tips from Bulb Fix. This guide covers preparation, bulb compatibility, installation, troubleshooting, and disposal for DIY homeowners.

According to Bulb Fix, changing a fluorescent light bulb is a straightforward, safety-first task. Turn off the circuit, wait for the tube to cool, then remove the old bulb and install a compatible replacement. This guide covers tools, steps, and precautions to prevent shocks or breakage. It emphasizes a calm, methodical approach and minimal handling to avoid bulb damage.
Safety First: Power Down and Personal Protection
Before touching a fluorescent fixture, switch off the light and, when possible, cut power at the circuit breaker. Fluorescent systems can retain a small charge in their ballast, so wait a few minutes after turning off the breaker. Wear safety goggles and sturdy gloves to guard eyes and hands from glass shards if the bulb cracks. Work on a dry, stable surface and keep a towel or cloth handy to catch any debris. Bulb Fix emphasizes taking a deliberate, careful approach to reduce the risk of electric shock and accidental breakage. If a cover plate is present, remove it slowly and set it aside in a safe spot to avoid bending the diffuser or bending the bulb.
Understanding Fluorescent Lamps: Types and Compatibility
Fluorescent tubes come in several formats (T8, T5, 2-foot, 4-foot) and may use rapid-start or programmed-start ballasts. Always match the replacement bulb size and wattage to the fixture label or the ballast specification. If you replace a bulb with an incompatible type, you risk poor light, flicker, or ballast overheating. Check whether you have a linear tube or a circular compact fluorescent, and ensure the pins or end-caps align with the socket called tombstones. When in doubt, photograph the label on the fixture for reference and consult the replacement bulb packaging.
Tools, Materials, and Workspace Prep
Gather the essentials before you begin: a compatible fluorescent bulb, safety goggles, gloves, a stable ladder or step stool, and a soft cloth to protect surfaces. Keep a towel nearby to catch any dust or shards. If external covers require removal, a screwdriver may be helpful, but many fixtures unscrew without tools. Clear the area below the fixture to prevent tripping, and turn on a bright work light if the room is dim. Having everything within arm’s reach minimizes the chance of dropping the bulb.
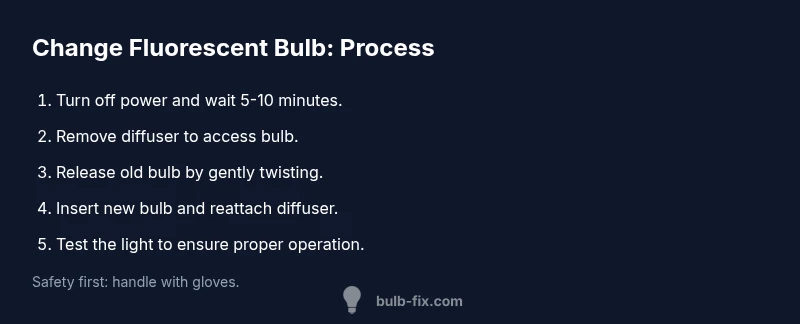
Step-By-Step Overview: What to Expect
This overview outlines the high-level flow: power down, remove the diffuser (if present), release the old bulb, inspect the socket and ballast, insert the new bulb, reattach the diffuser, and test. The exact actions are detailed in the step-by-step section below. Expect to handle the bulb carefully with gloves, avoid touching the glass, and reseat firmly to prevent flicker. In larger spaces or high ceilings, plan for extra time and a second pair of hands if available. Remember to check the fixture label for the exact bulb type before purchasing.
Troubleshooting Common Issues Without Panic
If the bulb flickers, re-seat it and verify you have the correct replacement. A no-light condition could indicate a faulty ballast or a misaligned end-cap, not just a bad bulb. Check for corrosion on the tombstones and ensure the ballast is compatible with the new tube. For stubborn bulbs, avoid forcing the fit; instead, double-check the type and length and consult the fixture label. If problems persist, consult a licensed electrician or the fixture manufacturer.
Disposal, Replacement Frequency, and Maintenance
Fluorescent lamps contain small amounts of mercury and should be recycled where possible. Do not throw them in regular trash. Note the replacement interval based on usage in the space; brighter rooms and higher usage often shorten lamp life. Clean the fixture with a dry cloth before reinstalling the cover to remove dust that can reduce light output. Periodically inspect the ballast and end-caps for signs of wear and replace components only when necessary to maintain efficiency and safety.
Safety Recap and Pro Tips
Always power down completely before handling any fluorescent bulb. Wear gloves to avoid oil fingerprints that can shorten bulb life. Keep a clear workspace and never force a bulb into a socket. If you’re unsure about ballast compatibility, consult the fixture label or a licensed electrician. With proper precautions, changing a fluorescent bulb is a quick, safe DIY task that improves lighting quality and energy efficiency.
Tools & Materials
- Replacement fluorescent bulb (check type and length)(Match the tube size (e.g., T8, T12) and the fixture’s ballast type.)
- Safety goggles(Protect eyes from glass shards and debris.)
- Work gloves(Grip bulb firmly and protect hands.)
- Non-conductive ladder or sturdy step stool(Place on a stable surface; ensure height allows safe reach.)
- Soft cloth or old towel(Catches dust and protects the bulb and fixture.)
- Screwdriver (Phillips or flat-head)(Helpful if the fixture has a cover plate that needs removal.)
- Safety flashlight or headlamp(Good for dim fixtures; ensures you can see clearly.)
Steps
Estimated time: Total time: 10-20 minutes
- 1
Power Down and Prepare
Switch off the light and, if possible, the circuit at the breaker. This reduces the chance of shock while handling the bulb. Allow time for the ballast to discharge.
Tip: Verify power is off by attempting to turn on the light after switching off the breaker. - 2
Remove the Fixture Cover
Gently remove the diffuser or cover with both hands, supporting it to avoid dropping it. Set the cover in a safe place before accessing the bulb.
Tip: If the cover resists, use a screwdriver only as a last resort and keep fingers away from the bulb. - 3
Release the Old Bulb
Wearing gloves, grip the old bulb and rotate counterclockwise to release it from the tombstone end-caps. Support with your other hand as you loosen.
Tip: Support the bulb during removal to prevent shattering or bending the tube. - 4
Install the New Bulb
Align the new bulb with the end-caps or pins and insert firmly. If needed, rotate gently to lock in place, then reattach the diffuser or cover.
Tip: Avoid touching the glass with bare skin; use gloves or a lint-free cloth. - 5
Test for Proper Illumination
Restore power and switch on the fixture. Observe for flicker or dim output. If the bulb remains dead, re-seat or verify ballast compatibility.
Tip: If flicker continues, wait a few minutes and test again; a ballast issue may be the cause. - 6
Clean Up and Final Check
Carefully collect tools, replace the diffuser, and wipe the surrounding area. Check that the fixture remains cool before leaving.
Tip: Take a final photo for reference and note the bulb replacement date.
Got Questions?
Do I need to turn off the circuit breaker when changing a fluorescent bulb?
Yes. For safety, switch off the light and the corresponding circuit if accessible. Fluorescent ballasts can retain a small charge, so a breaker cut adds an extra layer of protection.
Turn off the light and the circuit for safety; fluorescent ballasts can hold a charge, so use the breaker if you can.
What if the bulb won’t twist out or won’t light after replacement?
Gently re-seat the bulb and try twisting again. If it still won’t move, check ballast compatibility and socket condition. Avoid forcing the bulb, which can shatter it or damage the socket.
Gently re-seat and twist before retrying; if it still won’t move, check the ballast and socket.
Is it usually necessary to replace the ballast when changing a bulb?
Most bulb changes don’t require ballast replacement. If you experience frequent flicker or no light after a bulb change, the ballast may be the culprit and may need replacement or fixture upgrade.
Bulbs usually work with the existing ballast; if flicker or no light persists, the ballast may be at fault.
How should I dispose of a used fluorescent bulb?
Fluorescent bulbs contain mercury and should be recycled according to local regulations. Check with your waste management provider or recycling centers for drop-off locations.
Dispose fluorescent bulbs by recycling them at approved centers; don’t throw them in regular trash.
What lighting types are compatible with 4-foot fluorescent tubes?
Ensure the fixture’s ballast is rated for 4-foot tubes (T8/T12) and that the wattage matches the bulb specification. If in doubt, consult the fixture label.
Make sure the ballast supports 4-foot tubes and the wattage matches the bulb.
Watch Video
Key Points
- Power down before touching bulbs
- Match bulb size and ballast
- Wear gloves and handle gently
- Re-seat bulbs firmly to avoid flicker
- Recycle fluorescent bulbs responsibly