Fluorescent Light Bulb Change: Safe Step-by-Step Guide
Learn to safely replace a fluorescent light bulb with practical steps, essential tools, safety tips, and proper disposal guidance—brought to you by Bulb Fix, your lighting guide.

You will learn how to safely replace a fluorescent light bulb, from verifying fixture type to proper disposal. This guide covers safety precautions, needed tools, step-by-step changes, and troubleshooting tips for common issues like flicker or bulb grab. By following these steps, homeowners can complete the change with minimal risk.
Why Fluorescent Bulb Change Matters
A fluorescent light bulb change isn’t just about brightness; it’s about safety, efficiency, and the long-term health of your fixtures. When you replace a fluorescent bulb, you address flicker, color consistency, and energy use. According to Bulb Fix, the proper bulb type and ballast compatibility significantly influence performance and lifespan. Fluorescent tubes contain trace amounts of mercury, so handling them carefully and disposing them properly matter for home safety and the environment. In this guide, we cover how to identify your fixture type, choose the right bulb (T8, T12 tubes, or CFLs), and perform the change with minimal disruption to daily routines. A correct change reduces waste, lowers energy costs, and preserves fixture reliability. Bulb Fix’s analysis shows that following manufacturer specifications helps you avoid premature ballast failure and repeated bulb replacements.
Fluorescent Lighting Basics: Tube vs Compact Fluorescents
Fluorescent lighting comes in two common forms: linear tubes (like T8, T12) and compact fluorescent lamps (CFLs). Tubes require compatible ballasts and sometimes tombstones or end-caps on a fixture, while CFLs screw into standard sockets but may need a ballast-compatible version. The fluorescent light bulb change you perform should match the fixture’s design and ballast type. Bulbs are labeled with length (28W, 32W equivalents), glass diameter, and pin configuration, which helps you select a correct replacement. When choosing, consider brightness (lumens), color temperature (Kelvin), and the fixture’s startup behavior. Understanding these basics helps prevent premature flicker, reduced life, and wasted effort.
Fixture and Bulb Compatibility: What to Check
Compatibility is the heart of a successful fluorescent bulb change. Start by locating the fixture’s label, which lists bulb type (T8 vs T12) and ballast type (programmed rapid start, instant start, or a magnetic ballast). If you see a ballast, replacing with an incompatible LED or CFL may require ballast bypass or rewiring. For fixtures without a ballast, you’ll typically install a direct-illuminate bulb designed for that base. Always confirm the bulb length, base type (িনি), and whether the fixture requires a specific ballast to function correctly. Bulb Fix emphasizes that choosing the wrong bulb type is a leading cause of persistent flicker and early failure.
Safety Essentials Before You Start
Before any bulb change, ensure power is fully off. Flip the switch, and if possible, switch off the circuit breaker to eliminate any risk of shock. Wear safety glasses and non-slip shoes; fluorescent tubes are fragile and can break, releasing mercury-containing vapors if damaged. Use a stable ladder or step stool, and avoid reaching into fixtures with wet hands or on a rug. Check the room’s ventilation if you’re replacing bulbs near potentially dusty or dusty fixtures. If you’re unsure about the fixture, consult a licensed electrician. The goal is to minimize risk while handling glass and electrical components.
Choosing the Right Replacement: Types and Codes
Selecting the correct replacement involves matching the bulb’s base, length, and ballast requirements. For tube-type fixtures, identify the tube diameter (T8 or T12), length (e.g., 4 feet), and wattage. For CFLs, look for pin base compatibility and ballast requirements. If a fixture uses a magnetic ballast, you may need a compatible LED replacement that eliminates the ballast or maintains lamp compatibility. Always check the product packaging and fixture label for exact specifications. When in doubt, bring a photo of the ballast label to the store or consult the manufacturer’s guidelines. The right choice improves energy efficiency and extends fixture life.
Step-By-Step Overview: What to Expect
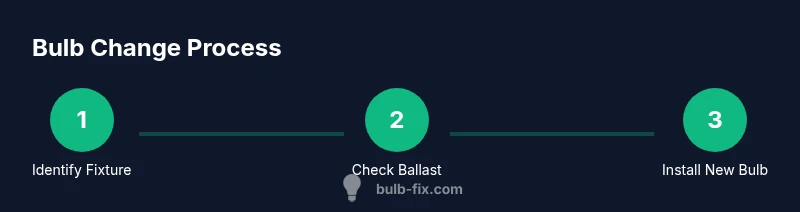
Replacing a fluorescent bulb is a straightforward task when you follow the correct sequence—identify the fixture, verify compatibility, remove the old bulb, install the new one, and test the circuit. If your fixture includes a ballast, ensure the ballast remains suitable for the new bulb type. The most common issues are flicker, dimming, or no light at all. Prevent these by confirming the ballast type and ensuring the new bulb is properly seated. The process takes a little patience and careful handling, especially with long tubes that can bend or break easily.
Common Problems After Replacement and How to Fix
If you notice flicker after a bulb change, check for loose connections, improper seating, or a failing ballast. A buzzing fixture may indicate an aged or incompatible ballast. If the lamp glows briefly and then goes out, the ballast or socket might be failing. In compact fixtures, ensure the end-caps are intact and the tube sits correctly in the socket. Never force a bulb into a socket—this can bend the pins and cause arcing. When trouble persists, replace the ballast or consult an electrician. Keeping spare bulbs of the correct type on hand helps minimize downtime.
Environmental Impact and Disposal
Fluorescent bulbs contain small amounts of mercury, so proper disposal is essential. Never throw them into regular trash; use local recycling programs or hazardous waste collection events. When transporting spent bulbs, place them in a protective container to prevent breakage. If you’re replacing multiple bulbs, coordinate with your local waste services to schedule a disposal pickup. Bulb Fix recommends following your municipality’s guidelines for recycling and ensuring that spent bulbs are managed safely to protect people and the environment.
Quick Maintenance Tips for Longevity
- Keep fixtures clean to reduce heat buildup and prolong lamp life.
- Avoid rapid on/off cycling, which can shorten lamp life.
- Periodically inspect sockets and ballast for wear and replace components as needed.
- Document lamp types and replacement dates to simplify future changes.
- Store spare bulbs in a cool, dry place to preserve performance. Regular checks help you catch issues before they cause major downtime.
Tools & Materials
- Safety glasses (ANSI Z87.1 compliant)(Protect eyes from broken glass and mercury exposure during handling.)
- Non-conductive work gloves(Grip bulbs firmly, protect fingers from sharp edges.)
- Stable ladder or step stool(Ensure ladder is on level ground; never stand on furniture.)
- Replacement fluorescent bulb (correct type)(Match base type, length, wattage, and ballast compatibility.)
- Soft dry cloth or lint-free wipe(Dust fixture and sockets before replacing to improve contact quality.)
- Permanent marker or label tape(Label bulbs with replacement dates for maintenance tracking.)
- Bulb disposal bag or container(Carry spent bulbs to disposal sites safely.)
Steps
Estimated time: 15-25 minutes
- 1
Turn off power
Switch off the light at the wall and, if possible, switch off the circuit breaker. Wait a few minutes for any capacitor discharge in the fixture before handling the bulb.
Tip: Double-check the fixture is powered down by gently touching the bulb holder—no heat should be emitted. - 2
Remove old bulb
Carefully grasp the bulb with gloved hands and gently twist to release from the socket. If it’s a long tube, support it along its length to avoid bending and cracking.
Tip: Do not force a stubborn bulb; if it doesn’t come free, check for a side latch or end-cap release in the fixture. - 3
Inspect fixture and ballast
Look for any signs of ballast wear or socket damage. If the ballast type isn’t documented or appears degraded, avoid replacing with a mismatched bulb and consider a professional assessment.
Tip: Refer to the fixture label for ballast type and bulb compatibility before purchasing a replacement. - 4
Install new bulb
Align pins with the socket and gently insert, then rotate or press until seated. For long tubes, ensure both ends are firmly engaged.
Tip: Avoid touching the glass with bare hands; use a tissue or cloth to minimize oil transfer, which can shorten bulb life. - 5
Test and dispose
Restore power and test the light. If the bulb flickers or fails to illuminate, re-check seating or replace the ballast. Dispose of the old bulb according to local guidelines.
Tip: Keep a spare bulb on hand for quick replacement and keep spent bulbs in a protective container until disposal.
Got Questions?
Do I need to shut off the power at the breaker when changing a fluorescent bulb?
Yes. Turn the switch off and, if possible, switch off the circuit breaker to eliminate any risk of shock. Fluorescent fixtures often involve ballasts that can retain charge.
Yes. Always cut power at the switch or breaker before starting.
Can I replace a fluorescent bulb with an LED bulb in any fixture?
LED replacements depend on ballast compatibility. In many cases you can use an LED ballast-compatible lamp or bypass the ballast, but it may require rewiring. Check the fixture label and consult a professional if needed.
LED replacements depend on ballast compatibility; check the label and consider professional help if needed.
What should I do if my new bulb flickers after installation?
First ensure the bulb is fully seated and the ballast is compatible. If flickering persists, the ballast may be failing or incompatible with the new bulb. Replace ballast or consult an electrician.
If flickering continues after seating the bulb, the ballast may be failing; consider replacement or professional help.
How do I dispose of spent fluorescent bulbs?
Fluorescent bulbs contain mercury and should not go in regular trash. Use local recycling programs, household hazardous waste events, or store bulbs in a protective container until disposal.
Don’t throw them in the trash; recycle them through local programs or hazardous waste events.
What’s the difference between a T8 and a T12 bulb?
T8 and T12 refer to tube diameter; T8 is more common today with better efficiency. Always match the lamp to the fixture’s ballast and socket specifications.
T8 vs T12 is about tube diameter; pick the one your fixture supports and that matches the ballast.
Watch Video
Key Points
- Identify fixture type and ballast before buying a bulb.
- Handle bulbs carefully and dispose properly.
- Ensure safety by de-energizing the circuit and using proper PPE.
- Choose bulbs that match base, length, and ballast requirements.
- Test after installation and keep spare parts on hand.