How to Remove a Fluorescent Light Bulb: Safe Step-by-Step Guide
Learn to remove fluorescent bulbs safely, protect yourself from broken glass and mercury, and dispose properly. This Bulb Fix guide provides tools, steps, and safety tips for homeowners.

This guide shows you how to remove a fluorescent light bulb safely with minimal risk of cuts or mercury exposure. Start by turning off power at the fixture or breaker, wear PPE, and support the bulb during removal. For long tubes or CFLs, use two hands and rotate carefully before sliding the bulb out. Bulb Fix emphasizes preparation, technique, and proper disposal.
Why removing fluorescent bulbs requires care
Fluorescent bulbs, including CFLs and linear tubes, contain small amounts of mercury. When you handle them, the risk is not just glass cuts but exposure to hazardous materials if the bulb breaks. For that reason, knowing how to remove fluorescent light bulb safely protects you, your family, and the environment. According to Bulb Fix, proper procedure starts with turning off the power at the fixture or circuit breaker and clearing the area. If you’re replacing a bulb in a high-traffic space, consider enlisting a helper to stabilize a ladder or reach. The common question many homeowners search online is "how to remove fluorescent light bulb" and the answer remains consistent: plan, protect, and proceed slowly. Always wear PPE, keep pets and children away, and avoid forcing the bulb if it resists the socket. In practice, safety is about preparation as much as the removal technique.
Safety and PPE you should use
Before you touch any bulb, equip yourself with the right gear. Nitrile or latex gloves protect your skin from sharp edges, safety glasses shield your eyes from glass splinters, and closed-toe shoes guard your feet. A sturdy ladder or step stool helps you reach fixtures safely, and a clean drop cloth or old towel catches shards if the bulb slips. Bulbs may be warm after operation, so allow a brief cool-down. According to Bulb Fix, never bypass PPE for comfort; safety gear reduces the risk of cuts and exposure. Keep pets and children away from the room until you’ve completed the task and disposed of any waste properly.
Tools and materials you’ll need
Gather the necessary tools and materials before you begin. Essential items include gloves, safety glasses, a stable ladder, a protective sheet or towel, a replacement bulb compatible with your fixture, and a rigid container or thick bag to transport the old bulb. For cleanup after a breakage, have a broom, dustpan, sturdy cardboard, and a sealed bag or container for mercury-containing waste. A flashlight can help you see into dim fixtures. Bulb Fix recommends preparing all items in advance to keep your hands free and avoid juggling tools while handling bulbs.
Step-by-step considerations for bulb types (CFLs vs fluorescent tubes)
Fluorescent fixtures come in several styles. CFLs are screw-in or pin-based and remove by turning counterclockwise or slowly pulling straight out after loosening the base. Linear fluorescent tubes sit in sockets on each end; you remove the tube by lifting and rotating 90 degrees to disengage the end pins. Some fixtures use a ballast, which can affect how the bulb is held in place. If you’re unsure about the fixture’s design, consult the manual or a professional. The key is to avoid forcing the bulb, listen for a click of release, and support the bulb’s ends as you free it from the sockets.
Handling broken bulbs and cleanup
If a bulb breaks, do not panic. Evacuate the room, ventilate for a few minutes if possible, and avoid sweeping up shards with a vacuum—the mercury can become aerosolized and spread. Wear gloves and use stiff paper or cardboard to gently scoop up glass. Place all fragments and cleanup materials in a rigid, sealed container. Wipe the area with damp disposable wipes if available. Do not use a regular broom that can disperse mercury-containing dust. If a break occurs in an occupied area, you may need to follow local hazardous waste guidelines or call your local waste department for instructions.
Replacement and disposal guidelines
Once the old bulb is safely removed, replace it with the appropriate ballast-compatible bulb. Tighten the base firmly but do not overtighten, which can damage the socket. Turn the power back on and test the fixture. For disposal, most fluorescent bulbs contain small amounts of mercury and should not be thrown in regular trash. Take the bulb to a recycling or hazardous waste facility that accepts fluorescent bulbs, and follow your municipality’s rules. Bulb Fix analysis shows that safe disposal and recycling reduce environmental impact and ensure compliance with local regulations.
Quick safety checklist & common mistakes to avoid
Always power down before touching any bulb. Avoid twisting too hard or prying at the bulb with tools—this can crack the glass or damage the socket. Do not vacuum broken glass; mercury-containing dust requires special handling. Keep track of your fixture type (CFL vs linear tube) to apply the correct removal method. When in doubt, pause and consult the fixture’s instruction sheet or contact a licensed electrician. A deliberate, patient approach reduces risk and ensures a safe removal.
Final considerations: after replacement and ongoing care
After installation, inspect the fixture for signs of heat damage, loose connections, or unusual smells. If you notice staining, flickering, or delayed lighting, replace the bulb and, if necessary, the ballast. Routine checks help prevent electrical hazards. This guide aims to equip homeowners with clear steps to safely remove fluorescent light bulbs while protecting people and the environment. The Bulb Fix team stands by practical, safe lighting guidance for everyday tasks.
Tools & Materials
- Gloves (nitrile or latex)(Protect hands from glass and grime)
- Safety glasses(Eye protection from shards)
- Sturdy ladder or step stool(Ensure stable access to fixture)
- Drop cloth or old towel(Contain debris and catch shards)
- Replacement bulb compatible with fixture(Plan to install correct type)
- Rigid container or heavy-duty bag(Transport old bulb safely)
- Vacuum (optional)(Only for non-mercury-containing debris—avoid with broken mercury bulbs)
- Flashlight(Improve visibility inside fixture)
Steps
Estimated time: 15-25 minutes
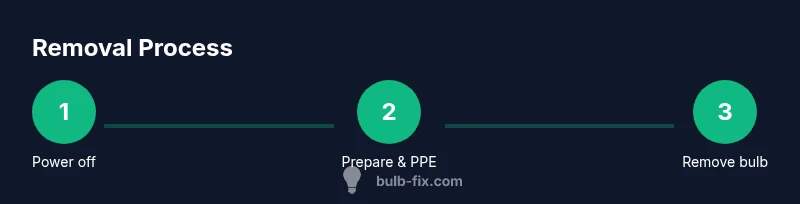
- 1
Power off and secure the area
Switch off the fixture at the switch or the circuit breaker. If a ceiling fixture is hard to reach, cut power at the breaker for extra safety. Wait a moment to ensure any capacitors discharge and surfaces are not energized.
Tip: Use a non-contact voltage tester to confirm power is off before touching the bulb. - 2
Wear PPE and prepare the workspace
Put on gloves and safety glasses. Clear the area of furniture and pets, and lay down a drop cloth to catch any stray shards. If the bulb feels warm, allow it to cool for a few minutes.
Tip: Remove rings or bracelets to avoid snagging the bulb ends. - 3
Remove the bulb carefully
For linear tubes (tubes with a ballast), hold near both ends, rotate 90 degrees to disengage, and slide out. For CFLs, grip the base and twist counterclockwise to loosen the bulb from the socket, then gently pull straight down.
Tip: Support the bulb with both hands to avoid bending or snapping the glass. - 4
Handle a bulb that resists removal
If the bulb does not loosen after a full turn, recheck the fixture for a locking pin or twist-lock socket. Do not force the bulb; back out slowly and try again with steady pressure.
Tip: If you feel resistance, take a short break and re-evaluate rather than forcing it. - 5
Contain and transport the old bulb
Place intact bulbs into a rigid box or bag. For broken bulbs, scoop up fragments with stiff paper and place all materials in a sealed container. Do not compress or smash the bulb during transport.
Tip: Keep the waste container closed to prevent vapor release. - 6
Dispose, replace, and test
Take the old bulb to a recycling or hazardous waste facility per local guidelines. Install the new bulb, resecure the fixture, and turn the power back on to test.
Tip: Keep a record of disposal if your area requires documentation.
Got Questions?
Is it safe to remove a fluorescent bulb while the lights are on?
No. Always power off at the switch or circuit breaker before handling a fluorescent bulb to reduce the risk of electric shock or accidental restarting.
Always power off before handling a fluorescent bulb to stay safe.
What should I do if the bulb breaks during removal?
Evacuate the area, ventilate briefly, and follow proper cleanup for mercury-containing waste. Use gloves and avoid sweeping; use stiff paper to scoop up shards into a sealed container.
If it breaks, leave the area, ventilate, then carefully collect shards with a stiff card and seal them.
How do I dispose of fluorescent bulbs?
Most fluorescent bulbs require recycling rather than regular trash. Check local guidelines and take bulbs to a recycling center or hazardous waste facility.
Recycle fluorescent bulbs per local rules; don’t throw them in the regular trash.
Can I remove CFLs or tubes while installed with a ballast?
Yes, but the removal technique depends on the fixture design. If you’re unsure, consult the fixture instructions or a licensed electrician.
If in doubt, consult the fixture manual or a pro due to ballast differences.
Do I need to replace the ballast when removing a bulb?
Ballast replacement is not required simply to remove a bulb, but faulty ballast can affect performance and may require service by a professional.
Bulb removal doesn’t require ballast replacement, but a faulty ballast may need inspection.
Are there different steps for 4-pin CFLs?
Yes. 4-pin CFLs use a different socket arrangement; gently rotate and pull according to the fixture’s design, or replace the socket per manufacturer guidance.
4-pin CFLs may need specific socket handling; check the fixture design or manual.
Watch Video
Key Points
- Turn off power before touching bulbs
- Wear PPE and handle gently to prevent breakage
- Contain and dispose of bulbs properly
- Know the fixture type (CFL vs linear) to remove correctly
- Follow local disposal guidelines and recycle when possible