How to Replace a Bulb in an Electric Fireplace Safely
Learn to replace a bulb in an electric fireplace safely with a clear, step-by-step guide. Identify bulb type, gather tools, power down, and test the unit after installation.

You will learn how to replace a bulb in an electric fireplace safely and efficiently. This guide covers identifying the right bulb type, gathering tools, disabling power, and completing the replacement without damaging the unit. You’ll learn compatibility checks, safety best practices, and how to test the fireplace after replacement.
Safety and Compatibility Checks
Before you touch anything, confirm you’re replacing the correct bulb for your model. Electric fireplaces use different bulb bases, wattages, and LED modules. Always power down and unplug, then test the unit after replacement to make sure the glow matches the intended setting. According to Bulb Fix, compatibility checks save you from installing the wrong bulb, which can cause overheating or sensor issues. Start by locating the model number or the bulb label on the unit and cross-reference it with the owner's manual. If you’re unsure, choose a bulb that matches the base type and wattage shown on the label. If the label is missing, contact the manufacturer or search the model online. Don’t ignore safety warnings—frigid or damaged wiring can pose a shock risk; proceed only after the area around the unit has cooled.
Tools, Materials, and Workspace Setup
Prepare a clean, dry workspace with the fireplace unplugged. Gather a replacement bulb that matches the base and wattage, insulating gloves, a soft cloth or tissue, and a flashlight. Optional items include a screwdriver for model-specific panels and a manual or model-specific guide. Keep a small bowl or tray to hold screws or small parts; working with a tidy space minimizes the risk of losing pieces. If the unit is mounted high, use a stable step stool. Ensure you protect the surrounding surface from accidental bulb oil or fingerprints that could affect heat distribution. Bulb Fix recommends laying out parts before you begin so you can work in a single, controlled session.
Understanding Bulbs Used in Electric Fireplaces
Most electric fireplaces use either LED replacement bulbs or incandescent equivalents with specific bases such as E26/E27 or G4/G9 depending on the model. LEDs tend to last longer and stay cooler, but you must match the base and wattage. In older units, halogen or incandescent bulbs are common; these can generate more heat and should be handled with care. The burning question is: can you replace a bulb in an electric fireplace with LED if the unit originally used incandescent? In many cases yes, as long as the socket and driver support LED technologies; always check the fixture’s manual or manufacturer’s recommendations. If you’re unsure, choose an LED with the same base size and a wattage equal to or below the original specification. This approach helps maintain the intended ambiance and protects safety sensors and dimming circuits.
Identifying the Right Base and Wattage
The exact base type (E27, GU10, etc.) and wattage dictate compatibility. Look for labels on the socket or the bulb itself; the label often shows base type and maximum wattage. If the model uses a replaceable LED module rather than a screw-in bulb, the replacement procedure differs, and you’ll need the exact module. Do not exceed the wattage; an overpowered bulb can overheat the housing and damage internal wiring. When in doubt, bring the old bulb to a hardware store to compare bases or consult the manual. Accurate identification saves time and reduces the risk of melted plastics or loose connections.
Accessing the Bulb Compartment Safely
Open the front panel or decorative grate according to your model’s design. Some units use a simple snap-in panel; others require removing tiny screws. Use a flashlight to illuminate the socket area and gently expose the bulb. If you must touch metals or glass, use gloves to avoid leaving fingerprints and to protect your hands. Be mindful of hot surfaces if the fireplace has been in use recently; allow sufficient cooling time. Keep the area around the panel dry to avoid slipping or oil transfer, which can affect heat transfer from the bulb to the housing.
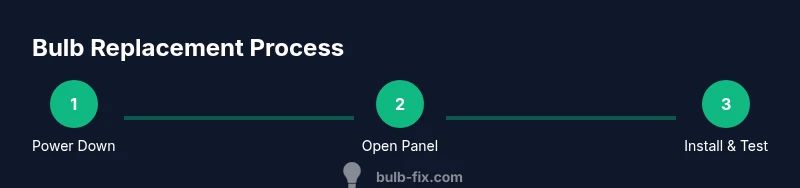
Step-by-step Overview (Context for the Full Guide)
To avoid duplicating the formal STEP-BY-STEP section, here is a quick overview of the expected sequence: Power down, access the bulb compartment, carefully remove the old bulb, verify compatibility, install the replacement bulb, reassemble the unit, and finally test the performance. For exact actions, times, and tips, refer to the STEP-BY-STEP block below. Bulb Fix emphasizes following model-specific directions to prevent damage or safety hazards.
Testing the Replacement and Final Checks
After installing the new bulb, reassemble the panel and plug the unit back in. Turn on the fireplace and start at a low brightness to observe the light output. Look for flicker, dimming inconsistencies, or unusual warmth around the bulb area. If you notice anything abnormal, power down again and recheck bulb seating and connections. Ensure the glow matches your preferred setting and that there is no buzzing or smell of burning plastics. Regular testing after replacement helps catch issues before they affect performance or safety.
Maintenance and Longevity Tips
To extend bulb life, store replacement bulbs in a cool, dry place away from direct sunlight; handle bulbs with gloves; wipe away fingerprints before insertion. Regularly inspect the bulb and socket for wear, corrosion, or melted plastic. A tight connection prevents arcing and flicker. If your unit supports dimming, keep the setting moderate to reduce heat exposure. Scheduling periodic checks aligns with Bulb Fix guidance to maintain safe and efficient operation.
Tools & Materials
- Replacement bulb(Ensure correct wattage, base type, and size per manufacturer.)
- Insulating gloves(Protect hands and prevent oils from getting on glass.)
- Soft cloth or tissue(Handle bulb with a clean, lint-free material.)
- Screwdriver (if panel is held by screws)(Phillips or flathead as needed by model.)
- Flashlight( illuminates the socket area in tight spaces.)
- Owner’s manual or model-specific guide(Helpful for model-specific steps and bulb specs.)
Steps
Estimated time: 15-25 minutes
- 1
Power down and prep safely
Turn off the fireplace and unplug from the wall. If possible, switch off the corresponding circuit breaker to ensure no power reaches the unit. Allow the unit to cool completely if it has been running.
Tip: Wear insulating gloves and work on a dry, level surface. - 2
Access the bulb compartment
Open the front panel or grate according to your model’s design. Some units require removing screws or gently popping a hinge cover. Use a flashlight to clearly view the socket.
Tip: Consult the owner’s manual for panel removal steps to avoid damage. - 3
Remove the old bulb
Grip the bulb gently and rotate counterclockwise to unscrew (or pull straight out for pin bases). Do not force if it resists; bulbs can break if forced.
Tip: Do not touch the bulb glass with bare fingers; use a cloth or gloves. - 4
Check compatibility
Compare the base type and wattage to the new bulb. Ensure the replacement matches the socket and that you’re not exceeding the unit’s wattage rating.
Tip: If in doubt, bring the old bulb to the store or refer to the manual. - 5
Install the replacement bulb
Insert the new bulb carefully, align with the socket, and twist or press as required by the base design. Ensure a snug connection without overtightening.
Tip: Wipe fingerprints off the bulb with a cloth before inserting. - 6
Reassemble and restore power
Replace the panel or grate, plug the unit back in, and restore power. Return to normal brightness settings if applicable.
Tip: Ensure no tools or rags are left in the panel area before sealing. - 7
Test and observe
Turn on the unit and verify the bulb lights smoothly. Check for flicker or unusual heat. If problems persist, power down and recheck seating or try a different bulb with the same specs.
Tip: Test for several minutes to confirm stability before leaving unattended.
Got Questions?
Do I need to unplug the fireplace before changing the bulb?
Yes. Always unplug the fireplace and, if possible, switch off the circuit breaker to ensure there is no live power reaching the unit.
Yes—unplug the fireplace and switch off the circuit breaker to stay safe.
What bulb type should I use for my electric fireplace?
Check the owner’s manual or the bulb label for base type and wattage. Common options include LED and incandescent variants with specific bases.
Check your manual or the bulb label to confirm the base and wattage.
Can I replace with LED bulbs if the original was incandescent?
LED replacements are usually compatible if the base and wattage match. Ensure the fixture’s driver supports LED and do not exceed the recommended wattage.
Yes, if the base and wattage match and the fixture supports LED.
What if the bulb is stuck and won’t twist out?
Do not force it. Let the unit cool, wear gloves, and twist gently. If stubborn, consult the manual or contact the manufacturer for model-specific steps.
If it’s stuck, wait, wear gloves, and twist gently; don’t force.
Will changing the bulb void the warranty?
Bulbs are typically considered consumer-replaceable parts. Follow the instructions and use the correct parts to avoid warranty issues.
Most warranties allow bulb changes when done per the manual.
How long do bulbs last in electric fireplaces?
Lifespan depends on bulb type; LEDs last longer than incandescent options. Replace when brightness or color shifts occur or when recommended by the manufacturer.
LED bulbs last longer; replace when brightness drops.
Watch Video
Key Points
- Power off and unplug before starting any replacement.
- Match base type and wattage to the unit’s spec.
- Handle bulbs with gloves to prevent fingerprints or oils.
- Test the fireplace after replacement to confirm proper operation and safety.