How to replace halogen bulb with LED: A practical guide
Learn to safely replace halogen bulbs with LED. This Bulb Fix guide covers base types, compatibility, essential tools, a step-by-step process, and tips to maximize energy efficiency and bulb longevity.

You can replace a halogen bulb with an LED by first turning off power and letting the fixture cool, then confirming the base type (e.g., GU10 or GU5.3). Choose a compatible LED with the same base and wattage, install it, and test the light. Follow safety guidelines for electrical work.
What replacing halogen with LED means for your home
Replacing a halogen bulb with LED is a straightforward upgrade that can dramatically reduce energy use, lower heat output, and cut maintenance frequency in many lighting fixtures. For homeowners, this change often translates into noticeable long-term savings on electricity bills and fewer bulb replacements over time. When you replace halogen with LED, you’ll typically enjoy instant full brightness, a wide range of color temperatures, and the option to fit dimmers or smart lighting ecosystems in compatible fixtures. The Bulb Fix team has found that many common indoor fixtures—recessed cans, pendants, and track lighting—can accept LED replacements with minimal modification. Before you begin, review the fixture type, the base, and any dimmer or driver requirements. Keep in mind that LEDs are designed to run cooler and with more efficient drivers, but choosing the wrong base or an incompatible dimmer can lead to flicker or reduced performance. If you’re unsure, consult a licensed electrician or a trusted lighting guide like Bulb Fix’s troubleshooting resources to avoid surprises.
Safety and compliance
Before touching any electrical components, ensure the power to the fixture is completely off at the switch and, if possible, at the breaker. Use a non-contact voltage tester to confirm there’s no live current in the socket or housing. Wear safety glasses and gloves to protect against sharp edges and hot bulbs. Never attempt repairs on fixtures that are hard-wired behind a wall switch if you don’t have direct access to the wiring. If you notice damaged wiring, scorched sockets, or a buzzing driver, stop immediately and call a professional. When in doubt, prioritize safety over speed, and rely on reputable guides such as Bulb Fix for step-by-step procedures and safety notes.
Base types and LED compatibility
Most halogen lamps use specific base types like GU10 or GU5.3 (MR16) in mains-powered fixtures. LEDs designed to replace halogen bulbs must have the same base and the correct voltage rating. Some LED bulbs also require compatible drivers or transformers; if your fixture uses a transformer, confirm that the LED’s driver can operate with it. Dimmer compatibility is another critical factor: many LEDs are dimmable, but not all dimmers are LED-friendly. If you have a dimmer, look for LED bulbs labeled for dimming and verify the dimmer type (leading-edge vs. trailing-edge) to avoid flicker or buzzing. If the base or voltage is unclear, check the fixture label, bulb packaging, or manufacturer specs. In cases where a retrofit is not straightforward, consulting Bulb Fix resources or a professional is advisable.
Choosing the right LED bulb
When selecting an LED replacement, prioritize compatibility with the base type (e.g., GU10, GU5.3), proper voltage, and appropriate brightness. Compare lumens rather than wattage to ensure you achieve the same perceived brightness. Choose color temperature that fits the room’s mood and function (warm white for living spaces, cool white for task lighting, and daylight for detail-focused areas). If your fixture uses a dimmer, pick a dimmable LED and verify dimmer compatibility. Consider the bulb shape and size to ensure it fits within the fixture housing, especially in enclosed or recessed spaces. Finally, verify the LED’s rated lifespan, warranty, and the manufacturer’s guidance for use in enclosed fixtures to prevent premature failure.
Tools, accessories, and preparation
Gather a non-contact voltage tester, a clean cloth or lint-free wipe, safety glasses, work gloves, and the LED replacement bulb. If you expect to access recessed or ceiling fixtures, a stable ladder and a flashlight will help. For fixtures with removable trims or sockets, a small screwdriver (Phillips or flat-head, depending on the model) may be needed to access the bulb. Keep a spare LED bulb on hand for future replacements and a plan for proper disposal of the old halogen bulb. Clear the workspace of dust and debris to prevent dirt from entering the socket during replacement. Finally, have the fixture manual or the Bulb Fix troubleshooting guide handy in case you encounter an unexpected base or wiring configuration.
Step-by-step replacement overview
This section provides a high-level overview of the replacement process. If you want the precise actions, proceed to the dedicated Step-by-Step section below. For most residential fixtures, the process involves verifying power, identifying the base, selecting a compatible LED, removing the old bulb, installing the LED, and testing the circuit. In enclosed fixtures or fixtures with unusual sockets, you may need to remove trim or housing to gain access. Always handle bulbs by the base and avoid touching the glass with bare fingers to prevent oil residue from shortening LED life. If a fixture uses a transformer or specialized driver, ensure the LED matches the driver’s specifications. Finally, document the replacement in case you need to refer back for maintenance or warranty purposes.
Common problems and troubleshooting
Flickering, buzzing, or reduced brightness after replacement usually indicates a dimmer incompatibility or an incompatible LED driver. If you experience flicker, try a different LED with a compatible driver or change the dimmer to a model rated for LEDs. If the LED does not light at all, recheck the bulb orientation and ensure it is fully seated in the socket. In some cases, the fixture’s transformer or driver may require refurbishment or replacement to support LED operation. When issues persist, consult Bulb Fix resources or a licensed electrician to avoid unsafe conditions.
Costs, savings, and long-term considerations
While LED bulbs may have a higher upfront cost than halogen equivalents, their longer lifespan and energy efficiency typically translate to long-term savings. Consider the total cost of ownership, including the bulb price, replacement frequency, and any potential changes to your electrical setup (like dimmer replacements). In some fixtures, the efficiency gains are complemented by cooler operation, which reduces heat buildup and can protect nearby materials. Bulb Fix recommends evaluating rooms where lights are used frequently and areas with high maintenance costs to prioritize LED upgrades for maximum impact.
Maintenance, disposal, and safety checklist
After installing LEDs, wipe the bulb with a lint-free cloth to remove fingerprints. Dispose of halogen bulbs at designated recycling points according to local regulations. Check for any signs of arcing, discoloration, or warmth around the socket over the next few days; if anything looks abnormal, turn off power and seek professional help. Keep track of warranty information and the replacement schedule for different fixtures to maintain consistent performance. Finally, maintain a small stock of LED bulbs and ensure your toolbox has the appropriate bulbs for future upgrades.
Quick reference checklist
- Power off and verify fixture is de-energized
- Identify base type and confirm compatibility
- Choose a matching LED with suitable brightness and color temperature
- Install LED firmly and avoid overtightening
- Restore power and test for proper operation
- Verify dimmer compatibility if applicable
- Dispose of old bulb safely and store spare LEDs
Tools & Materials
- LED bulb with matching base(Ensure base matches fixture (e.g., GU10, GU5.3). Check dimmer compatibility if needed.)
- Non-contact voltage tester(Use to confirm power is off before handling the socket.)
- Safety glasses(Protect eyes from glare and potential glass breakage.)
- Work gloves(Prevent fingerprint oils on LED bulb surfaces.)
- Screwdrivers (Phillips/flat)(Needed for fixtures with trim or socket access panels.)
- Lint-free cloth(Clean hands and glass surfaces without leaving fibers.)
- Stable ladder or step stool(For ceiling fixtures or high-mounted bulbs.)
Steps
Estimated time: 15-30 minutes
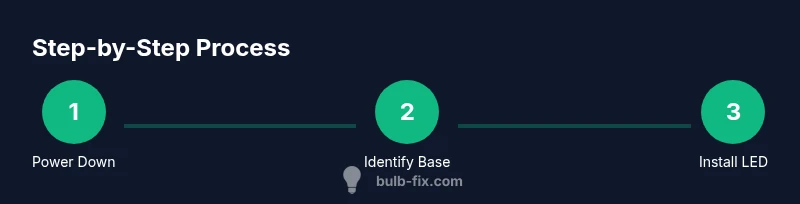
- 1
Power down and verify
Switch off the light at the wall switch and, if possible, at the breaker. Use a non-contact voltage tester to confirm no current is present in the socket. Allow any recently used fixtures to cool before handling.
Tip: Always double-check with the tester before touching the bulb or socket. - 2
Identify base type
Carefully inspect the bulb base to confirm whether it’s GU10, GU5.3, G4, or another common halogen base. If the base is unclear, look for markings on the socket or fixture label, or consult the fixture manual.
Tip: If the base is unfamiliar, take a photo of the bulb and base to compare with LED options. - 3
Select a compatible LED
Choose an LED replacement with the same base and voltage. If dimming is desired, select a dimmable LED that matches your dimmer type. Ensure the LED’s lumen rating closely matches the brightness you want.
Tip: Prioritize color temperature that fits the room's function (warm for living spaces, cool for task zones). - 4
Remove the old halogen bulb
Gently rotate or pull the halogen bulb out of its socket. Do not twist too hard to avoid damaging the socket. Allow any heat to dissipate before handling.
Tip: Handle by the base and avoid touching the glass with bare fingers. - 5
Install the LED bulb
Align the LED with the socket and insert firmly until seated. Do not overtighten, as this can damage the socket or bulb’s driver.
Tip: Use a clean cloth to wipe the LED before installing if you suspect dust buildup. - 6
Restore power and test
Turn the circuit back on and switch the light on. Observe for smooth operation without flicker or buzz. If issues appear, consider dimmer compatibility or try a different LED model.
Tip: Note any unusual behavior and compare it with Bulb Fix troubleshooting tips. - 7
Address any dimmer or driver issues
If flicker persists, confirm you’re using an LED compatible with the existing dimmer type or replace the dimmer with an LED-friendly model. Some fixtures require LED-specific drivers.
Tip: When in doubt, consult a professional rather than forcing a mismatch. - 8
Finalize and clean up
Tidy the work area, dispose of the old halogen bulb properly, and store spare LEDs for future replacements. If you replaced a ceiling fixture, reattach any trim or housing securely.
Tip: Keep a small inventory of common LED bases for quick future upgrades.
Got Questions?
Can I replace halogen bulbs with LEDs in any fixture?
Most residential fixtures can accept LED replacements, but check the base type, voltage, and whether the fixture uses a transformer or driver that supports LED. If in doubt, consult a professional or a Bulb Fix guide for compatibility notes.
Most fixtures can be upgraded, but always verify base type and driver compatibility before buying LEDs.
What base types are common for halogen bulbs?
Common halogen bases include GU10 and GU5.3 (MR16). Other variants exist like G4, but always confirm the exact base by inspecting the socket or fixture label.
Halogen bases like GU10 and GU5.3 are typical; check the socket or label for confirmation.
Will LEDs require a new dimmer?
If you want dimming, choose a compatible LED bulb and ensure your dimmer is LED-compatible. Some fixtures need a different dimmer or a non-dimmable setup for the LED to work correctly.
If you want dimming, use an LED that supports it and a compatible dimmer.
Are there safety concerns when replacing bulbs?
Yes. Always cut power, use testers, and avoid forceful handling if sockets are worn or damaged. If you’re unsure, consult a professional.
Safety first: power off, test for no voltage, and don’t force parts that feel stuck.
How long do LED bulbs last compared to halogens?
LED bulbs typically last longer than halogens under normal conditions, especially in fixtures used frequently or left on for extended periods. Check the warranty and expected life on the product page.
LED bulbs usually last much longer than halogens when used normally.
What color temperature should I choose?
Choose color temperature based on room and task needs. Warm white (around 2700-3000K) suits living areas; cooler temperatures (3500-5000K) suit kitchens and workspaces.
Warm for cozy spaces, cooler for task lighting.
Watch Video
Key Points
- Verify the LED base type before buying.
- Always power off and let the fixture cool before handling.
- Choose LEDs with compatible base, voltage, and dimmer compatibility.
- Test the new LED after installation and adjust if needed.