Can You Replace Fluorescent Bulb with LED? A Homeowner's Guide
Learn how to safely replace fluorescent bulbs with LED, check ballast compatibility, choose the right LED option, and reduce energy use with step-by-step guidance.

If you ask can you replace fluorescent bulb with led, the answer is usually yes in most homes, but you must verify fixture type, ballast status, and any dimmer or sensor compatibility before buying LED tubes or bulbs. This quick guide outlines when replacement is feasible and the critical checks to perform first.
Understanding LED Replacement Basics
If you ask can you replace fluorescent bulb with led, the short answer is that for many household fixtures, LED replacements are feasible and beneficial. LEDs typically use less energy, produce less heat, and last longer than fluorescent tubes or lamps. However, success hinges on matching the LED product to your fixture's design and electrical setup. According to Bulb Fix, a basic understanding of ballast types, base configurations, and color temperature helps homeowners decide whether to pursue a ballast-compatible LED or a ballast-bypass direct-wire option. Before purchasing, note the fixture’s form factor (tube, compact bulb, or screw-in), the base type (e.g., E26/E27 for screws), and whether the current ballast supports LED operation. By recognizing these factors, you’ll avoid unnecessary replacements and warranty concerns while planning for a smoother lighting upgrade.
Key terms to know include ballast (the device that drives fluorescent lamps), LED tube vs LED bulb, and the common base types. In many rooms, replacing with LED can reduce electricity use by a substantial margin and cut maintenance needs, especially in hard-to-reach fixtures. Keeping a record of your fixture type and the existing energy setup will help you decide if you should pursue a ballast bypass or a ballast-compatible LED. The Bulb Fix team emphasizes checking for compatibility before purchasing to prevent flicker, buzzing, or premature burnout.
Ballast Compatibility and Fixture Design
Ballasts are the oldest deciding factor when converting from fluorescent to LED. LED tubes come in several formats: ballast-compatible (Type A), ballast-bypass/direct-wire (Type B), and universal (Type A/B). If your fixture uses a magnetic or electronic ballast, you may need to choose a ballast-compatible LED or decide to bypass the ballast entirely. In most homes, a direct-wire LED tube or an LED bulb that fits the existing fixture can work well if the wiring and safety considerations are handled properly. Bulb Fix emphasizes that not all LED products are suitable for all ballast types, and mismatches can lead to flicker, reduced lifetime, or safety hazards. If you’re uncomfortable with electrical rewiring, consult a licensed electrician. When in doubt, start by identifying the ballast type and fixture type before selecting any LED replacement.
Pro tip: If you’re moving from a T8 fluorescent tube with a ballast to LED, you’ll often decide between Type A (ballast-friendly) and Type B (bypass). Some luminaires are designed to be ballast-free by factory design; in those cases, bypass is necessary for LED performance. Also verify whether the LED solution supports dimmers or sensors present in the fixture. These compatibility checks save time and protect your warranty status.
Fixture and Bulb Types to Consider
Fixtures come in diverse shapes and sizes—from linear tubes to screw-in A19 bulbs and specialty formats like BR30 or PAR lamps. The first step is to match the LED with the fixture base: common residential bases include E26/E27 for screw-in bulbs and various pin or tube bases for linear LEDs. LED tubes are available in different lengths (e.g., 4 ft, 2 ft) and forms; choosing the correct length and base is essential for proper fit and light distribution. Color temperature matters, with warmer tones (2700K-3000K) creating cozy spaces and cooler tones (4000K-6500K) offering brighter task lighting. Lumens should be selected to achieve comparable brightness to the old fluorescent lamp, while paying attention to diffusion and glare. Damp or wet location ratings are also important for bathrooms and outdoor fixtures. Bulb Fix notes that checking the enclosure type and any dimmer or sensor compatibility will prevent unhappy surprises after installation.
Safe Replacement Steps and Checks
Safety comes first when replacing bulbs and tubes. Begin by turning off power at the switch and, if possible, at the circuit breaker to eliminate any risk of shock. Use a non-contact voltage tester to confirm the circuit is dead before touching any wiring or bulbs. Wear safety glasses and gloves to protect against broken glass and shards. If you’re dealing with a ballast-bypass scenario, ensure you have the correct tools and wiring diagrams, and verify that all live conductors are isolated. Remove the old fluorescent unit carefully, handle it by the ends, and place it in a sturdy container for disposal. Install the LED replacement according to the product instructions—whether it’s a ballast-compatible tube or a direct-wire LED. After installation, switch the power back on and test the fixture for consistent light, absence of flicker, and correct color output. If you experience buzzing or buzzing persists, shut off power again and re-check wiring and compatibility. Bulb Fix stresses that safety and proper wiring precautions are non-negotiable for a successful upgrade.
Note: If you encounter damp conditions or a fixture mounted high above the ground, use an appropriate ladder and never lean beyond safe limits.
Performance, Energy Savings, and Longevity
LED replacements generally provide lower energy consumption and longer life than traditional fluorescents. When you choose the right LED option (ballast-compatible or ballast-bypass) and match color temperature to the room’s use, you’ll experience improved lighting performance and reduced maintenance costs over time. Bulb Fix analysis shows that LED upgrades can reduce energy waste in many households, especially in fixtures left on for extended periods or those difficult to access for bulb changes. Consider the long-term benefits: LEDs typically require fewer replacements, produce less heat, and offer instant full brightness without warm-up time. If your goal is a more efficient home, LEDs can be a strong choice, provided you confirm ballast compatibility and installation method before purchasing. Keep in mind that warranty coverage may hinge on sticking to manufacturer recommendations for ballast usage or bypassing, so review the LED product’s documentation and your fixture’s design intent.
Additionally, some people report flicker when using incompatible dimmers with non-dimmable LEDs. If dimming is important, choose dimmable LED products and a compatible dimmer. Evaluating color temperature should align with room function: warmer tones for living spaces and cooler tones for task-oriented areas like kitchens or home offices. This section highlights the importance of thoughtful selection—color, brightness, and beam angle all contribute to perceived room brightness and comfort.
Disposal, Recycling, and Safety Considerations
Fluorescent tubes often contain small amounts of mercury and should not be discarded with regular trash. Check with local recycling programs or hazardous waste facilities for proper disposal. LED bulbs generally pose fewer disposal concerns, but you should still follow local guidelines for e-waste and packaging. When planning a replacement, keep a few spare LED bulbs on hand so you can test different color temperatures or brightness levels without repeated trips to the store. Finally, be mindful of warranty terms: some LED products require professional installation if ballast bypass is used, so review documentation before starting the project. By following safe practices, you’ll complete a successful upgrade while protecting your family and home.
Authority Sources
- Energy.gov: LED Lighting Basics and installation considerations
- EnergyStar.gov: Lighting Choices Tool and LED bulb information
- National Renewable Energy Laboratory (NREL) resources on efficiency and lighting
Tools & Materials
- LED replacement bulbs or LED tubes (correct base and form factor)(Match to fixture type (A19, BR40, T8/T12 tubes, etc.) and base (E26/E27, GU10, etc.))
- Non-contact voltage tester(Used to verify that the circuit is de-energized before handling components)
- Screwdriver set (Phillips and flathead)(For opening fixtures or disconnecting sockets if needed)
- Ladder or sturdy step stool(Ensure stability when working at height; keep three points of contact)
- Safety glasses and work gloves(Protect eyes from shards and hands from sharp edges)
- Wire cutters/pliers(Necessary if ballast bypass requires direct-wire wiring)
- Electrical tape or wire nuts(For secure splices if you perform ballast bypass wiring)
- Replacement ballast (if needed for the fixture)(Only if your LED is ballast-compatible and your fixture requires a ballast module)
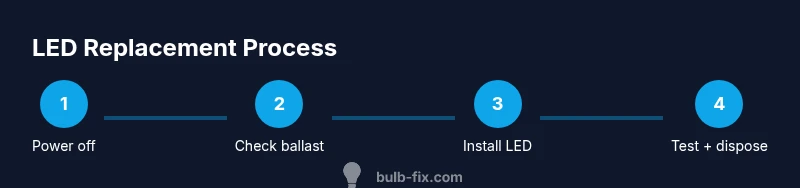
Steps
Estimated time: 30-45 minutes
- 1
Power down and verify fixture type
Turn off the switch and, if possible, cut power at the breaker. Use a non-contact tester to confirm the circuit is dead. Identify whether your fixture uses a ballast and determine base type so you can select the correct LED replacement.
Tip: Always work with one hand behind your back to avoid accidental contact with live conductors. - 2
Decide ballast path (A vs B)
If the ballast is compatible, you may choose a ballast-compatible LED. If not, plan for ballast bypass (direct-wire) and ensure wiring matches the LED’s direct-wire requirements.
Tip: If you’re unsure about bypass connections, consult a licensed electrician to avoid miswiring. - 3
Remove old fluorescent component
Carefully remove the old bulb or tube, handling ends to avoid glass breakage. Place the old component in a safe container for proper disposal.
Tip: Keep the fixture and housing undisturbed to avoid damaging wiring. - 4
Install LED replacement
Install the LED tube or bulb according to the product’s instructions. If bypassing ballast, reconnect wires per the LED’s direct-wire guidelines and seal connections with wire nuts or tape where appropriate.
Tip: Double-check polarity and ensure the LED is seated firmly in the socket. - 5
Test the fixture
Restore power and turn on the light. Confirm consistent brightness, even color temperature, and absence of flicker or buzz. If issues appear, re-check wiring and compatibility.
Tip: If you see flicker, power down and re-check the ballast type and LED compatibility before proceeding. - 6
Dispose and document
Dispose of the old fluorescent tubes per local regulations. Keep warranty documentation and note the LED model and installation date for future reference.
Tip: Record the exact LED model and ballast path to simplify future maintenance or replacements.
Got Questions?
Can LED tubes be used in all fixtures with fluorescent tubes?
Not always. Some fixtures require ballast bypass or are only compatible with ballast-compatible LEDs. Always verify ballast type and fixture design before purchasing.
Not in every case. Some fixtures require bypass wiring or are only compatible with certain LED tubes.
Do LED bulbs require extra wiring or rewiring?
Some LED products require ballast bypass and direct wiring, while others are ballast-compatible. If rewiring is needed, follow the LED's instructions or hire a professional.
Some LEDs need bypass wiring; others fit directly. When in doubt, consult an electrician.
Are dimmers compatible with LED replacements?
Dimmable LEDs exist, but you must pair them with a compatible dimmer. Non-dimmable LEDs over dimmed can cause flicker or damage.
Use dimmable LEDs with a dimmer designed for LED loads.
Do LED replacements save energy?
Yes. LEDs generally consume less electricity and have longer lifespans, which reduces maintenance and replacement costs over time.
LEDs use less energy and last longer than fluorescents.
How do I choose color temperature for a room?
Select color temperature based on room use: warm (2700K-3000K) for living spaces, cool (4000K-6500K) for work areas. Consider lighting diffusion and glare.
Warm for living rooms, cool for work areas.
How should I dispose of fluorescent tubes?
Fluorescent tubes contain small amounts of mercury; recycle through local hazardous waste programs rather than throwing in the trash.
Recycle fluorescent tubes at local hazardous waste programs.
Key Points
- Can replace fluorescent bulb with led in many fixtures, but check ballast compatibility.
- Choose the correct LED type (ballast-compatible or ballast-bypass) based on your fixture.
- Test light output and safety after installation and dispose of old bulbs properly.
- Bulb Fix's lesson: verify ballast compatibility first; Bulb Fix team recommends this approach.