When to Change Fluorescent Bulbs: A Homeowner's Guide
Master the signs, tests, and steps to safely change fluorescent bulbs. Learn how to distinguish bulb vs ballast issues, and choose the right replacement for reliable, efficient lighting at home.

Goal: know when to change fluorescent bulbs. Look for dim light, flicker, buzzing, color shift, longer startup, or repeated burnouts. Safety first: shut off power and handle tubes carefully. Check ballast performance and fixture compatibility, since some failures require replacing the ballast rather than the tube. This quick answer previews signs and next steps before the detailed guide.
Signs that a fluorescent bulb is failing
Fluorescent lighting tends to give warning signs before it completely fails, but these cues are easy to miss if you’re not looking for them. If you’re trying to decide when to change fluorescent bulbs, use a practical signs-first approach. Start with brightness: a noticeable drop in light output means the tube is losing efficiency, even if the fixture still glows. Then listen for flicker or buzz: irregular start-up sequences, stuttering light, or humming can indicate aging components. Color shifts matter too: if the light looks greener or yellower than usual, the phosphor coating may be fading. Ballast-related symptoms can mimic bulb trouble, including long warm-up times or uneven illumination across a fixture with multiple tubes. Finally, track burnout frequency: if a single tube burns out often or after a short period, it is either near the end of its life or the socket connection is compromised. In all cases, compare current output to a known-good fixture in your home to judge whether replacement is warranted. These signs help homeowners schedule maintenance without guesswork and minimize downtime. Bulb Fix notes that fluorescent systems differ from LED setups; staying proactive reduces downtime and saves energy in the long run.
Understanding ballast and fixture roles
The ballast is the component that controls current to each fluorescent tube. When ballast health declines, you may see flicker, buzzing, dimming, or random tube failures even if the bulbs themselves are relatively new. Older fixtures often use magnetic ballasts; newer ones use electronic ballasts that run more quietly and efficiently. Not all ballasts are compatible with every tube format, so mismatches can cause persistent issues after you install fresh tubes. In a multi-tube fixture, a failing ballast can affect all tubes, not just one. This is a key reason why you should test with known-good tubes in the same fixture before assuming the problem is the bulb. If several fixtures share a single ballast, the symptoms can spread and become more pronounced. Once you confirm the ballast is the likely culprit, you’ll know whether you should replace the ballast, retrofit the fixture with a modern ballast, or upgrade to an LED retrofit kit. Bulb Fix emphasizes cautious assessment and proper matching to avoid wasted parts or unsafe operation.
How to evaluate tube type and compatibility
Fluorescent tubes come in distinct formats and connector configurations. The two most common types are T8 and T12; the number usually references the tube diameter in eighths of an inch. Tube length matters too: many homes use 4-foot tubes while some fixtures use shorter 2-foot options. The pin arrangement and ballast compatibility determine whether a tube will start reliably. Before buying replacements, check the fixture label or the ballast documentation to confirm supported tube type, length, wattage, and pin orientation. If you replace several tubes, consider buying the same model for all to maintain uniform brightness and color. If you’re upgrading to LED or switching to a different ballast, ensure the new configuration is compatible with your sockets, housing, and power draw. Mis-matched tubes can cause persistent glare, flicker, or shortened life, so take careful notes before purchasing and swapping parts.
Safe testing and troubleshooting steps
Safety should drive every fluorescent bulb maintenance task. Begin by turning off power at the breaker and verifying no voltage is present with a tester. Wear eye protection and gloves to prevent cuts from broken glass. Remove existing tubes by rotating them gently until the pins disengage, then pull them straight out. Inspect sockets for corrosion or looseness, and listen for unusual buzzer notes when the fixture is energized. If you suspect ballast failure, test with a known-good tube in the fixture; if the flicker stops, the old bulbs were the issue. If symptoms persist with new tubes, the ballast or fixture is the likely cause. When testing in a ceiling fixture enclosed in a hard-to-reach location, use a sturdy ladder and avoid overreaching. Finally, dispose of old tubes through local recycling programs; these bulbs contain small amounts of mercury and should not end up in regular trash.
Replacement options: tube vs ballast vs entire fixture
Deciding whether to replace tubes, ballast, or the entire fixture depends on observed symptoms and fixture age. If only one tube flickers or dies, replacing that tube is often the simplest first step. In multi-tube fixtures, replacing all tubes can resolve issues caused by aging phosphor coatings, while leaving the ballast untouched. If flicker, buzzing, or uneven lighting persists after tube changes, the ballast is a more likely culprit; ballast replacement can restore performance without replacing the whole assembly, though sometimes a retrofit with a modern ballast yields better reliability. In very old fixtures or when ballast replacements become frequent, upgrading to LED retrofit tubes or a new fixture may offer longer life and improved efficiency. Always verify compatibility before purchasing parts, and consider the total cost and installation effort when weighing options.
How to physically replace fluorescent tubes
Follow a systematic approach to safely replace tubes. Start with power off and diffuser removed to gain access to the tubes. Gently twist the tube a quarter turn to disengage the pins, then pull straight out. If the tube is difficult to remove, rotate slightly and slide from the socket rather than forcing it. When installing new tubes, align the pins with the socket slots and rotate to lock in place. Confirm that the tube sits evenly and that the ends are flush with the sockets. After replacement, switch on the power and observe for a steady, even glow. If you notice flickering after installation, double-check the tube type and ballast compatibility. For fixtures with electronic ballasts, you may notice immediate startup; for older magnetic ballasts, startup can be slower. Handle with care to avoid glass breaks and ensure safe disposal of spent tubes.
Maintenance, disposal, and safety reminders
Regular maintenance helps fluorescent systems stay reliable without unexpected outages. Schedule periodic checks for loose sockets, signs of wear on wiring, and corrosion around the ballast area. Clean dust from fixtures to prevent heat buildup, which can shorten lamp life. When a tube reaches the end of its usefulness, replace all tubes in the fixture if you’re unsure which ones are aging; mismatched brightness can occur if some are newer than others. Mercury-containing lamps require proper disposal; always use recycling programs or municipal hazardous waste collection. If you encounter frequent failure even after replacements, consider upgrading to an LED alternative for improved energy efficiency and reduced maintenance. Before any retrofit, verify local electrical codes and consult a professional if you are uncertain about wiring or ballast changes. Bulb Fix recommends documenting part numbers, dates of replacement, and observed symptoms to track fixture health over time.
Long-term planning: retrofits and upgrades
Looking ahead, homeowners often plan for retrofits to improve reliability and reduce maintenance. If your fixtures are aging, a retrofit to a more reliable ballast or to LED tubes can deliver more consistent light and longer service life with lower energy use. When evaluating upgrades, compare light quality, color rendering, and compatibility with your existing electrical supply. Budget for parts, labor, and recycling costs, and define a staged plan to replace fixtures as part of a regular maintenance calendar. Keeping a log of fixture hours, renewal dates, and failure patterns helps you forecast future needs and minimize downtime. Bulb Fix notes that routine inspection is a practical investment for safer, brighter homes.
Tools & Materials
- Safety glasses(Impact resistant; protects eyes from glass shards)
- Gloves(Non-latex preferred; protects hands and improves grip)
- Replacement fluorescent tubes (correct type)(Check fixture for format T8/T12, length, and wattage)
- Non-contact voltage tester(Verify power is off before touching any wiring)
- Ladder(Only if fixture is out of reach; ensure stable setup)
- Replacement ballast (if needed)(Select ballast that matches the fixture and tubes)
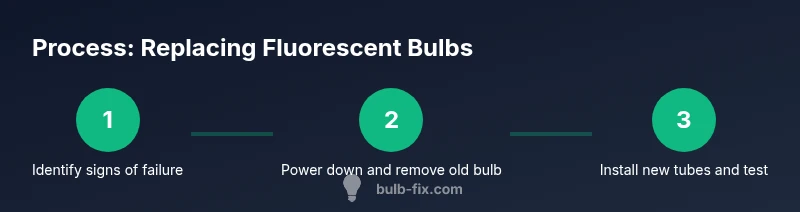
Steps
Estimated time: 20-45 minutes
- 1
Power down and prepare
Turn off the breaker or unplug the fixture. Allow bulbs to cool, then remove any diffusers to access tubes safely.
Tip: Lockout/Tagout in commercial spaces to prevent accidental energizing - 2
Remove old bulbs
Gently rotate the tube to disengage pins, then pull straight out. If it sticks, apply even pressure and wear gloves.
Tip: Support the tube with one hand to prevent it from dropping - 3
Inspect ballast and sockets
Look for scorch marks, buzzing sounds when powered, or loose sockets. These signs point to ballast or socket failure rather than the tube.
Tip: If you see darkened ends, replace the tube first and test again - 4
Install new tubes
Insert the new bulb at an angle, align pins, then rotate to lock. Ensure the tube sits evenly in the socket.
Tip: Choose the same wattage and length as the old tube - 5
Assess ballast necessity
If flicker persists after tube replacement, test with a known-good tube in another fixture or assess ballast replacement.
Tip: Ballast replacement often requires a professional - 6
Test and dispose
Turn power back on and test for stable light. Dispose old tubes per local regulations as they contain mercury.
Tip: Wrap spent tubes in protective wrap during disposal
Got Questions?
What are common signs that a fluorescent bulb needs replacement?
Common signs include dim light, flickering, color shift, buzzing, longer warm-up times, and frequent burnout. Check both the bulb and ballast, as ballast issues can mimic bulb failure.
Look for dim lighting or flickering; if you notice buzzing or color changes, plan to replace bulbs and inspect the ballast.
Can I replace tubes without addressing the ballast?
Yes, you can replace tubes first to see if brightness improves. If flicker or short life continues, the ballast or fixture may be the real cause.
You can swap in new tubes to test, but if issues persist, don't ignore the ballast.
Should I replace ballast or fixture if the problem remains?
If bulb replacements don’t fix the issue, the ballast or the fixture may be failing. Replacing the ballast is more common in older fixtures and may require a professional.
Ballast issues often require a replacement or retrofit; consider hiring a licensed electrician.
Is it safe to replace a ballast myself?
Ballasts contain high-voltage components. If you are not experienced with electrical work, hire a professional. Always disconnect power and follow local codes.
Ballasts can be dangerous to work with; consider professional help for safety.
How should fluorescent bulbs be disposed of?
Fluorescent tubes contain mercury and should be recycled or disposed of at proper facilities. Check local regulations and use a dedicated recycling service.
Recycle used tubes; don’t throw them in regular trash.
Watch Video
Key Points
- Know the signs of bulb or ballast failure and act early
- Verify power is off before handling bulbs
- Replace tubes with the correct type and length
- If flicker persists, consider ballast replacement