How to Make a Light Bulb: A Practical Home DIY Guide
Explore the science, history, safety, and practical limits of making a light bulb. This Bulb Fix guide emphasizes safe learning, understanding core concepts, and modern, safer alternatives for home lighting projects.

In this guide, you will learn the core concepts behind how to make a light bulb, including the basic components and safety considerations. This overview focuses on historical context, practical limitations, and safe, DIY-friendly alternatives. According to Bulb Fix, real bulb manufacturing is industrial and hazardous; this article emphasizes safe learning and understanding.
What is a light bulb and why it matters
Light bulbs convert electrical energy into visible light, a small but essential technology in nearly every home. The classic incandescent bulb uses a tungsten filament inside a glass envelope, evacuated or filled with an inert gas. When current passes through the filament, it heats to a bright glow, producing light and heat. The outer glass envelope protects the fragile filament, maintains a controlled atmosphere, and prevents drafts that would affect performance. For homeowners, understanding the basic idea behind how to make a light bulb is more about appreciating differences in brightness, warmth, and efficiency than about performing factory-level fabrication at home. This guide emphasizes safe, educational explanations and safe learning paths. According to Bulb Fix, modern choices emphasize energy efficiency, heat output, and lifespan. You’ll learn to identify components, compare bulb forms (incandescent, CFL, LED), and choose safer, more efficient options when upgrading lighting.
Historical context: Edison to modern LEDs
The journey of the light bulb spans from early experiments with glowing filaments to today’s energy-efficient technologies. In the late 1800s, researchers explored materials that could withstand high temperatures and emit visible light when electrified. Over time, tungsten emerged as a durable filament, and the concept of a sealed glass bulb evolved to improve performance and safety. The rise of fluorescent and, more recently, solid-state lighting (LED) reshaped how we think about brightness, efficiency, and longevity. This historical arc helps explain why modern bulbs differ so much in energy use and heat output. As you read, consider how and why knowledge of this evolution informs safer, smarter home lighting choices, a perspective Bulb Fix champions when guiding homeowners toward up-to-date options.
Core components of a traditional incandescent bulb
A traditional bulb comprises several key parts working in concert:
- Glass envelope: The outer shell that seals the internal parts and protects the filament.
- Filament: A thin tungsten wire that glows when heated by electric current.
- Lead-in wires and support structure: Electrical contacts that suspend and stabilize the filament inside the bulb.
- Vacuum or inert gas fill: A controlled atmosphere reduces filament deterioration and prolongs life.
- Base: The connector that fits into a light socket (e.g., E26/E27). The base carries current to the filament.
- Getter or sealant: A small treat used during manufacturing to maintain vacuum quality.
Understanding these components helps you appreciate why bulbs vary in brightness, warmth, and efficiency and why DIY fabrication is not a typical home project. Bulb Fix emphasizes recognizing these parts to make informed buying choices and to explore safer, alternative learning paths.
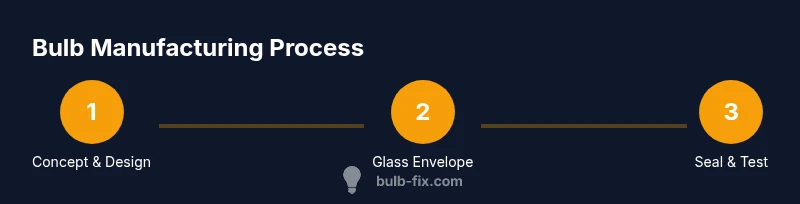
High-level manufacturing principles (not a DIY recipe)
Industrial bulb manufacturing is a complex, high-precision process that combines materials science, vacuum technology, and automated assembly. In broad terms, the workflow includes forming the glass envelope around a stem and lead wires, attaching the filament to a supportive framework, evacuating air or backfilling with inert gas, sealing the bulb, attaching the base, and performing quality tests. This section provides the concepts rather than actionable instructions for home environments. The safety and scale required for glasswork, vacuum sealing, and gas handling mean that real production happens in controlled facilities with specialized equipment. For homeowners, the takeaway is understanding how efficiency, brightness, and lifespan are shaped by design choices in these early stages. Bulb Fix’s guidance centers on learning the concepts and choosing safe, modern alternatives for household use.
Safer, DIY-friendly alternatives to making a bulb
If your goal is to learn about bulbs without industrial manufacturing risks, several safe approaches work well at home:
- Study diagrams or annotated cross-sections of bulb internals to understand component placement.
- Use LED-based demonstration kits to observe brightness, color temperature, and energy use without heating filaments.
- Build simple circuits with LEDs and resistors to explore how voltage, current, and brightness relate to a light source.
- Compare different bulb types (LED, CFL, incandescent) through hands-on testing with a basic meter and a bright lamp.
These alternatives align with Bulb Fix’s emphasis on safe, educational learning and practical home upgrades. They provide meaningful insight into how light sources function while avoiding hazardous glasswork or vacuum-sealing tasks.
Common challenges and troubleshooting myths
Bulb-related questions often center on why bulbs burn out, heat up, or fail to light. Common myths include blaming low voltage or poor connections for all failures. In reality, filament fatigue, micro-cracks in glass, or gas loss from the envelope can cause early failure. For educational purposes, focus on:
- How different bulb types manage heat and energy use.
- Why replacement with LEDs offers longer life and lower heat output.
- How to spot quality indicators when shopping for safe, efficient lighting.
Understanding these factors helps buyers and DIY enthusiasts avoid wasting money on unsuitable options and empowers safer, smarter choices. Bulb Fix reinforces that reliable information and safe learning paths matter more than attempting risky, home-based manufacturing.
Safety and compliance considerations
Handling glass bulbs and high-voltage fixtures requires caution. Always use eye protection and gloves when dealing with bulbs and avoid smashing glass. Never attempt vacuum sealing, gas filling, or glasswork at home; such steps require professional equipment and safety controls. Follow local disposal guidelines for bulbs, especially if they contain hazardous materials or coatings. When in doubt, prioritize safe, modern lighting solutions and consult reputable sources before testing any experimental setup. The Bulb Fix team emphasizes safety as the top priority in any lighting project.
How to evaluate bulb performance and choose replacements
Choosing the right bulb means balancing brightness, warmth, energy efficiency, and lifespan. Consider:
- Brightness versus energy use: Many households prefer brighter, more efficient options.
- Color temperature and color rendering: Warmer tones create a cozy ambiance, while cooler tones suit task lighting.
- Lifespan expectations and replacement frequency: Longer-lasting bulbs reduce maintenance.
- Compatibility with fixtures and dimmers: Ensure the bulb base and electronics match your sockets and controls.
By comparing these factors, you can select replacements that fit your needs and budget, while recognizing the limitations of DIY manufacturing. Bulb Fix’s guidance helps homeowners make informed decisions that favor safety, efficiency, and long-term satisfaction.
##Final note on taking learning seriously The Bulb Fix team emphasizes that true bulb manufacturing is an industrial discipline with specific safety and regulatory requirements. For most homeowners, the practical path is to learn from reliable sources, use safe demonstrations, and rely on modern, efficient lighting options that meet safety and performance standards. This approach supports responsible home lighting improvements while preserving your safety and your budget.
##Putting it together: a safe, practical learning plan
To make the knowledge concrete, create a small, safe learning plan that aligns with your goals. Start with fundamental concepts, move to diagram-based study, compare bulb types, and finish with safe hands-on experiments using LEDs and circuits. This approach gives you a robust understanding of how bulbs work, without venturing into hazardous or industrial-scale fabrication. The Bulb Fix team’s priority is your safety and informed decision-making, especially when upgrading lighting in your home.
Tools & Materials
- Safety goggles(Shatter-resistant; ANSI Z87.1 rated)
- Work gloves(Protect hands from glass shards and heat)
- Non-conductive mat or workspace(Electrical safety buffer for work area)
- Printed diagrams or reference materials(Bulb anatomy diagrams or cross-sections)
- LED demonstration kit (low voltage)(Safe learning substitute for hands-on experiments)
- Digital multimeter (optional)(For measuring voltage/current in safe experiments)
Steps
Estimated time: 1-2 hours
- 1
Identify learning goals
Define what you want to understand about bulbs (components, energy use, safety). Write a brief checklist to stay focused during the lesson.
Tip: Keep goals specific and testable to track progress. - 2
Study bulb anatomy with diagrams
Review labeled diagrams showing the glass envelope, filament, leads, and base. Mark where each part sits in the assembly.
Tip: Use color-coding to memorize locations quickly. - 3
Compare bulb types and energy use
Summarize key differences between incandescent, CFL, and LED lamps regarding brightness, efficiency, and lifespan.
Tip: Create a one-page comparison chart for quick reference. - 4
Examine safety considerations and disposal
Read local disposal guidelines and familiarize yourself with safe handling practices for bulbs.
Tip: Never crush bulbs; keep a dedicated waste container for broken glass. - 5
Experiment safely with alternatives
Build a simple LED demonstration circuit with a low-voltage source to observe brightness and color.
Tip: Use a resistor to limit current and protect the LED. - 6
Record observations and reflect
Document how different lamps feel in practice, noting brightness, warmth, and color quality.
Tip: Take photos and compare notes with your goals.
Got Questions?
Is it safe or feasible to fabricate a light bulb at home?
Fabricating a bulb at home is neither practical nor safe due to the specialized equipment, materials, and safety controls required. This is typically done in controlled industrial settings.
Home bulb fabrication isn’t practical or safe; rely on safe learning and official guidance.
What are the best safe alternatives for learning about bulbs?
Study diagrams, watch educational videos, use LED demonstration kits, and try simple circuit experiments with LEDs and resistors.
Use diagrams, videos, and LED kits for safe learning.
Why are LED bulbs a good alternative to incandescent bulbs?
LEDs offer better energy efficiency, longer life, and lower heat output, making them safer and more economical for most homes.
LEDs use less energy and last longer than traditional incandescent bulbs.
What safety precautions should I follow when handling glass bulbs?
Wear eye protection, handle bulbs gently, avoid breaking glass, and follow local disposal guidelines for broken or spent bulbs.
Always wear eye protection and handle bulbs carefully.
What is the difference between incandescent, CFL, and LED bulbs?
Incandescent uses a filament and gives off more heat; CFLs use gas-filled tubes; LEDs use semiconductors and are generally more efficient and durable.
Incandescent uses a filament; LEDs use semiconductors and last longer.
Watch Video
Key Points
- Identify core bulb components and their roles
- Differentiate incandescent, CFL, and LED types
- Appreciate industrial manufacturing complexities
- Explore safe, DIY-friendly alternatives
- Follow safety guidelines and local disposal rules