Heat Light Bulb Troubleshooting: Quick Fixes for Common Issues
A practical, safety-first guide to diagnosing and fixing heat light bulb problems—from overheating to faulty sockets—with steps, tips, and maintenance from Bulb Fix.

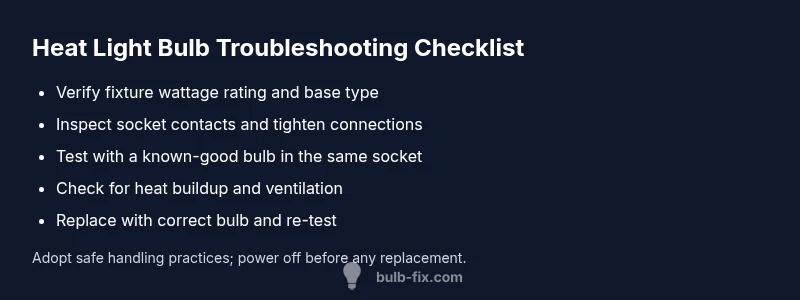
Most heat light bulb problems start with simple, safety-first checks: power, socket, and compatibility. Start by switching off power at the breaker, replacing any obviously burnt bulbs, and reseating the base. If the bulb still won’t light, try a known-good bulb in the same socket to rule out the fixture.
Understanding heat light bulb safety and performance
Bulbs labeled as heat-producing can heat fixtures significantly; and the amount of heat influences longevity and safety. The heat light bulb you’re troubleshooting should be matched to the fixture’s wattage rating and temperature class. According to Bulb Fix, safety starts with verifying that you’re using the correct bulb type for the socket and fixture. Never exceed the fixture’s rated wattage, and avoid touching hot bulbs with bare skin. When handling, wear gloves or use a dry cloth, and allow the bulb to cool before inspection. Keep flammable materials away from the fixture. In many homes, overheating is caused by using a bulb with too high wattage for the fixture or by a loose connection that creates resistance and additional heat. Understanding these basics helps you diagnose issues faster and prevents fire hazards.
Common symptoms and initial checks
If the heat light bulb is flickering, dim, or not turning on, start with the simplest checks. First, switch off power at the breaker to avoid shock. Let the bulb cool, then inspect the glass for cracks or chips. Visually examine the base and socket for signs of discoloration, melting plastic, or corrosion. If you smell burning or see smoke, cut power and do not attempt to reuse the bulb. Swap in a known-good bulb of the same base type to determine whether the problem is the bulb or the fixture. If the new bulb works, the original bulb is faulty; if not, the fixture or wiring may be the culprit.
Diagnostic flow you can follow at home
Use a simple flow to identify the root cause and apply the right fix. Start with: symptom recognition (no light, flicker, or excessive heat); quick bulb test by swapping with a known-good bulb in the same socket; socket test by inspecting for looseness, corrosion, or damage; power pathway check including the breaker, outlet, and switch wiring; and finally assess fixture compatibility and consider professional help if signs of electrical fault or overheating persist. Bulb Fix emphasizes safety and escalation only when needed, to prevent accidents and extended downtime with heat light bulbs.
Most common causes and practical fixes
- Loose or damaged socket: Turn off power, reseat or replace the socket; ensure the bulb seats firmly and the contact is clean. Easy fix, but may require a pro if the socket shows damage. In the meantime, avoid forcing connections that feel stiff.
- Incompatible wattage or base: Verify the fixture’s rating and base type; replace with a bulb rated for the fixture. Easy to medium to fix depending on availability and access to the right base size for the heat light bulb.
- Worn-out bulb or filament failure: Replace with a new, correctly rated bulb; check for flicker after replacement. Easy.
- Faulty wiring or switch: If the issue persists after bulb and socket checks, test the switch and wiring with a multimeter if you have training; otherwise call an electrician. Medium to hard depending on wiring complexity.
- Fixture heat buildup or poor ventilation: Ensure the fixture doesn’t trap heat; relocate the bulb, improve ventilation, or use a bulb with lower wattage if necessary. Medium.
Safety-first precautions and when to call a pro
Always switch off power before touching any bulbs. Wear protective gloves when handling hot glass, and never operate a fixture that shows signs of scorching, melted components, or burning smells. If you’re uncomfortable with electrical testing or if the wiring seems damaged, contact a licensed electrician. For those who want to learn, practice on non-energized circuits and never mix tasks (electric work with wet hands). The Bulb Fix team emphasizes that many overheating problems can be prevented by using fixtures rated for heat bulbs and regular socket maintenance.
Maintenance to prevent overheating and extend bulb life
Adopt a proactive approach: keep fixtures clean, ensure proper ventilation, and replace heat light bulbs before the end of their rated lifespan. Store spare bulbs in a cool, dry place and label replacements by wattage and base type. Create a quick checklist for each room and schedule annual inspections of sockets and switches. Over time, consistent checks prevent hazardous heat buildup and reduce the frequency of failures, helping you keep every room safely illuminated with heat light bulbs.
Quick fixes you can try today (safe steps)
- Power off and reseat: Remove the bulb, inspect the base contact, and reseat firmly. If the contact looks corroded, replace the socket. 2) Check the fixture path: Ensure vents are clear and the fixture isn’t enclosed in a way that traps heat. 3) Swap with a known-good bulb: Confirm the issue is the bulb or fixture, and not the room wiring. 4) Re-test after cooling: After reassembly, restore power and observe for stability. If issues persist, proceed to Step 5 or seek professional help; never continue using a fixture with signs of overheating.
How to choose replacement bulbs for heat-prone fixtures
Choose bulbs with appropriate wattage, base type (e.g., E26, GU10), and temperature class clearly labeled on the packaging. For enclosed fixtures, use bulbs rated for enclosed use and avoid high-wattage LED bulbs that generate significant heat. Consider LED options that deliver similar brightness with far less heat, and always verify compatibility with dimmers or timers if you use them. When in doubt, consult the fixture’s manual or a professional; the aim is to minimize heat while keeping lighting levels adequate.
Steps
Estimated time: 20-30 minutes
- 1
Power down and prepare
Switch off the circuit breaker and unplug any powered fixture. Allow any hot surfaces to cool before touching, and gather a replacement bulb and a clean cloth for handling. This reduces the risk of shock or burns and keeps the work area safe.
Tip: Use a non-contact voltage tester to confirm zero current before touching wires. - 2
Remove and inspect the bulb
Carefully remove the bulb from the socket and inspect the glass for cracks or chips. Check the base contacts for signs of corrosion or burn marks. If you see damage, replace both bulb and socket if needed, and do not reuse the damaged components.
Tip: Wear gloves to avoid cuts if the glass breaks. - 3
Test with a known-good bulb
Install a new, correctly rated bulb of the same base type in the same socket. If the new bulb lights up, the original bulb was faulty or near end of life. If it still doesn’t light, the issue is likely with the fixture or wiring.
Tip: Ensure the replacement bulb matches the fixture’s wattage rating. - 4
Check the socket and wiring
Inspect the socket contacts for looseness or corrosion. Gently bend the contact springs if needed to improve grip. If you notice melted plastic, scorch marks, or frayed wiring, discontinue use and call an electrician.
Tip: Don’t force connections that feel stiff or distorted. - 5
Evaluate the fixture and power path
Trace the power path from the breaker to the outlet or switch. If you have an outlet tester, use it to confirm proper voltage. For switches, verify they’re functioning and not intermittently breaking the circuit.
Tip: Don’t test with a live test light near flammable materials. - 6
Re-test and restore power
Install the original or replacement bulb again, restore power, and monitor for stable lighting. If issues persist, pursue professional assessment or consider replacing the fixture to match heat-output requirements.
Tip: Record a brief note of what you changed to simplify future troubleshooting.
Diagnosis: Bulb won't light, flickers, or shows excessive heat in a heat-prone fixture
Possible Causes
- highFaulty bulb
- highLoose or damaged socket
- mediumPower supply issues (breaker, outlet, switch)
- mediumIncompatible wattage or base for the fixture
- lowWiring or switch faults
Fixes
- easyPower off at the breaker and reseat the bulb; replace if visibly damaged
- easyTest with a known-good bulb in the same socket to rule out the fixture
- mediumInspect and tighten/replace the socket contacts; inspect wiring for damage
- mediumCheck the circuit, outlet, and switch wiring for faults; consider electrician if uncertain
- easyReplace with a correctly rated bulb and ensure fixture compatibility
Got Questions?
What are the most common causes of a heat light bulb failing to operate?
The most frequent reasons are a burnt-out bulb, a loose socket, or incorrect wattage for the fixture. In enclosed fixtures, heat buildup can degrade components; ensure proper compatibility and ventilation.
Most failures come from a burnt-out bulb, loose socket, or wrong wattage; check compatibility and ventilation.
Is it safe to replace a heat light bulb with an LED bulb?
LED bulbs generate far less heat and are usually compatible, but verify the fixture type and base. If the fixture is enclosed or uses dimmers, confirm specifications before swapping.
LEDs run cooler, but check your fixture's specs before swapping.
What safety steps should I take before handling a bulb?
Always switch off power at the breaker and let the bulb cool completely before touching. Wear gloves to protect your hands and avoid contact with hot glass.
Always power off and let it cool before touching.
When should I replace a heat light bulb?
Replace bulbs at the first signs of dimming, flickering, or unusual warmth in the fixture. Proactively changing bulbs can prevent overheating and damage.
Replace if it flickers, dims, or feels unusually hot.
Do I need professional help for socket or wiring issues?
If the socket shows signs of damage, or you suspect wiring or circuit issues, hire a licensed electrician. Electrical work can be hazardous and should be handled by a pro.
For damaged sockets or wiring, call a licensed electrician.
How can I prevent overheating in the future?
Use bulbs with wattage rated for the fixture, ensure adequate ventilation, and perform regular socket maintenance. Consider LED options for lower heat output.
Use the right wattage and keep fixtures well ventilated.
Watch Video
Key Points
- Power off before touching bulbs
- Match wattage and base to fixture
- Test with a known-good bulb to isolate issues
- Call a pro for wiring or persistent overheating