How to Check Christmas Tree Bulbs: A Practical Guide
Learn to safely check Christmas tree bulbs, identify faults, and replace them efficiently with practical testing, safety tips, and storage guidance. A Bulb Fix guide for homeowners and DIY enthusiasts.

By the end, you will know exactly how to check bulbs on a Christmas tree for safety and performance. The process covers unplugging, visual inspection, testing each bulb, replacing faulty units, and preventing overload. Following these steps minimizes fire risk and maximizes holiday cheer. This quick guide is written with homeowners in mind and references safe handling, common troubleshooting, and storage tips for next season.
Why checking bulbs on a Christmas tree matters
A well-lit Christmas tree sets the mood for the season, but faulty bulbs can create uneven lighting, dim sections, or hazards. According to Bulb Fix, most seasonal lighting mishaps start with overlooked bulbs rather than faulty cords. A quick, deliberate check before you hang garlands and ornaments helps you avoid outages, flicker, and potential hazards. If you want to learn how to check bulbs on a christmas tree, this section explains why it matters and how to approach the task safely. The goal is to ensure every strand contributes to a warm, festive atmosphere without risking overheating or short circuits.
Key reasons to check bulbs on a tree include safety, performance, and longevity. Damaged bulbs or frayed wires can overheat or short circuit, increasing fire risk. Loose connections can cause flicker or intermittent lighting that undermines the holiday mood. Visual inspection lets you catch issues early, before you plug in the entire strand. Finally, a proactive check makes storage and reuse easier for next year, reducing waste and last-minute shopping pressure.
Bulb Fix recommends treating this as a quick routine rather than a chore. Start with the safest path: unplug the tree, work in a dry area, and keep a clear workspace. By adopting a systematic approach, you’ll finish faster and with confidence, knowing the bulbs on your Christmas tree are ready to shine safely.
Safety first: unplug and prep
Safety is the cornerstone of any bulb inspection. Always unplug the tree from the outlet before touching any light strands. If you use a power strip, switch it off and unplug from the wall to eliminate residual energy. Set up a stable stool or ladder to reach higher sections of the tree, and keep the floor dry and uncluttered to avoid slips. This initial step protects you from shocks and accidental short circuits during bulb checks. If the tree is on a live timer, switch the timer off and unplug before you begin.
Before you start, gather your tools and materials in a small, dry area so you won’t be scrambling mid-inspection. Wipe down any dust from sockets with a dry cloth, and inspect for obvious signs of damage like scorch marks or melted plastic. A well-prepared workspace reduces the likelihood of mishaps and makes the inspection smoother. Remember: if you see damaged insulation, melted plugs, or exposed wires, do not attempt a repair—replace the strand or bulbs and discontinue use.
Visual inspection: bulbs, sockets, and wiring
The visual inspection is your first pass to identify obvious problems. Look for bulbs that are dark, burnt, cracked, or discolored, and check each socket for cracks or looseness. Examine strands for frayed wires, exposed copper, or melted insulation near the plug end. A loose connection at the plug or the socket can cause flicker or intermittent lighting. If a bulb looks suspicious, do not force it out; remove the entire bulb and replace if needed. Use a flashlight to illuminate shadowed areas of the tree, especially on older strands where damage may be hidden behind branches. Remember to handle bulbs gently to prevent accidental breakage.
During this stage, you’ll often find several bulbs that are visibly damaged or that emit faint flicker when slightly touched. Bulb Fix emphasizes that catching these issues early prevents a larger outage later, as a single faulty bulb can stress the rest of the strand. Keep a small bowl nearby to hold any broken bulbs safely, and never touch glass with bare hands when bulbs are broken.
Testing bulbs: tester, swap, and map
Testing is the most reliable way to confirm bulb health without guesswork. If you have a dedicated bulb tester, use it on each bulb before reinserting it into the strand. If you don’t have a tester, swap suspected bulbs with known-good ones from a spare strand or a single bulb you know is functional. As you test, map the strand by marking sections that show dimming or flicker, so you can replace multiple bulbs at once without recounting. Do not test while plugged in; this reduces the risk of shock.
After testing, re-check the strand with the other end unplugged to confirm consistent brightness. If you still see flicker after swapping, you may be dealing with a larger issue such as damaged wire or a failing transformer. In that case, consider reducing the number of connected strands or replacing the entire set to maintain safety and performance.
This step is where a lot of people save time later. By testing early, you avoid swapping bulbs in a tree that can still fail at a critical moment, like during a holiday gathering.
Replacing faulty bulbs safely
Once you’ve identified faulty bulbs, replace them with bulbs that match the base and voltage of the strand. Do not mix bulb types in one strand unless the manufacturer explicitly allows it. Gently screw or push bulbs into the sockets until they are snug but not overly tight. Avoid using metal tools to remove bulbs; use plastic or gloved hands to prevent cuts if a bulb shatters. If multiple bulbs are dead, replace them in small groups to maintain balance across the strand rather than swapping them all at once.
After replacement, re-test that entire section of the strand with the power off, then restore power and confirm consistent brightness. If you notice persistent dimming in a group of bulbs, it could indicate a damaged wire or a weak connector. In such cases, it’s safer to retire that portion of the strand or replace the entire set rather than risk an electrical fault.
Managing strands and preventing overload
Overloading a single outlet or daisy-chaining too many strands increases heat and the risk of a short or fire. Check the strand’s packaging for maximum outlet usage and do not exceed it. When using multiple strands, plug them into separate outlets or use a surge-protected power strip rated for holiday lights. Keep the tree away from heat sources and pets to prevent accidental damage. If you use timers, set them to a reasonable schedule so the lights aren’t on for extended periods while everyone is away or asleep.
Dimming or flickering is often a sign of too many lights on a single circuit. If this happens, reduce the number of bulbs active in that run or split the load across more outlets. This approach keeps the tree bright and safe while preserving the energy efficiency of LED bulbs where possible.
Common problems and quick fixes
Despite best efforts, common problems like flicker, partial outages, or buzzing can occur. Flicker may result from loose connections, damaged sockets, or a failing transformer. A partial outage is usually caused by a burned-out bulb or a poor connection; reseat bulbs and replace as needed. If you hear buzzing, unplug immediately and inspect for degraded insulation or a damaged plug. Quick fixes include swapping bulbs, tightening connections, or replacing a worn-out strand altogether when issues persist. If a bulb breaks, clear shards with care and discard the bulb in a rigid container.
Bulb Fix notes that keeping spare bulbs and a small-disposal container nearby speeds up fixes and reduces the risk of repeating the problem later in the season.
Seasonal maintenance and storage tips
Once the season ends, store bulbs properly to extend their life. Remove bulbs gently without twisting aggressively to avoid socket wear. Keep bulbs in a labeled storage box or bag with dividers to prevent contact and breakage. Dry, cool storage helps preserve plastic insulation and bulb bases, especially for older strands. Before next season, perform a quick pre-check on the storage box so you know what you have and what needs replacing. A well-organized setup saves time and reduces the chance of scavenging for mismatched bulbs when it’s time to decorate again.
For frequent holiday decorators, it’s worth keeping a small maintenance kit: spare bulbs, a tester, non-conductive gloves, and a flashlight. With a routine setup, you’ll be ready to check bulbs on a christmas tree quickly and safely next year as well.
Conclusion and final checklist
In this guide you learned how to check bulbs on a christmas tree comprehensively. The goal is to ensure safety, consistent brightness, and longevity of your decorations. The Bulb Fix team recommends following a methodical approach: unplug, visually inspect, test, replace, and re-test before you say the tree is ready for the season. A little preparation now avoids last-minute scrambling and hot spots on the tree. Keeping a small maintenance kit and establishing a pre-season checklist helps you stay confident year after year.
Tools & Materials
- Step stool or stable ladder(Reach tree height safely; ensure stability on a dry surface)
- Bulb tester or spare bulbs of the same type(Test each bulb individually before re-insertion)
- Replacement bulbs (same type/base)(Keep extras in a labeled container; prefer LED where compatible)
- Safety goggles(Protect eyes from glass shards if a bulb breaks)
- Non-conductive gloves(Minimize risk of electric shock and protect fingers)
- Flashlight(Illuminate darker tree areas for a thorough check)
- Electrical tape(Use to secure loose connections if needed)
- Trash bag or small container(Contain broken bulbs safely during cleanup)
Steps
Estimated time: 30-60 minutes
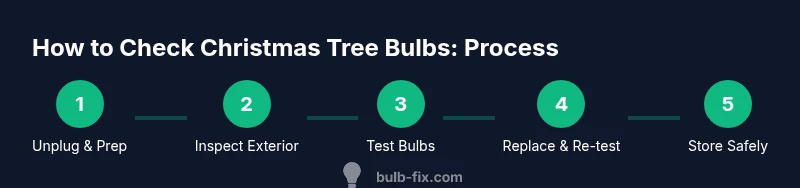
- 1
Unplug and prep workspace
Ensure the tree is unplugged at the outlet. Move furniture or décor to create a dry, clear space and set up a stable stool or ladder. Gather tools in reach to avoid mid-task trips.
Tip: Always unplug before handling any bulbs to prevent shocks. - 2
Inspect exterior strand and plug
Check the plug for damage and examine the cord for fraying or scorch marks near the outlet. If you spot damage, do not continue; replace the strand.
Tip: Damaged cords are a red flag—swap the strand rather than attempting a repair. - 3
Visually inspect bulbs and sockets
Look for dark, cracked, or discolored bulbs and for loose or cracked sockets. Lift the bulb gently to confirm it’s seated properly and inspect sockets for melted insulation.
Tip: Handle bulbs with gloves to avoid skin oils affecting glass integrity. - 4
Test bulbs individually
Using a tester or by swapping with known-good bulbs, test each bulb one by one. Record any dim or flickering bulbs on a quick map.
Tip: Test with power off and unplugged for safety; mark sections for easier replacement. - 5
Replace faulty bulbs
Install replacement bulbs with the same base and voltage. Do not overtighten; snug is sufficient. Replace bulbs in small groups to keep track of performance.
Tip: If several bulbs fail, consider replacing the entire strand to avoid ongoing outages. - 6
Re-test the strand
Plug the strand back in and observe all bulbs at full brightness. Look for flicker or hotspots and adjust as needed.
Tip: Use a flashlight to inspect under branches where lighting can be hidden. - 7
Secure and tidy
Secure loose wires and tidy the cord along the tree base. Avoid bunching or running cords across walkways to prevent trips.
Tip: A clean setup reduces accidental unplugging and damage during festive use. - 8
Store bulbs safely
After checking, store bulbs in a labeled container with dividers to prevent breakage. Keep spare bulbs separate and accessible for next season.
Tip: Document what you have and what needs replacement for next year.
Got Questions?
How can I tell if a bulb is bad?
Look for a dark or discolored bulb, a crack in the glass, or a bulb that doesn't light when seated in its socket. Use a tester or swap with a known-good bulb to confirm.
Look for bulbs that won't light or look damaged, and test with a tester or a working bulb to confirm.
Is it safe to replace bulbs with the tree plugged in?
No. Always unplug the tree before replacing bulbs or handling sockets to prevent electric shock and short circuits.
No, unplug first, then replace bulbs to stay safe.
What should I do with damaged strands?
If you find damaged insulation, melted plugs, or frayed cords, retire the strand and replace it. Do not attempt to repair damaged wiring.
Dispose of damaged strands safely and replace them to avoid hazards.
Are LED lights safer than incandescent for trees?
LED lights are cooler and generally safer, with lower energy use. Ensure compatibility with the strand and transformer before mixing technologies.
LEDs are cooler and more energy-efficient, but check compatibility.
How often should I inspect Christmas tree lights?
Do a quick pre-season inspection and a mid-season check if you reuse the same strands. Regular checks help prevent outages and hazards.
Inspect before decorating and check mid-season if possible.
What if only part of the strand lights up?
This usually indicates a faulty bulb or loose connection. Swap bulbs in the affected area and reseat sockets, and consider replacing the strand if the issue persists.
If part of the strand is dark, swap bulbs and reseat connections, then reassess.
Watch Video
Key Points
- Unplug before inspecting to stay safe.
- Swap faulty bulbs with the same base and voltage.
- Test the entire strand after replacements.
- Store bulbs in a labeled, protective container.