How to Check an LED Bulb Without a Multimeter
A practical, safe guide to testing LED bulbs without a multimeter, covering signs of failure, simple field tests, and when replacement is the best option.

This guide shows how to check an LED bulb without a multimeter by safely testing its light output, continuity, and basic circuit behavior. You’ll use common household items (a battery, a resistor, and a known-good socket) to verify if the bulb lights up, flickers, or stays dark, and you’ll learn quick safety checks before handling electrical components.
Why LED bulbs behave differently and why you might not need a multimeter
According to Bulb Fix, many homeowners reach for a multimeter when diagnosing LED bulbs, but most common issues can be identified with simple checks. This is important because non-meter testing reduces risk and helps you decide whether a replacement is needed. LED bulbs rely on drivers and fixtures; a fault can reside in either component, not just the bulb. In this section we explain why a meter isn't always necessary and what you can learn from quick observations in the socket or fixture. By understanding light output, color temperature, flicker, and warmth, you can triage common problems before breaking out tools. The goal is to empower homeowners to make informed decisions without exposing themselves to live electrical risks. Throughout this guide from Bulb Fix, you’ll see practical tests you can perform with household items and a methodical approach that lowers guesswork and wasted replacements.
Tools & Materials
- Flashlight(Bright beam to inspect filaments and base.)
- Replacement LED bulb of the same base(Use to confirm fixture vs bulb fault when swapped.)
- Known-good socket or fixture(A fixture that you know is powered and safe.)
- Soft cloth or microfiber(Used to wipe contacts and remove dust.)
- Non-contact voltage tester(Optional, for quick power-check in fixtures.)
Steps
Estimated time: 15-30 minutes
- 1
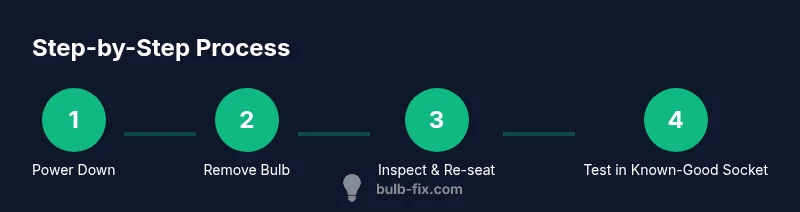
Power down the fixture
Turn off power at the wall switch and unplug the lamp or fixture if possible. Waiting a moment helps ensure residual charge dissipates before you handle the bulb. This reduces the risk of shock and protects you from accidental contact with live components.
Tip: Use a non-contact voltage tester to confirm there is no energy present before touching the bulb. - 2
Remove the LED bulb
Gently twist the bulb counterclockwise by holding the base, not the glass. If the bulb is tight, use a rubber grip or gloved hand to apply even pressure. Do not yank; applying force to the glass can break the bulb or socket.
Tip: If resistance appears abnormal, skip continuing and inspect the socket for damage. - 3
Inspect the bulb and base
Look for visible cracks, scorching, melted coating, or corrosion on the base. A damaged bulb or base is often the culprit rather than the driver. Do not reuse visibly damaged bulbs.
Tip: Note any discoloration or deformity—these are red flags for replacement. - 4
Clean contacts and reseat
Wipe the socket contacts with a dry microfiber to remove dust or oxidation. Reinsert the bulb ensuring it seats fully and evenly in the socket. A poor contact can mimic a failure.
Tip: Avoid using liquids or cleaners that could conduct electricity. - 5
Test in a known-good socket
Place the bulb into a different, known-good fixture and power it to see if it lights. If it works in another fixture, the original socket or fixture may be at fault rather than the bulb.
Tip: Compare brightness and color; any mismatch can indicate compatibility issues. - 6
Compare with a replacement bulb
If available, install a fresh bulb of the same base in the original socket. If the new bulb works while the old one does not, the original bulb is likely at end of life. If neither works, the issue may be the fixture.
Tip: Label both bulbs to avoid confusion during troubleshooting.
Got Questions?
Can I test LED bulbs without any tools?
Yes, you can perform basic checks like visual inspection and swapping into a known-good socket. You won’t measure electrical characteristics, but you can identify obvious faults. Always follow safety steps to avoid shocks.
Yes. You can do basic checks such as visual inspection and trying the bulb in a known-good socket, but you won’t measure voltage or resistance.
Why does an LED bulb flicker after installation?
Flicker can indicate incompatibility with the fixture, a failing driver, or a loose connection. Start by tightening the bulb, then test in a known-good socket and check for dimmer compatibility.
Flicker can be caused by a bad driver, loose connection, or dimmer incompatibility. Check connections and test in a known-good socket.
Are all bulbs testable without a meter?
Most common faults can be identified without a meter through visual inspection and simple socket tests. A meter is needed for precise measurements like current or resistance.
Most faults can be checked by eye and in a known-good socket; you’ll need a meter for exact electrical readings.
How can I tell if a dimmer is LED-compatible?
Check the fixture or dimmer label for LED compatibility or refer to the manufacturer’s specs. If in doubt, replace with an LED-compatible dimmer.
Look for an LED-compatible label on the dimmer or fixture—if unsure, use an LED-compatible dimmer.
What if the bulb glows dimly but won’t fully light?
A dim glow often signals a weak connection, an incompatible dimmer, or a failing driver. Try reseating, test in a known-good socket, or replace with a new bulb.
A dim glow usually means a weak connection or driver issue; reseat and test, or try a new bulb.
When should I replace the fixture instead of the bulb?
If multiple bulbs fail across the same fixture or there are signs of overheating, the fixture’s driver or wiring may be at fault. Consider professional inspection.
If several bulbs fail in the same fixture or you see overheating signs, the fixture may be at fault and require a professional check.
Watch Video
Key Points
- Power off before handling bulbs
- Inspect for visible damage
- Test in a known-good socket
- Use a replacement to confirm failure
- Check dimmer compatibility when applicable