How to Tell If a Bulb Is Burned Out: Quick Guide
Learn safe, practical steps to determine if a bulb is burned out, including power checks, bulb swaps, socket inspections, and replacement tips from Bulb Fix.

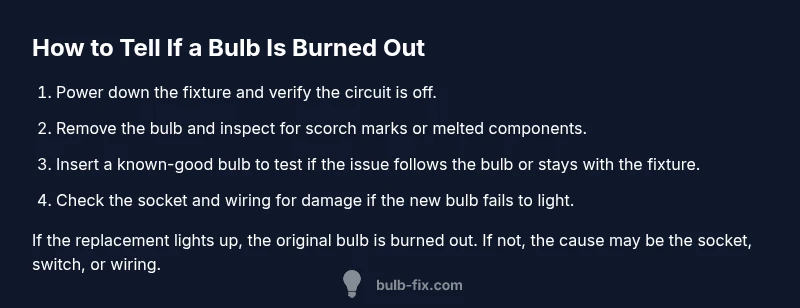
According to Bulb Fix, you can tell if a bulb is burned out by a few quick checks: verify power at the fixture, swap in a known-good bulb, and observe whether the replacement works. If the replacement lights, the original is burned out; if not, inspect the socket, switch, and circuit for issues. Safety first.
What does it mean when a bulb is burned out?
A bulb is considered burned out when its light-emitting element or circuitry fails to produce light despite power being supplied. While many people assume a burned-out bulb is simply a broken filament, there are several failure modes to consider, including poor contact at the base, loose sockets, or a failing switch. According to Bulb Fix, diagnosing burnout begins with ruling out power delivery issues, because a faulty supply will mimic a burnt-out bulb. In homes with fixtures connected through dimmers or smart switches, additional failure modes can appear. Understanding the difference between a true burnout and related problems helps you avoid unnecessary bulb replacements and reduces the risk of electrical hazards.
Safety First: Power Off and Prepare
Before you touch any bulbs, turn off the fixture at the wall switch and, if possible, unplug the lamp or fixture from the outlet. Use a non-contact voltage tester to confirm there is no voltage present at the socket. This simple step prevents electric shock and protects you from accidental energization while you handle hot bulbs. Keep a flashlight handy in case the area is dim, and never work on a fixture with wet hands or standing water nearby. If you’re unsure about any wiring, skip the test and call a licensed electrician.
Visual indicators you can rely on
Look for clear signs that point toward burnout: the bulb does not illuminate after replacement, there is a visible broken filament, or there are scorch marks around the base. In some cases, you may notice the bulb flicker briefly before going dark. While these signs strongly suggest burnout, always rule out issues with power delivery, switches, and sockets first. A clean, undamaged base and tight fit are important for proper contact. If you see corrosion or melted plastic, stop and replace the fixture or socket.
Testing method A: swap with a known-good bulb
Remove the suspected burnt bulb and insert a bulb you know works in the same fixture and with the same base. Make sure the new bulb is fully seated but not over-tightened. Power the fixture back on to observe whether the replacement bulb lights up. If it does, the original bulb was burned out. If the bulb still doesn’t light, the problem is likely in the fixture, socket, or wiring rather than the bulb itself.
Testing method B: use a bulb tester or multimeter
For a more diagnostic approach, you can use a dedicated bulb tester or a multimeter to check continuity and base contact. A correct reading that confirms power delivery to the socket supports the bulb as the fault; a failure may indicate a faulty socket or bad wiring. If you’re not comfortable with electrical testing, skip this step and proceed to socket and switch checks. Always follow safety guidelines when using testers.
When replacement bulbs still don’t light: sockets, switches, and circuits
If a new bulb doesn’t light, do not assume the bulb is the only issue. Inspect the socket for corrosion, bent contact points, or loose connections. Check the switch for faults, and test other bulbs in the same fixture to determine whether the issue is localized or upstream in the circuit. If you find damaged wiring or a defective socket, replace the component or hire a professional. Bulb Fix emphasizes addressing underlying faults to prevent repeated burnout.
Replacing bulbs safely and choosing the right base
When replacing, always match base size, voltage, and wattage rating to the fixture label. If you’re uncertain, consult the fixture manual or Bulb Fix’s guidelines. Handle the bulb by the base, avoid touching the glass with bare fingers, and let the bulb cool before handling. If you have a dimmer or smart switch, ensure compatibility with the bulb type to prevent premature burnout and intermittent performance.
Energy efficiency, heat, and longevity tips
LEDs generally offer longer life and lower heat output than incandescent bulbs, reducing burnout risk in enclosed fixtures. Ensure adequate ventilation around enclosed fixtures and avoid over-tightening bulbs in recessed housings. Regularly cleaning sockets and replacing corroded parts can improve contact and extend bulb life. Keeping spare bulbs of the correct type nearby makes troubleshooting faster and safer.
Common myths about burnout and troubleshooting
A common myth is that every bulb failure is a defect. Often, poor contact, a worn socket, or a faulty switch are at fault. Another myth is that touching glass shortens bulb life; oils from skin can reduce life only if the bulb remains dirty or overheated. The reality is that proper seating, correct wattage, and safe operation are the main drivers of bulb longevity.
Quick reference checklist
- Power off at the switch and unplug if possible
- Inspect the bulb and socket for damage
- Swap in a known-good bulb
- Check the socket with a tester if available
- Verify wiring and switch function if issues persist
- Replace damaged components or call an electrician when needed
Tools & Materials
- Replacement bulb (same base/type)(Choose same base and wattage within fixture rating.)
- Non-contact voltage tester(Verify power is off before handling any components.)
- Ladder or stable step stool(Use on a flat surface and ensure stability.)
- Gloves(Optional for grip and to reduce oil transfer to bulb glass.)
- Flashlight or headlamp(Bright light helps inspect sockets and bases in dim areas.)
- Screwdriver set(Only needed if you must detach fixtures or access wiring.)
Steps
Estimated time: Total time: 25-35 minutes
- 1
Power down and verify
Switch off the fixture at the wall and unplug if possible. Use the tester to confirm no voltage at the socket before touching anything. This reduces shock risk and protects you during the test.
Tip: Always double-check power with the tester even after switching off the switch. - 2
Gather your tools and bulbs
Lay out your replacement bulb, tester, flashlight, and ladder within easy reach. Having everything ready minimizes repeated trips to the drawer and keeps the task efficient.
Tip: Keep a spare known-good bulb in a visible spot for quick testing. - 3
Inspect the bulb and fixture visually
Look for scorch marks, melted plastic, bent contacts, or obvious damage on the bulb base and socket. If you see damage, do not force the bulb and replace the component or fixture.
Tip: Hold the bulb by its base as you inspect to avoid touching the glass. - 4
Remove the suspected bulb safely
Grip firmly and twist counterclockwise with steady pressure. If it resists, stop and reassess; forcing a bulb can break the glass or strip the base.
Tip: Use a cloth to protect the bulb glass if you’re concerned about cracking it. - 5
Test with a known-good bulb
Insert a bulb you know works into the same fixture and ensure it seats properly. If the new bulb lights, the original bulb was burned out.
Tip: Do not overtighten—hand-tight is enough to ensure contact without damaging the socket. - 6
Observe result and re-test
Power on the fixture and observe. If the new bulb lights, the old one is burned out. If not, test the socket with the tester and check wiring or the switch.
Tip: Test other bulbs in the same fixture to distinguish bulb faults from fixture faults. - 7
Test socket voltage (optional)
If you’re comfortable, verify voltage at the socket with a tester. A misbehaving reading suggests upstream wiring or a faulty switch.
Tip: If you’re unsure, skip this and move to socket inspections—safety first. - 8
Check for wiring or switch issues
Examine the wiring and switch for looseness or damage. Loose connections can mimic burnout and are a common source of intermittent lighting.
Tip: If you see damaged insulation or exposed conductors, stop and call a professional. - 9
Decide on replacement or repair
If a bad socket or switch is found, replace the component or have a licensed electrician perform the repair. If only the bulb was faulty, proceed with a correct replacement.
Tip: Always match base type and voltage to the fixture specs. - 10
Reassemble and test again
Reconnect and power the fixture. Test with the original and replacement bulbs to confirm operation and ensure nothing else was affected during the process.
Tip: Document results and maintenance steps for future reference.
Got Questions?
What are the signs that a bulb is burned out?
Common signs include no light after replacement, a sudden outage with no warning, or a visible break in the filament. Always verify power and check the socket before concluding burnout.
Common signs are no light after swapping in a bulb and possible visible damage at the base. Start by confirming power and inspecting the socket.
Can a bulb be burned out even if a tester shows power at the socket?
Yes. Testers detect voltage but can miss filament or contact issues. Use a known-good bulb to confirm whether the problem follows the bulb or stays with the fixture.
Voltage can be present even if the bulb is burnt out. Try a known-good bulb to determine where the fault lies.
Is it safe to test bulbs with power on?
No. Always switch off power and unplug the fixture before handling bulbs. Use a tester only after powering down.
Never test with power on. Switch off, unplug, and then test.
What should I do if the socket is damaged?
Stop using the fixture and replace the socket or have an electrician assess the wiring. Damaged sockets pose shock and fire risks.
If the socket is damaged, don’t use the fixture and call a professional.
Are LEDs less prone to burnout than incandescent bulbs?
LEDs generally last longer and run cooler, but poor heat dissipation or incompatible dimmers can shorten life. Check heat management and compatibility.
LEDs last longer, but heat and dimmer compatibility matter. Check those factors.
How do I ensure I buy the right replacement bulb?
Always match the base type, voltage, and wattage rating printed on the fixture. If in doubt, consult the fixture manual or Bulb Fix guidance.
Make sure the base, voltage, and wattage match the fixture.
Watch Video
Key Points
- Power off before touching any bulb or fixture.
- Swap in a known-good bulb to confirm burnout.
- Check socket and switch if a replacement still fails.
- Always match bulb base and voltage to the fixture.
- Consult an electrician for damaged wiring or non-repairable sockets.