How to Tell If Bulbs Have Gone Bad
Learn practical, safety-first methods to tell if bulbs have gone bad, with signs to watch for, testing steps, and disposal tips from Bulb Fix.

With this guide you will learn how to tell if bulbs have gone bad by inspecting brightness, color, flicker, and odor, then confirming with a safe bulb swap and basic electrical checks. You’ll know when to replace, how to choose a replacement, and how to dispose of old bulbs properly. Follow safe, practical steps.
Why bulbs fail and why it matters
Bulbs wear out for several reasons, from filament fatigue in incandescent bulbs to phosphor degradation in LEDs and CFLs. Over time, the brightness can drop, color temperature shifts, and even abrupt failures occur. Recognizing these signs helps you avoid wasted energy, unstable lighting, and potential safety hazards. According to Bulb Fix, understanding common failure modes makes it easier to choose compatible replacements and maintain electrical safety in the home. In practical terms, a failed bulb is not just an inconvenience—it can indicate a loose connection, overheating, or an overloaded circuit. Always start by turning off power at the switch or breaker before handling any bulb, and wear gloves to protect your hands from hot glass or sharp edges.
Visual signs bulbs exhibit when they’re failing
The easiest indicators are visible or audible. Dimming that progresses over days or weeks suggests aging. A noticeable color shift toward yellow or purple can indicate phosphor degradation in LED bulbs or poor color rendering. Flickering, especially when the light changes with voltage, can signal a loose connection or incompatible dimmer. A buzzing or crackling sound points to arcing or damaged filaments. Finally, a burnt or smoky odor near the fixture is a warning sign of overheating. If you observe any of these signs, stop using the fixture until you confirm the bulb and fixture are safe. Bulb Fix emphasizes that consistent brightness and color cue reliability are markers of healthy operation. This is exactly what "how to tell if bulbs have gone bad" looks like in real homes.
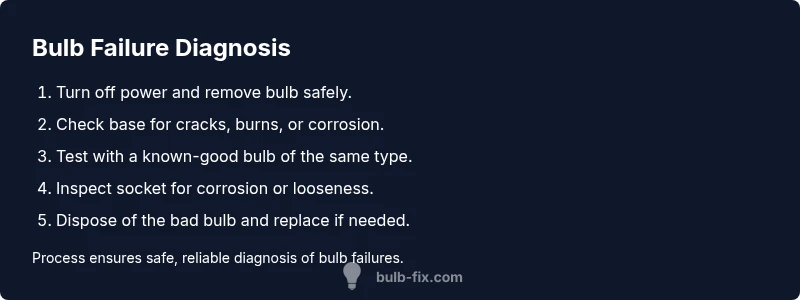
How to perform a safe inspection
Before touching anything, power down and unplug or switch off the circuit breaker. Visually inspect the bulb for cracks or scorch marks; if present, replace immediately. For screw-in bulbs, gently unscrew and note whether the base is intact. Check the socket for corrosion, bent contacts, or loose springs. Inspect the fixture for heat buildup, moisture, or signs of water exposure. If moisture is present, do not power the circuit until the issue is resolved. For pin-based bulbs, verify the pins are straight and fully seated. Keep a small container handy for used bulbs to avoid accidents. Remember, Bulb Fix recommends moving methodically rather than guessing—safe handling matters.
Testing methods: swap, testers, and wattage checks
A simple and reliable method is to swap in a known-good bulb of the same type and wattage. If the replacement works but the original does not, the bulb is likely bad. Use a non-contact voltage tester to verify that the fixture is receiving power. Confirm you are using the correct bulb type and wattage to prevent overheating. For LEDs, check the dimmer compatibility; incompatible dimmers can cause flicker or early failure. If you don’t have a spare, borrow from an outlet in a different room to compare performance. Always dispose of the suspected bad bulb properly if testing confirms failure. This approach helps you answer definitively, which is the core of knowing how to tell if bulbs have gone bad.
Socket, fixture, and wiring checks
Faulty sockets are a common cause of premature bulb failure. Look for obvious signs of damage, corrosion, or soot on the base contacts. A loose socket can prevent good contact; gently tighten with the appropriate screwdriver if you know how. Check nearby wiring for loose connections or signs of heat damage. If you smell burning plastic or see discoloration near the connector, stop and call a licensed electrician. These checks help prevent repeated bulb failures and ensure the fixture remains safe. Bulb Fix has found that many issues stem from compromised sockets rather than the bulb itself.
When to replace versus repair
Not all failures are equal: some are economic. If a bulb shows rapid dimming or rapid cycles of on/off, replacement is usually the most cost-effective option. LED bulbs degrade over time and may require replacement after their rated hours; incandescent bulbs burn out as the filament wears. In fixtures with questionable wiring or moisture, rely on a professional assessment. The decision to replace or repair should consider energy efficiency, heat management, and the fixture’s age. Bulb Fix guidance suggests prioritizing safety and reliability; if in doubt, replace with an ENERGY STAR-rated bulb.
Disposal and safety reminders
Keep old bulbs out of reach of children and pets. CFLs and other mercury-containing bulbs require special recycling; follow local guidelines. Place bulb waste in sturdy container to prevent breakage, and seal it before disposal. Do not crush bulbs or throw them in regular trash where allowed. For LEDs, recycling is encouraged but not always required; check your waste authority. Bulb Fix notes that responsible disposal reduces environmental impact and keeps your home safe.
Maintenance tips to extend bulb life
To maximize life, avoid excessive heat, install bulbs at the correct rating, and ensure fixtures are clean and free of dust. Use proper wattage and avoid frequent switching on and off for LEDs; if you have a dimmer, ensure compatibility. Regularly inspect sockets for corrosion and tighten connections as needed. Keep spare bulbs of the same type on hand so you can quickly swap in without forcing the fixture. With careful handling and routine maintenance, you can reduce early failures and maintain steady light quality.
Common mistakes and myths to avoid
Avoid assumptions like “all bulbs fail quickly in cold weather” or “batteries improve lighting.” The real causes are often heat, vibration, poor socket contact, or incompatible dimming. Don't ignore a persistent flicker—diagnose rather than replace blindly. Never mix bulb types in a fixture with a dimmer, unless the dimmer is rated for mixed LED loads.
Tools & Materials
- Replacement bulbs (same type and wattage)(Have at least one spare of the same type)
- Safety gloves(Protect hands from glass; avoid cuts)
- Safety goggles(Eye protection during handling)
- Non-contact voltage tester(Optional but helpful for power verification)
- Screwdriver set (flat and Phillips)(Only if you need to access fixtures)
- Trash bag or container for used bulbs(Keep bulbs safe during disposal)
- Work light or headlamp(If lighting is poor, improves visibility)
Steps
Estimated time: 30-45 minutes
- 1
Power down and prepare
Turn off the circuit at the switch or breaker and put on gloves. Ensure you're in a well-lit area so you can see the bulb base and socket clearly. This initial safety step protects you from shocks and burns as you handle potentially hot bulbs.
Tip: Always double-check that the power is off before touching any lighting hardware. - 2
Inspect the bulb visually
Look for cracks, scorch marks, or a cloudy look on the bulb. If the bulb shows any damage, replace it with a safe spare. Visual cues can reveal issues that testing won’t catch.
Tip: If you see visible damage, do not attempt to use the bulb again. - 3
Remove the bulb carefully
Gently twist or pull the bulb straight out, depending on the base type. If it’s stuck, do not force it; instead, switch off power and use a small amount of lubricant on the base if recommended by the fixture manufacturer.
Tip: Support the bulb with your other hand while removing to prevent dropping. - 4
Check the socket and fixture
Inspect the socket contacts for corrosion or burns. Look for loose springs or bent pins. If the fixture shows heat or moisture signs, stop and address those issues before reusing it.
Tip: A damaged socket or moisture exposure is a bigger concern than a single bulb. - 5
Test with a known-good bulb
Insert a bulb of the same type and wattage that you know works. If the fixture lights up, the original bulb is likely bad. If not, the issue may lie with the fixture or wiring.
Tip: Use the same base type and wattage to ensure a valid test. - 6
Decide replacement and disposal
If the bulb is bad, replace it and dispose of the old unit following local guidelines. If the fixture is questionable, consider professional inspection before continuing use.
Tip: Keep a spare set handy to reduce repeat trips to the store.
Got Questions?
What are the most common signs bulbs have gone bad?
Common signs include dimming, color shifts, flickering, buzzing, and odd odors. Visual damage or crackling sounds also indicate potential failure. If you notice any of these, replace the bulb and inspect the fixture for safety.
Bulbs going bad usually show dimming, color changes, flicker, buzz, or a burnt smell. Look for damage and test with a known-good bulb, then check the socket and wiring for safety.
Can dimming be caused by something other than a bad bulb?
Yes. Dimmer compatibility, poor wiring, or a degraded dimmer switch can cause dimming even with good bulbs. Check if the dimmer is rated for LED or other bulb types and inspect the wiring for wear.
Dimming isn’t always the bulb—dimmer compatibility and wiring issues can also cause it.
Is it safe to keep using a bulb that flickers?
Flickering can be a sign of power issues, loose connections, or dimmer problems. Don’t rely on a flicker as a normal condition; investigate and replace if necessary to avoid risk.
Flickering isn’t normal. Check the bulb, socket, and dimmer, and replace if needed.
How should I dispose of burned-out bulbs?
Follow local guidelines. CFLs and some LEDs require recycling due to materials like mercury. Place bulbs in a sturdy container to prevent breaks and follow your municipal rules.
Dispose bulbs according to local rules—many types need recycling, especially CFLs.
What if my fixture uses a dimmer switch?
Ensure the dimmer is compatible with the bulb type. Incompatible combos can shorten bulb life or cause flicker. If unsure, replace with non-dimmable bulbs or upgrade the dimmer.
Check compatibility between bulb type and dimmer; mismatches can cause problems.
Watch Video
Key Points
- Check signs of bulb failure early to prevent unsafe conditions
- Test with a known-good bulb to confirm a bad bulb
- Inspect sockets and fixtures to diagnose root causes
- Dispose of damaged bulbs safely and recycle where possible
- Keep spare bulbs handy to minimize outages