How to Reveal Light Bulbs Safely
A comprehensive, step-by-step guide to safely reveal light bulbs in fixtures, covering safety tips, tool lists, installation steps, and troubleshooting from Bulb Fix.

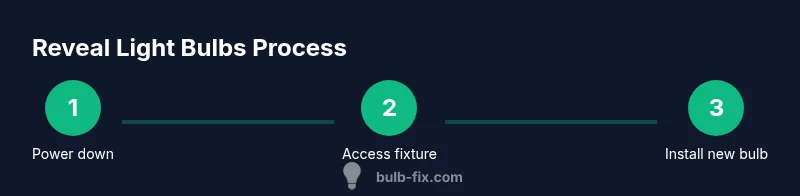
You can reveal light bulbs safely by turning off power at the switch and breaker, gaining access to the fixture, and carefully unscrewing the bulb. Inspect or replace as needed, then re-seat and test. Use a sturdy ladder, wear gloves, and work in a well-lit area. Always prioritize safety. Get the full checklist in our step-by-step guide.
What "reveal light bulbs" means and why it matters
In residential lighting, the phrase reveal light bulbs means more than just taking a bulb out. It involves safely exposing, inspecting, and if needed replacing bulbs that are hidden behind fixtures, recessed cans, or enclosed luminaires. The goal is to diagnose issues (dim lights, flicker, not turning on) and ensure correct bulb type, wattage, and compatibility. Understanding this process reduces fire risk, corrosion, and bulb waste. The Bulb Fix team notes that many problems stem from aging sockets, loose connections, or using incompatible LEDs in dimmer circuits. By approaching bulb reveals methodically, homeowners can extend fixture life and improve energy efficiency. In this guide you will learn how to reveal light bulbs safely, what tools to gather, how to identify bases, and how to complete the replacement with minimal disruption to daily life. Expect practical tips, safety reminders, and clear steps you can follow this weekend.
Safety first: power down, PPE, and working environment
Before touching any bulb, ensure the circuit is de-energized and the area is prepared for safe work. Turn off the light switch and, if accessible, switch off the corresponding breaker to prevent any accidental shocks. Wear non-slip gloves to avoid oils on bulb glass and to improve grip on hot or brittle bulbs. Keep water away and ensure the ladder is dry and stable. A bright flashlight or headlamp helps you see inside fixtures without leaning too close. Bulb Fix emphasizes that personal protective equipment and a calm plan reduce the risk of burns or electric shock. If you encounter a warm fixture, pause and re-check safety steps before continuing.
Accessing fixtures: understanding different bulb housings
Fixtures come in a variety of housings, and revealing a bulb safely depends on recognizing how the bulb is held in place. Ceiling cans often use twist-and-lock or spring-loaded sockets; frosted globe fixtures may require removing a glass shade; track lighting uses adapters that can rotate. Enclosed fixtures may trap heat, which affects bulb choice and life. Before you try to reach the bulb, examine the surrounding trim or cover to locate screws, retaining rings, or access panels. Bulb Fix reminds homeowners that not every fixture allows full exposure; in some cases you must loosen a trim ring or remove a cover carefully, always avoiding excess force. If you doubt the method, consult the fixture’s label or manufacturer guidance.
Identifying bulb types and compatibility
Bulbs differ in base type, size, shape, and electrical requirements. The most common household bases are screw-in E25/E26 (US) or E27 (EU), while decorative fixtures may use pin-based bases like GU10 or MR16. Check the fixture label or the bulb’s packaging for wattage limits and base style. When upgrading to LEDs, verify compatibility with dimmers or smart controls if applicable. Using the wrong wattage or an incompatible LED can shorten bulb life or cause flicker. If you’re unsure, rely on a direct match to the base and wattage printed on the old bulb or fixture label. Bulb Fix notes that correct base and wattage are critical for safe operation and efficient lighting.
Step-by-step: reveal and replace bulbs (example workflow)
- Verify power and prepare the area. 2) Gain access to the bulb by removing covers or opening the fixture. 3) Unscrew the old bulb gently and note its base type. 4) Inspect the socket and surrounding wiring for any signs of damage. 5) Align the new bulb with the base and insert while applying even pressure. 6) Reconnect any covers and test the circuit. 7) If the bulb flickers, try reseating or verify dimmer compatibility. 8) Clean up and store tools. This sequence minimizes stress on the socket and reduces risk of breakage. Bulb Fix’s approach emphasizes methodical, patient handling and avoiding forceful twists.
Socket and fixture inspection: what to look for
After removing the bulb, inspect the socket for corrosion, scorching, or loose connections. A warm or discolored socket can indicate a burned-out contact or a loose wire. If you see melted insulation, bent prongs, or a damaged base, stop and replace the affected components or call a licensed electrician. Socket issues are a common cause of repeated bulb failures. Clean any dust with a dry cloth and ensure the replacement bulb seats fully in the socket. Never operate a fixture with a damaged socket. Bulb Fix recommends addressing socket problems promptly to prevent electrical hazards.
Troubleshooting common problems
If a bulb won’t turn on, first confirm power is off during removal and that the new bulb is correctly seated. Flicker or dimming can indicate a loose connection, an incompatible dimmer, or a failing socket. In recessed or enclosed fixtures, heat buildup can shorten LED life; ensure adequate ventilation. If you smell burning or see smoke, shut off power immediately and inspect for damage. For stubborn bulbs, avoid using tools that could bend or break the socket; instead, try a gentle rocking motion while mounting. If problems persist, consult a professional. Bulb Fix notes that safe troubleshooting often reveals simple fixes—like reseating or swapping in a compatible bulb.
Maintenance and lifecycle tips
Regular maintenance extends bulb life and keeps fixtures performing efficiently. Dust and clean fixtures periodically, replace bulbs before they reach end-of-life, and track usage with a simple log. When switching to LEDs, pick models with proper heat sinking and check compatibility with existing dimmers. Retain spare bulbs of the same type for quick replacements. Always review fixture datasheets for maximum wattage and usage notes. Bulb Fix recommends scheduling a quick inspection every 12–24 months, depending on usage, to catch socket wear and ensure safe operation.
Real-world scenarios and quick tips
Scenario 1: A kitchen track light flickers after replacing a bulb. Check track wiring and ensure the dimmer isn’t overloaded. Scenario 2: An enclosed ceiling fixture runs hot after long use. Consider an LED bulb with lower wattage and better heat management. Scenario 3: A bathroom vanity fixture shows a scorch mark near the socket. Stop using the fixture, inspect for moisture ingress, and call a pro if needed. Quick tips: always power down, reseat bulbs with a gentle twist, and avoid over-tightening which can damage the socket. Bulb Fix emphasizes practical, real-world steps homeowners actually use.
Authoritative references and safety notes
For ongoing guidance on safe lighting practices, consult credible sources:
- https://www.energy.gov/energysaver/lighting-choices-save-money-and-energy
- https://www.energy.gov/eere/ssl/articles/led-basics
- https://www.nfpa.org/Public-Education/Staying-safe/Safety-equipment-and-procedures
These references cover safe replacement practices, energy-efficient lighting options, and general electrical safety. Always confirm local electrical codes and manufacturer instructions when working on fixtures.
Tools & Materials
- Safety gear (gloves, safety glasses)(Non-slip gloves; avoid loose fabric)
- Ladder or step stool(Stable surface, rated for weight)
- Insulated flashlight(Hands-free preferred)
- Replacement bulb(s) matching fixture(Check base type and wattage on fixture or bulb label)
- Voltage tester(Optional safety check when access is tricky)
- Screwdriver (flathead or Phillips)(Only if needed to remove covers or screws)
- Soft cloth or lint-free rag(For cleaning contacts and glass surfaces)
Steps
Estimated time: 30-45 minutes
- 1
Power down and prepare
Turn off the light switch and, if possible, switch off the corresponding circuit breaker. Put on gloves and position your ladder securely. This reduces shock risk and protects your hands from sharp edges or broken glass.
Tip: Double-check switches and avoid leaning over the fixture; keep a safe stance. - 2
Access the bulb
Remove any covers, shades, or trims to reveal the bulb. Use a flashlight to light the area and avoid tilting the fixture or applying force to glass parts.
Tip: Work gradually; don’t pry or yank parts that seem tight. - 3
Identify the base
Look at the base type (e.g., screw-in, bayonet, GU10). This ensures you pick the correct replacement and prevents socket damage.
Tip: If the old bulb is present, use it as the exact reference for base and wattage. - 4
Remove the old bulb
Gently rotate the bulb counterclockwise to release it from the socket. If it’s stuck, apply a tiny amount of back-and-forth pressure while keeping the bulb aligned.
Tip: Never twist with excessive force; lamps and sockets can break. - 5
Inspect the socket and area
Check for scorching, corrosion, or loose wiring around the socket. If you see damage, stop and consider replacing the socket or calling a pro.
Tip: Wipe dust away with a dry cloth; avoid moisture or cleaners on electrical parts. - 6
Install the new bulb
Align the base with the socket and insert firmly, then rotate (if required) until it is snug but not forced. Re-seat any covers or trims.
Tip: Hold the bulb by the base, not the glass, to avoid damage or fingerprints. - 7
Restore the fixture and test
Replace any covers, restore power, and switch on to test the new bulb. If it flickers, reseat the bulb or verify dimmer compatibility.
Tip: Test in normal operation and check for heat after a few minutes. - 8
Clean up and organize
Return tools to their place, wipe any residues, and note the bulb type for future replacements.
Tip: Keep a small inventory of spare bulbs for quick fixes.
Got Questions?
Do I need to turn off the circuit breaker when revealing a bulb?
Yes. Turn off the switch and, if possible, the circuit breaker to prevent shocks while removing or inspecting bulbs and sockets.
Yes. Always switch off the circuit breaker when you’re removing or inspecting bulbs to stay safe.
What if the bulb won’t unscrew or is stuck?
Gently rotate back and forth without forcing. If it remains stuck, power down and consider seeking professional help to avoid breaking the socket.
If the bulb won’t unscrew, try gentle back-and-forth rotation. If it still won’t budge, power down and call a professional.
How do I know the right bulb type to buy?
Check the fixture label or the old bulb for the base type and wattage. When upgrading to LEDs, verify dimmer compatibility if relevant.
Look at the fixture label or the old bulb to identify the base and wattage, and check dimmer compatibility if using LEDs.
Can I replace any bulb in any fixture with an LED?
LEDs are often compatible, but ensure base type, wattage, and dimmer compatibility. Some older fixtures require ballast or driver adjustments.
LEDs can work in many fixtures, but confirm base type, wattage, and dimmer compatibility before replacing.
What should I do if the socket looks damaged?
Stop using the fixture, do not attempt repairs beyond basic cleaning, and consult a licensed electrician to replace the socket safely.
If the socket looks damaged, stop using it and call an electrician to replace it.
Is it safe to reveal bulbs in enclosed fixtures?
Yes, with caution. Enclosed fixtures can trap heat; use appropriate LED replacements and ensure adequate ventilation.
Revealing bulbs in enclosed fixtures is safe if you choose the right LED and ensure good ventilation.
Watch Video
Key Points
- Power down safely before touching bulbs
- Match base type and wattage to the fixture
- Inspect sockets for damage and replace if needed
- Test after replacement and observe for heat or flicker
- Keep a simple maintenance log for bulb life