Tesla Light Bulb Troubleshooting: Quick Fixes and Safety Tips
A practical, urgent guide to diagnosing and fixing issues with the tesla light bulb. Learn safe steps, common failure modes, and how to prevent future outages.

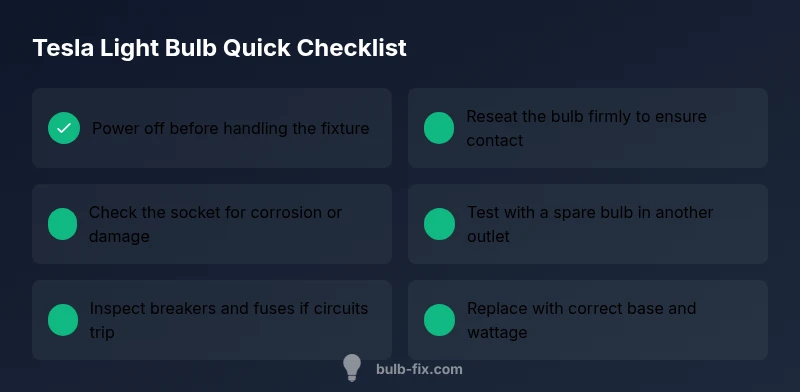
Most tesla light bulb failures stem from a loose connection or a burned-out bulb. Power down, reseat the bulb firmly, and swap in a known-good replacement. If it still won’t light, test the socket for corrosion or a blown fuse, and try a spare bulb in another outlet for safety.
Problem overview and common symptoms
A tesla light bulb failing to illuminate can disrupt a living room, home office, or any space you rely on for comfort and safety. Most issues appear quickly, but some symptoms are easy to misread. Common signs include a completely dark bulb after you flip the switch, a bulb that flickers briefly before going dark, or a bulb that glows dimly and feels warm to the touch. While many failures stem from the bulb itself, external factors like wiring, sockets, or switches can play a role. In practice, diagnosing the root cause starts with simple checks and safe testing, not guesswork. By identifying the exact symptom—the moment the light fails, the presence or absence of flicker, and whether other lights on the same circuit behave similarly—you can narrow down the likely culprits and reduce unnecessary replacements. This approach keeps your home safer, saves time, and helps you manage common issues efficiently when using a tesla light bulb in standard fixtures or smart lighting setups.
The tesla light bulb: understanding common failure modes
Bulbs labeled as tesla light bulb (a conceptual high-efficiency bulb used in smart lighting) fail for several predictable reasons. The most frequent are burnout from extended use and loose or corroded contacts at the socket. Incompatible dimmers, drivers, or smart-control electronics can cause flicker, dimming, or total failure even when the bulb itself is technically intact. A mismatched base, over-tightening during installation, or a damaged glass envelope can also create intermittent outages. In practice, you’ll often find that the symptom maps to a small subset of causes: a dead bulb, a loose connection, or a power-supply issue. Understanding these failure modes helps you decide quickly whether you should reseat, replace, or test the fixture wiring. When troubleshooting a tesla light bulb, it helps to confirm the fixture type, base size (like E26/E27), and whether any dimmer or smart switch is part of the circuit. This knowledge improves safety and reduces needless replacements.
Safety first: power-down, risk assessment, and preparation
Safety is the foundation of any bulb troubleshooting, especially when dealing with high-energy or smart lighting setups. Always power down at the breaker or unplug the fixture before touching the bulb. Allow the fixture to cool if it’s been lit recently, and use gloves or a clean cloth to handle the bulb to prevent skin oils from shortening bulb life. Keep water away from electrical components and ensure you have adequate lighting to inspect. If you’re working on a ceiling fixture, be mindful of falling dust and the risk of dropping a bulb. Never attempt repairs if you suspect damaged wiring, burnt insulation, or signs of arcing. In such cases, call a licensed electrician. These precautions protect you and your home while you diagnose a tesla light bulb issue.
Diagnostic flow: symptoms, likely causes, and quick fixes
Symptoms guide the diagnosis. If the bulb is completely dark, start by ruling out the simplest causes: a loose seating, a blown fuse, or an exhausted bulb. If you notice flicker, suspect a dimmer, driver, or control mismatch. If the bulb glows dimly, verify the fixture’s power rating and look for overheating signs. For every symptom, the flow is: confirm power, reseat the bulb, test with a spare bulb in the same socket, test in another socket, and escalate if none of these steps restore light. This method reduces guesswork and helps you reach a safe, reliable fix quickly for your tesla light bulb.
Step-by-step guide to the most common fix
If the most common issue is a loose seating or simple burnout, follow these steps to restore a tesla light bulb safely.
- Power down and unplug the fixture. 2) Remove the bulb by turning counterclockwise while holding the base. 3) Inspect the bulb and socket for damage. 4) If the socket looks clean and undamaged, reseat a new or known-good bulb firmly clockwise until snug. 5) Restore power and test the fixture. 6) If the bulb still won’t light, test in another outlet to rule out a circuit issue. 7) If the problem persists, consider replacing the fixture or consulting an electrician.
Tip: Use a clean cloth to grip and avoid touching the glass with bare fingers, and never force a stuck bulb.
Troubleshooting variations: alt causes and replacements
Not all tesla light bulb issues stem from the bulb itself. A faulty dimmer, incompatible switch, or damaged wiring can also cause failure. If the replacement works in another fixture but not in the target socket, the issue is likely the socket or wiring. Corrosion or bent contacts require cleaning or replacement. In high-humidity areas, moisture can accelerate corrosion; in dry environments, dust can accumulate and degrade contact quality. Keep an extra known-good bulb, check the base compatibility, and maintain a clean, dry fixture environment to prevent repeats.
Prevention and maintenance for long-term reliability
Preventing bulb problems is easier than repairing them. Use bulbs with correct base and wattage, match dimmers to the bulb type, and avoid over-tightening. Periodically inspect sockets for corrosion, loose connections, and signs of heat damage. Keep fixtures clean, replace aging wiring where necessary, and record the installation date so you know when to replace bulbs. In smart home configurations, ensure software and control devices are up to date and that any power-saving schedules do not starve bulbs of necessary current.
Common mistakes to avoid and safety reminders
Common mistakes include over-tightening, trying to bypass safety features, and ignoring warning smells or heat. Never operate a fixture with damaged insulation or wiring, and never mix bulb types on a single dimmer circuit. Always power down before handling, and never use metal tools to pry or fish bulbs from sockets. Following these reminders helps you avoid hazards while keeping tesla light bulbs functioning well.
Steps
Estimated time: 20-30 minutes
- 1
Power down and gather tools
Turn off the circuit at the breaker, unplug if possible, and gather a clean cloth, gloves, a replacement tesla light bulb, and a non-contact voltage tester.
Tip: Working with hot fixtures can burn you; wait for the fixture to cool. - 2
Remove the bulb safely
Carefully twist the bulb counterclockwise to disengage, holding the base not the glass. If the bulb is stuck, apply gentle pressure and avoid twisting force that could break the glass.
Tip: Use a soft cloth to grip the bulb to prevent slipping. - 3
Inspect socket and base
Look for corrosion, discoloration, or bent contacts. Wipe with a dry cloth; do not use liquids. If you see damage, stop and replace the fixture or contact an electrician.
Tip: Check base type and ensure the replacement bulb matches base (e.g., E26/E27). - 4
Test with spare bulb
Insert a known-good tesla light bulb or a similar base bulb into the socket to see if the issue remains. If the spare lights up, the original is likely burnt out.
Tip: Always carry spare bulbs of the correct base type. - 5
Check the power supply
Inspect the circuit breaker or fuse box for trips or blown fuses related to the fixture's circuit. Reset or replace as appropriate.
Tip: If a breaker trips repeatedly, stop and call an electrician. - 6
Reinstall and test again
Reinsert the working bulb, restore power, and flip the switch to confirm the fixture now lights. If not, proceed to wiring inspection or professional help.
Tip: Avoid over-tightening which can strip connectors. - 7
If it still fails, escalate
If the spare also fails in the same circuit, the issue is more likely the fixture's wiring or a controller, not the bulb. Schedule professional assistance.
Tip: Document symptoms and timeline for the electrician.
Diagnosis: Bulb won't light or shows abnormal behavior
Possible Causes
- highPower supply issue (tripped breaker, blown fuse)
- mediumLoose connection or improper seating
- highFaulty bulb (burnt out)
- lowIncompatible dimmer or control
- lowWiring damage or socket corrosion
Fixes
- easyReset circuit breaker and replace blown fuse
- easyReseat bulb and ensure contact, then test with a spare
- easyReplace with a known-good tesla light bulb of correct base
- easyTest in another socket to isolate the issue
- hardInspect and repair wiring or socket; consult an electrician if needed
Got Questions?
Why won't my tesla light bulb turn on after replacement?
If a new bulb doesn’t light, check the power source, ensure proper seating, and test with a spare. If the spare also fails, the issue may be the socket or circuit.
First check power and seating, then test with a spare to isolate the problem.
How can I tell if the bulb is burnt out or the socket is bad?
Test with a known-good bulb in the same socket. If it lights, the original is burnt out. If not, inspect the socket for corrosion or loose contact.
Use a spare bulb to diagnose quickly—if it lights, the bulb is bad; if not, the socket may be at fault.
Is it safe to replace a tesla light bulb without turning off the power?
No. Always switch off power at the breaker or unplug the fixture before touching the bulb to prevent shock or fire.
Never work on a live fixture; power it down first.
What should I do if the new bulb flickers?
Check dimmer compatibility and driver electronics. Test the bulb without the dimmer, and verify correct load and wiring.
If flickering persists, you may need a non-dimming setup or a different fixture.
When should I call a professional?
If you see burnt insulation, smell melting plastic, or repeatedly trip breakers, stop and get professional help.
If you notice burning smells or frequent trips, it’s time to seek an electrician.
Watch Video
Key Points
- Power down before handling any bulb.
- Check seating and socket for damage first.
- Test with a spare bulb to isolate the issue.
- Verify the circuit, fuse, and dimmer compatibility.
- When in doubt, contact a professional electrician.