Fire Light Bulb Troubleshooting Guide
Urgent guide to diagnosing and fixing overheating fire light bulbs safely. Learn common causes, step-by-step fixes, and when to call a pro. Tips from Bulb Fix.

Dealing with a fire light bulb? The most likely cause is overheating due to mismatched wattage, a damaged socket, or using an enclosed fixture. Immediate safety steps: switch off power at the breaker, let the fixture cool, and replace with a bulb rated for the fixture, preferably an energy-efficient LED. If problems persist, inspect wiring or call a licensed electrician.
What is a fire light bulb and why overheating happens
A fire light bulb is a term homeowners use when a bulb or fixture gets unusually hot. In practice, any bulb placed in a fixture that isn’t rated for its heat output can overheat, melting plastics and stressing wiring. Commonly, the problem isn’t the bulb alone but the fixture or installation: wrong wattage, an enclosed fixture, or a damaged socket. According to Bulb Fix, most overheating incidents are fixable with simple checks. Always start by confirming the fixture rating, base type, and the maximum wattage printed on the label. If you see scorch marks, a melted socket insert, or a burning smell, power down at the breaker immediately and do not continue using the fixture. Use this guide to identify the cause, replace with a safer option, and maintain heat management for the long term. For context, many homes rely on LED replacements that produce far less heat; upgrading is a smart safety move where permitted by the fixture. Fire safety should be part of your routine maintenance, especially in ceiling cans and enclosed fixtures where heat builds up fast.
Immediate safety steps you should take
Safety is non-negotiable when dealing with hot bulbs and wiring. First, switch off the power at the breaker and unplug any lamps. Allow the fixture to cool completely before touching. If you must handle a bulb that’s hot, wear insulated gloves and use a dry, non-conductive tool to avoid burns. Inspect the area for visible damage, like scorch marks or a melted socket. Do not attempt to remove a bulb if it’s jammed or the fixture feels unusually warm. After cooling, decide whether to replace the bulb, replace the socket, or replace the entire fixture. When in doubt, pause and contact a licensed electrician. These steps reduce the immediate risk of fire and protect your home while you plan a safer long-term solution.
Common causes of overheating in a fire light bulb
Several common culprits explain why a fire light bulb overheats. The wrong wattage for the fixture is the most frequent offender; even a few extra watts can push the fixture beyond its designed heat tolerance. Poor ventilation in enclosed fixtures traps heat, raising surface temperatures on the bulb and socket. A damaged or corroded socket can create resistance, producing extra heat and unstable connections. Using non-dimmable bulbs in compatible dimmer circuits without proper compatibility can generate heat spikes. Finally, frequent on/off cycling or leaving lights on for extended periods increases heat buildup. Understanding these causes helps you pinpoint the likely source quickly and choose a safer replacement. If you suspect multiple issues, address them sequentially to avoid wasted effort and the risk of a repeat problem.
Diagnostics: how to tell what's failing
Diagnosing overheating requires careful, non-destructive inspection. Start by verifying the fixture rating and bulb wattage match. If the bulb is hot but you replaced it with a correct wattage lamp and the fixture still heats up abnormally, inspect the socket for signs of wear—burn marks, looseness, or discoloration indicate replacement is needed. Next, check for air gaps around the fixture; properly ventilated fixtures dissipate heat more effectively. If your fixture is enclosed and cannot vent heat, replace it with an open design or LED bulb that produces less heat. Finally, consider wiring health: a warm or buzzing switch, tripped breakers, or a tingling sensation when touching metal parts are indicators of wiring faults that require a professional inspection. Conduct these checks carefully and stop if you notice dangerous signs. Document any findings with photos before proceeding to replacements.
Step-by-step fix for the most common cause: wrong wattage in enclosed fixtures
Follow these steps to correct a wattage mismatch and reduce heat effectively. 1) Power down at the breaker and, if possible, unplug the lamp. 2) Remove the old bulb using a dry, non-conductive glove or cloth; avoid twisting force. 3) Check the fixture label to confirm the maximum wattage and the base type (e.g., E26, GU24). 4) Choose a replacement with wattage at or below the label rating; switch to LED labeled for enclosed fixtures if heat is a concern. 5) If the socket shows scorch marks, replace it before reassembling. 6) Reassemble, turn the power back on, and test for heat after a short period. If the new bulb still overheats, the issue is likely the fixture or wiring and requires a pro.
Prevention tips to avoid future overheating
Proactively preventing overheating keeps your home safer. Use bulbs with wattage equal to or below the fixture’s rating, ideally LED bulbs that emit less heat while delivering the same light. Choose fixtures with open designs or rated for enclosed use when possible to improve air flow. Regularly inspect sockets for signs of wear, such as discoloration or looseness. Keep fixtures clean from dust, as debris can insulate heat and raise temperatures. Schedule routine checks, especially for ceiling cans and kitchen fixtures where heat is generated more readily.
When to call a professional and what to expect
If you’ve ruled out the bulb and socket as the source of excessive heat but the fixture continues to overheat, it’s time to escalate. A licensed electrician can assess wiring, switch wiring, and the overall circuit load. Expect inspection of the outlet, junction boxes, and any recent changes to lighting circuits. In many cases, a professional will recommend replacing the fixture or rewiring the circuit to meet safety standards. This is not a DIY area when heat, smoke, or melted components are present; safety should come first.
Printable safety checklist and quick-reference guide
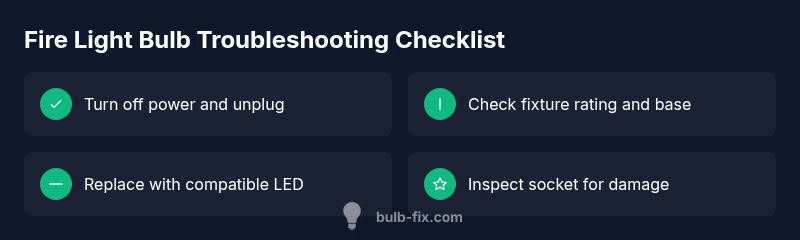
Keep this quick-reference guide handy: (1) Shut off power at the breaker before touching any fixture; (2) Confirm fixture wattage and bulb base; (3) Prefer LED bulbs for reduced heat; (4) Inspect sockets for scorch marks and replace if damaged; (5) Ensure proper ventilation and avoid enclosed fixtures when possible; (6) Call a pro if heat persists or you smell burning.
Steps
Estimated time: 30-45 minutes
- 1
Power down and unplug
Turn off the breaker and unplug the lamp or fixture. This eliminates shock risk and stops any current flow to the bulb while you work.
Tip: Always test with a non-contact voltage tester before touching components. - 2
Remove the old bulb safely
Allow the bulb to cool completely, then grip firmly and twist counterclockwise to remove. If it’s stuck, don’t force it; instead turn off power and check for socket damage.
Tip: Use a dry, non-conductive cloth to protect your hands and avoid glass cuts. - 3
Check rating and base
Read the fixture label for maximum wattage and the bulb base type (E26, GU10, etc.). If the label is missing, assume a conservative wattage and switch to LED with appropriate base.
Tip: LEDs often run cooler; confirm enclosure compatibility before switching. - 4
Install a safer replacement
Choose a bulb with wattage within rating and prefer LEDs designed for enclosed fixtures to minimize heat output.
Tip: Avoid “high-lumen” bulbs if the fixture can’t dissipate heat. - 5
Inspect the socket and fixture
Look for scorch marks, melted plastic, or loose connections. Replace the socket or fixture if damage is detected.
Tip: Only perform socket replacement if you’re comfortable and power is off. - 6
Reassemble, test, and monitor
Reinstall the bulb, restore power, and observe heat after a short period. If heat persists, stop using the fixture and call a pro.
Tip: Keep a thermometer or touch-test handy to gauge heat build-up during first tests.
Diagnosis: Bulb overheats or emits smoke after turning on
Possible Causes
- highWrong wattage for the fixture
- mediumDamaged or loose socket
- mediumEnclosed fixture trapping heat
- lowWiring fault or old wiring
Fixes
- easyPower down, confirm rating, and replace with correct wattage LED
- mediumInspect or replace damaged socket; tighten connections
- easyOpen fixtures or upgrade to LED with low heat output
- hardIf wiring signs appear (warm switches, buzzing, discoloration), call a licensed electrician
Got Questions?
Can a fire light bulb cause a house fire?
Yes. An overheating bulb can ignite nearby materials or melt components. Always follow rating guidance, switch off power if you notice heat, and replace with safe, properly rated bulbs. If you detect burning smells or visible damage, evacuate and call emergency services if needed.
Yes. Overheating bulbs can pose a fire risk; shut off power and replace with properly rated bulbs, and call a pro if you see damage.
What wattage should I use for an enclosed fixture?
Check the fixture label for the maximum wattage and base type. In enclosed fixtures, LEDs are typically the safest option because they generate far less heat than incandescent bulbs while delivering similar light.
Always check the label and prefer LED options for enclosed fixtures.
Why does my bulb flicker or hum?
Flicker or hum can result from loose connections, incompatible dimmers, or deteriorating ballasts. Start by tightening connections and ensuring the bulb type matches the dimmer. If the issue continues, replace with a compatible LED bulb or consult an electrician.
Flicker or hum usually means loose wiring or incompatible dimmers; fix connections or consult a pro if needed.
Can I replace with LED in any fixture?
Most fixtures support LED replacements, but confirm base compatibility and enclosure rating. Some older fixtures require rewiring or a dedicated LED-rated unit for safety. If in doubt, use a qualified electrician to verify.
LEDs work in many fixtures, but check base and enclosure ratings; consult a pro if unsure.
What should I do if the socket is damaged?
Do not use a damaged socket. Replace the socket or entire fixture, and avoid makeshift repairs. If you’re not confident with electrical work, hire a professional.
Don’t use a damaged socket; replace it and call a pro if you’re unsure.
How do I dispose of a burnt-out bulb?
Dispose according to bulb type: LEDs are often recyclable with electronics, incandescent bulbs may be local household waste or recycling programs. Check your city guidelines and avoid breaking bulbs during disposal.
Dispose bulbs according to local guidelines; LEDs are often recyclable, incandescent bulbs may go to waste programs.
Watch Video
Key Points
- Identify fixture rating and wattage before replacing.
- Prefer LED bulbs to minimize heat output.
- Inspect sockets and wiring for damage regularly.
- Upgrade fixtures if heat issues persist in enclosed spaces.
- When in doubt, hire a licensed electrician for safety.